To start self-hosting, choose one useful application, check its official requirements, and keep the first installation private. Plan how you will update it and restore its data before relying on it. The checklist below turns that plan into practical decisions, followed by a small Docker exercise with Uptime Kuma.
Self-hosting means operating an application on infrastructure you control, whether that is a computer at home or a rented server. You take responsibility for access, maintenance and recovery.
You need:
- A compatible computer or server and permission to administer it.
- The chosen application's installation, requirements and backup documentation.
- A separate backup destination before storing important data.
- For the optional exercise: working Docker Engine and Docker Compose, plus a browser on the Docker host or existing SSH access to it.
A domain name and public IP address are unnecessary for this local exercise.
1. Choose one job for your first self-hosted service
Start with a task you can describe in one sentence: “I want to learn how to run an app and save one monitoring check.” Choose something whose loss would be inconvenient rather than disastrous. Keep your only copies of photos, passwords and essential documents elsewhere while learning.
Uptime Kuma, a service-monitoring application, is the optional practice app here. Its SQLite database option avoids setting up a separate database service. You will create an account and one disposable check; this is a learning exercise rather than an outage-alerting system.
Copy this worksheet into your notes. Replace every undecided item before trusting important data to the service. The filled values are examples, not requirements for other applications.
Job: learn deployment and save one practice monitor
Success: sign in and see the saved monitor report Up
Users: me
Application/version: Uptime Kuma 2.5.11
Documentation: https://github.com/louislam/uptime-kuma
Host OS and CPU architecture: record mine and check support
Available CPU, memory and local storage: record mine
Deployment: Docker Compose; SQLite; no separate database
Access: private browser access on the host
Account: my own administrator login and unique password
MFA/access policy: record support and requirements before wider access
Persistent data: complete /app/data directory
Configuration/secrets: compose.yaml and protected recovery credentials
Backup destination: choose storage separate from this host
Backup schedule and retention: choose before important data
Maximum acceptable data loss: decide how much I can recreate
Restore-time goal: decide how long I can be without the service
Maintenance owner/check date: assign a person and date
Recovery test: restore separately, sign in, verify saved settings
You have finished this step when you can name one application, its intended users and an observable success criterion. Add more applications after you can maintain this one.
2. Check the host and the application's requirements
A server is the computer providing the service. It can be an existing PC, a NAS (network-attached storage device), or a VPS (virtual private server rented from a provider). Choose according to where the data should live and who will maintain the hardware:
- Existing PC or mini PC: uses hardware you may already own. You handle its power, disks, operating system and availability.
- Supported NAS: keeps the app near home storage. Check the NAS model, processor architecture and supported deployment tools for that specific application.
- Rented VPS: the provider handles the physical machine. You still administer the operating system, app, access rules and backups.
Record the supported operating system, CPU architecture, available memory, CPU capacity and local storage. Include data growth and every dependency. There is no useful universal RAM minimum for “self-hosting”: a monitoring app and a multi-user support platform have different needs.
For example, Chatwoot's Docker deployment involves PostgreSQL and Redis, with email configuration for mail features. Those requirements do not apply to the SQLite exercise below. A UPS, an uninterruptible power supply, helps with power interruptions; it does not replace a backup.
Docker packages an application and its runtime into a container. Compose describes its services, networking and storage in a YAML file. Start with Docker basics for beginners and how Docker Compose describes an application if these are new terms. Docker is optional when your chosen app documents another supported installation method.
The result of this step is a supported deployment method and a list of dependencies and persistent data. For the exercise, use local storage suitable for SQLite: Uptime Kuma warns against NFS and requires a filesystem with suitable locking support.
3. Decide who can reach the service
Choose one access route and write down its intended audience before opening anything:
- Host only: a browser on the same computer reaches a loopback address. This is the route used below.
- Home LAN: devices on your local network reach the server through an intentionally configured LAN address and port.
- Private remote access: authorized devices connect through a VPN or another authenticated private route.
- Public HTTPS: an internet hostname routes to the application, with deliberate authentication and authorization for private content.
Loopback means “this computer.” With Docker's publication 127.0.0.1:3001:3001, the first value is the host address, the second is the host port, and the third is the application's container port. This binds the published port to host loopback. A phone's 127.0.0.1 refers to the phone, so it cannot reach the server this way.
A reverse proxy accepts requests and forwards them to an application. HTTPS encrypts traffic between the browser and the endpoint terminating HTTPS. Neither routing nor encryption decides which users should be admitted.
Cloudflare Tunnel can route requests without opening inbound access to the origin, but a published hostname is still available to internet users unless you restrict it. Cloudflare's Access documentation explains the access-policy requirement. Keep application authentication as appropriate, and plan Cloudflare DNS changes without breaking existing services if you later change DNS.
Finish by recording the service's address, who may connect and where identity checks happen. Wider access is a separate project after the local exercise works.
4. Plan backups and a restore before important data
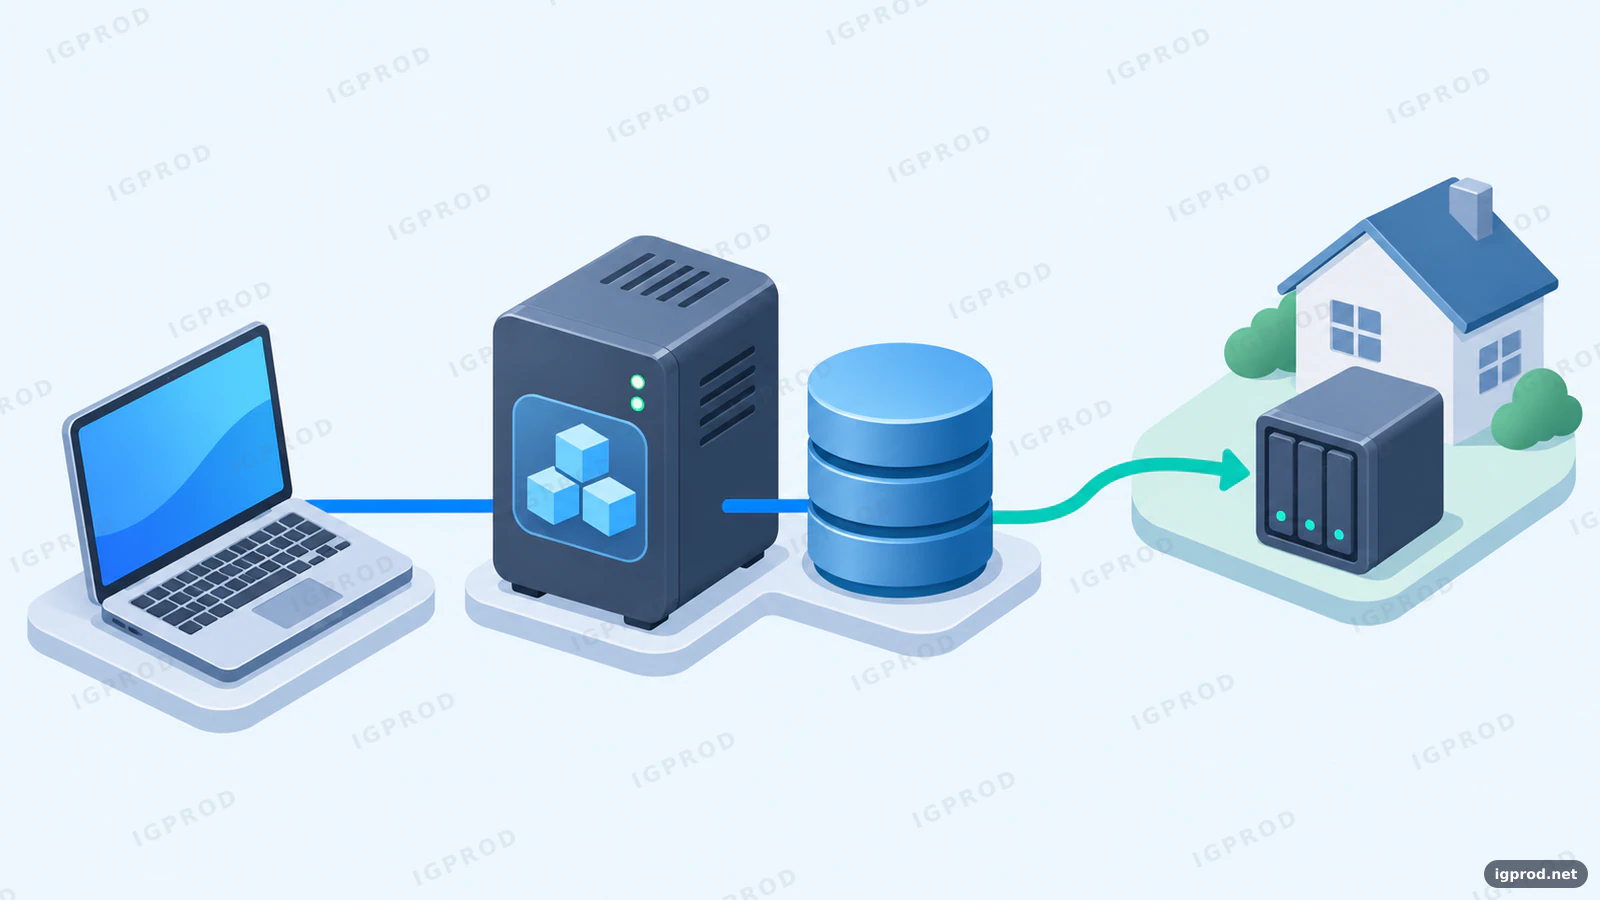
A container image can be downloaded again. Your database, uploads, settings and required secrets may be irreplaceable. List all of them, including the Compose file and anything needed to decrypt or authenticate a restored installation.
A Docker volume keeps data outside a container's writable layer, allowing it to survive container replacement. A volume on the same disk does not protect you from losing that disk. Choose a backup destination separate from the host, a schedule and retention period, and an off-site copy where appropriate. Protect sensitive backups and keep recovery keys available separately.
Choose two practical limits: how much recent work you can afford to lose, and how long you can wait to restore service. They determine your backup frequency and recovery plan. Assign responsibility to a person, even when that person is you.
For Uptime Kuma v2, the official migration guide specifies data-directory backups; the old JSON backup/restore feature was removed. Preserve the complete /app/data directory. Stop the application before a cold directory copy so SQLite is not changing while it is copied. Other products may need database dumps or coordinated snapshots instead.
Write this recovery acceptance checklist beside the backup plan:
- Create a backup using the application's documented method and retain compatible configuration and version details.
- Restore into separate storage in an isolated installation. Keep the original data intact.
- Check that the restored account works and the expected records, files and settings are present.
- Record the time required and any missing data. Compare those results with your chosen limits.
A readable archive is only an intermediate check. Recovery is demonstrated by a usable restored application. The sandbox for this guide did not run a backup or restore; complete that rehearsal before using the service for important data.
5. Try the plan with one private Docker service
We tested startup, SQLite setup, administrator creation and one local HTTP monitor on 12 November 2026 with louislam/uptime-kuma:2.5.11 in Docker. Notifications, remote access and recovery were outside this test. For broader monitoring configuration, use the full Uptime Kuma Docker guide.
5.1. Check Docker and save compose.yaml
Use an already configured Docker host. If Docker is missing, follow the official installation instructions for your operating system and the Linux Compose plugin instructions where applicable. Then open a terminal on that host and run:
docker version
docker compose version
mkdir -p ~/self-hosted/first-service
cd ~/self-hosted/first-service
The first command must reach Docker's Server section; the second must print a Compose version. Resolve connection or permission errors using your host's documented administrative method before continuing.
In a text editor, save the following complete file as compose.yaml in that directory. Preserve indentation and ensure the filename does not end in .txt.
services:
  web:
    # Fixed release used for this exercise; review updates deliberately.
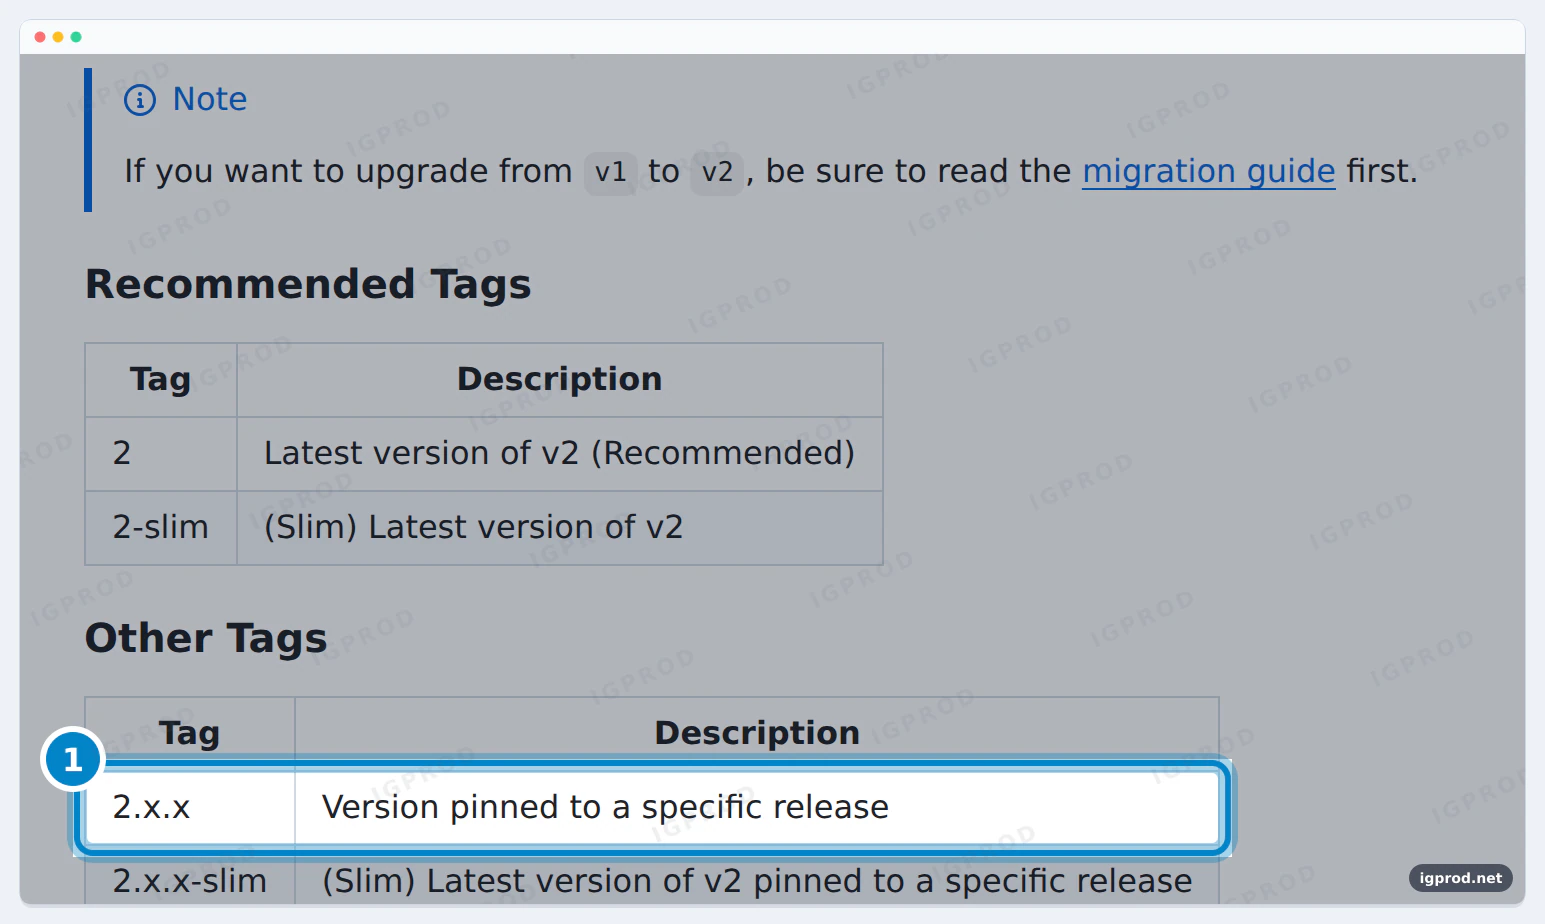
    image: louislam/uptime-kuma:2.5.11
    restart: unless-stopped
    ports:
      # Browser access on the Docker host only.
      - "127.0.0.1:3001:3001"
    volumes:
      # Retain the complete application data directory.
      - kuma_data:/app/data
volumes:
  kuma_data:
The named volume stores account and monitor data at the app's documented /app/data path. The fixed image tag makes the example reproducible. The official tag guide distinguishes a specific release from a moving major-version tag.
From the directory containing the file, validate and start it:
docker compose config --quiet
docker compose up -d
docker compose ps
Validation should finish without an error. Startup downloads the image if needed, so the initial download requires internet access. The status command should show the service running. Application readiness is confirmed by the setup screen in the next step.
5.2. Open the app and select SQLite
Open http://127.0.0.1:3001 in a browser on the Docker host. For a remote Linux host with existing SSH access, you can first run this optional forwarding command on your own computer, substituting your SSH account and server address:
ssh -N -L 3001:127.0.0.1:3001 [email protected]Keep that terminal open, then use the same browser address on your computer. The account and address above are examples. This SSH route was not part of the sandbox test.
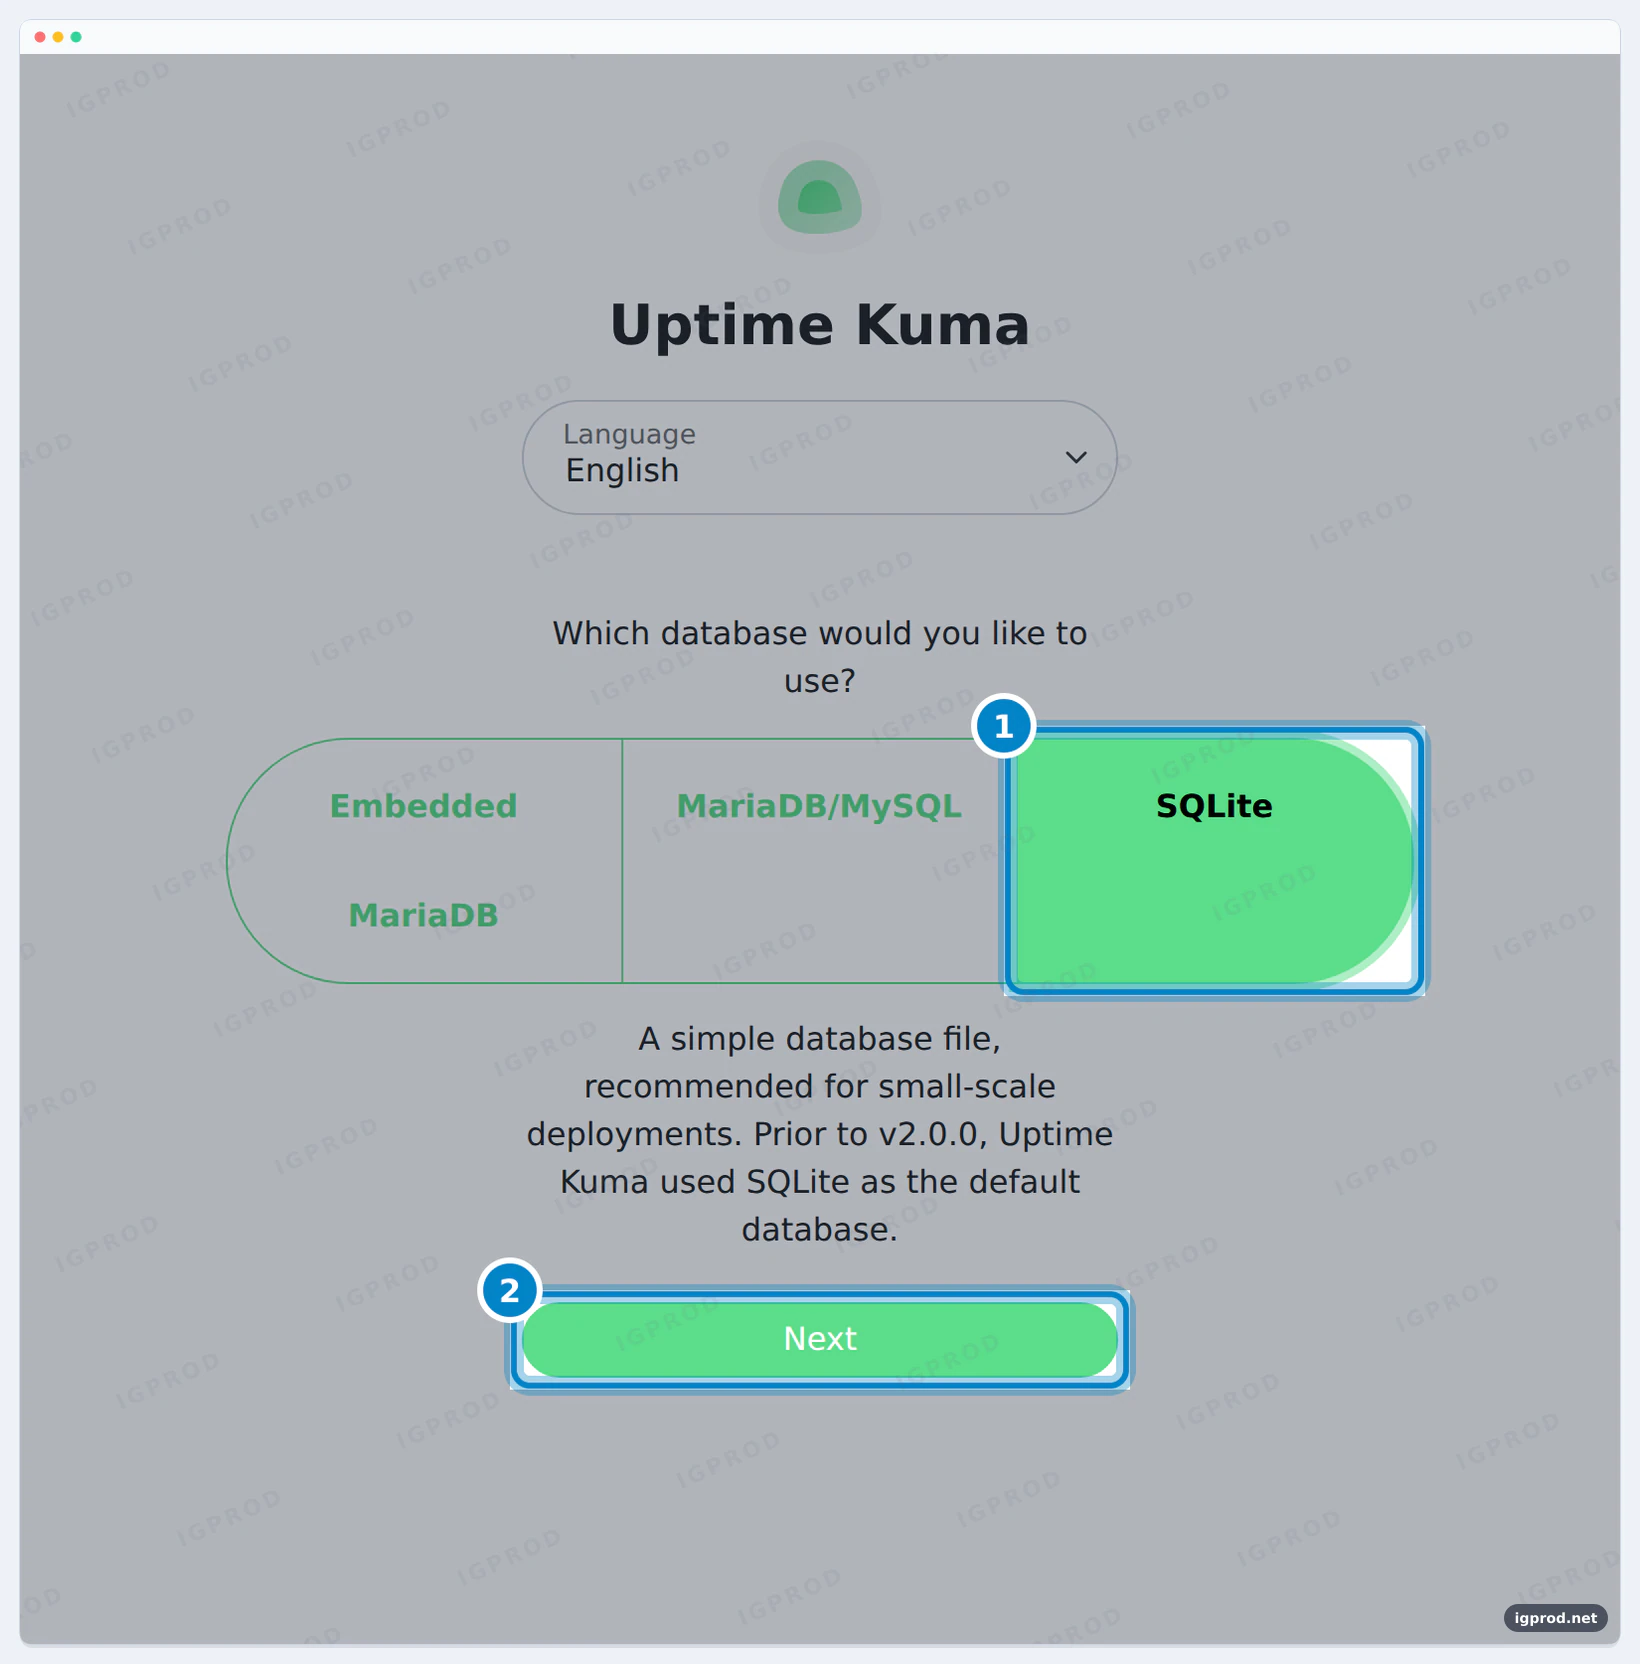
On “Which database would you like to use?”, select SQLite and click Next. The administrator-account form should appear.
5.3. Create your administrator account
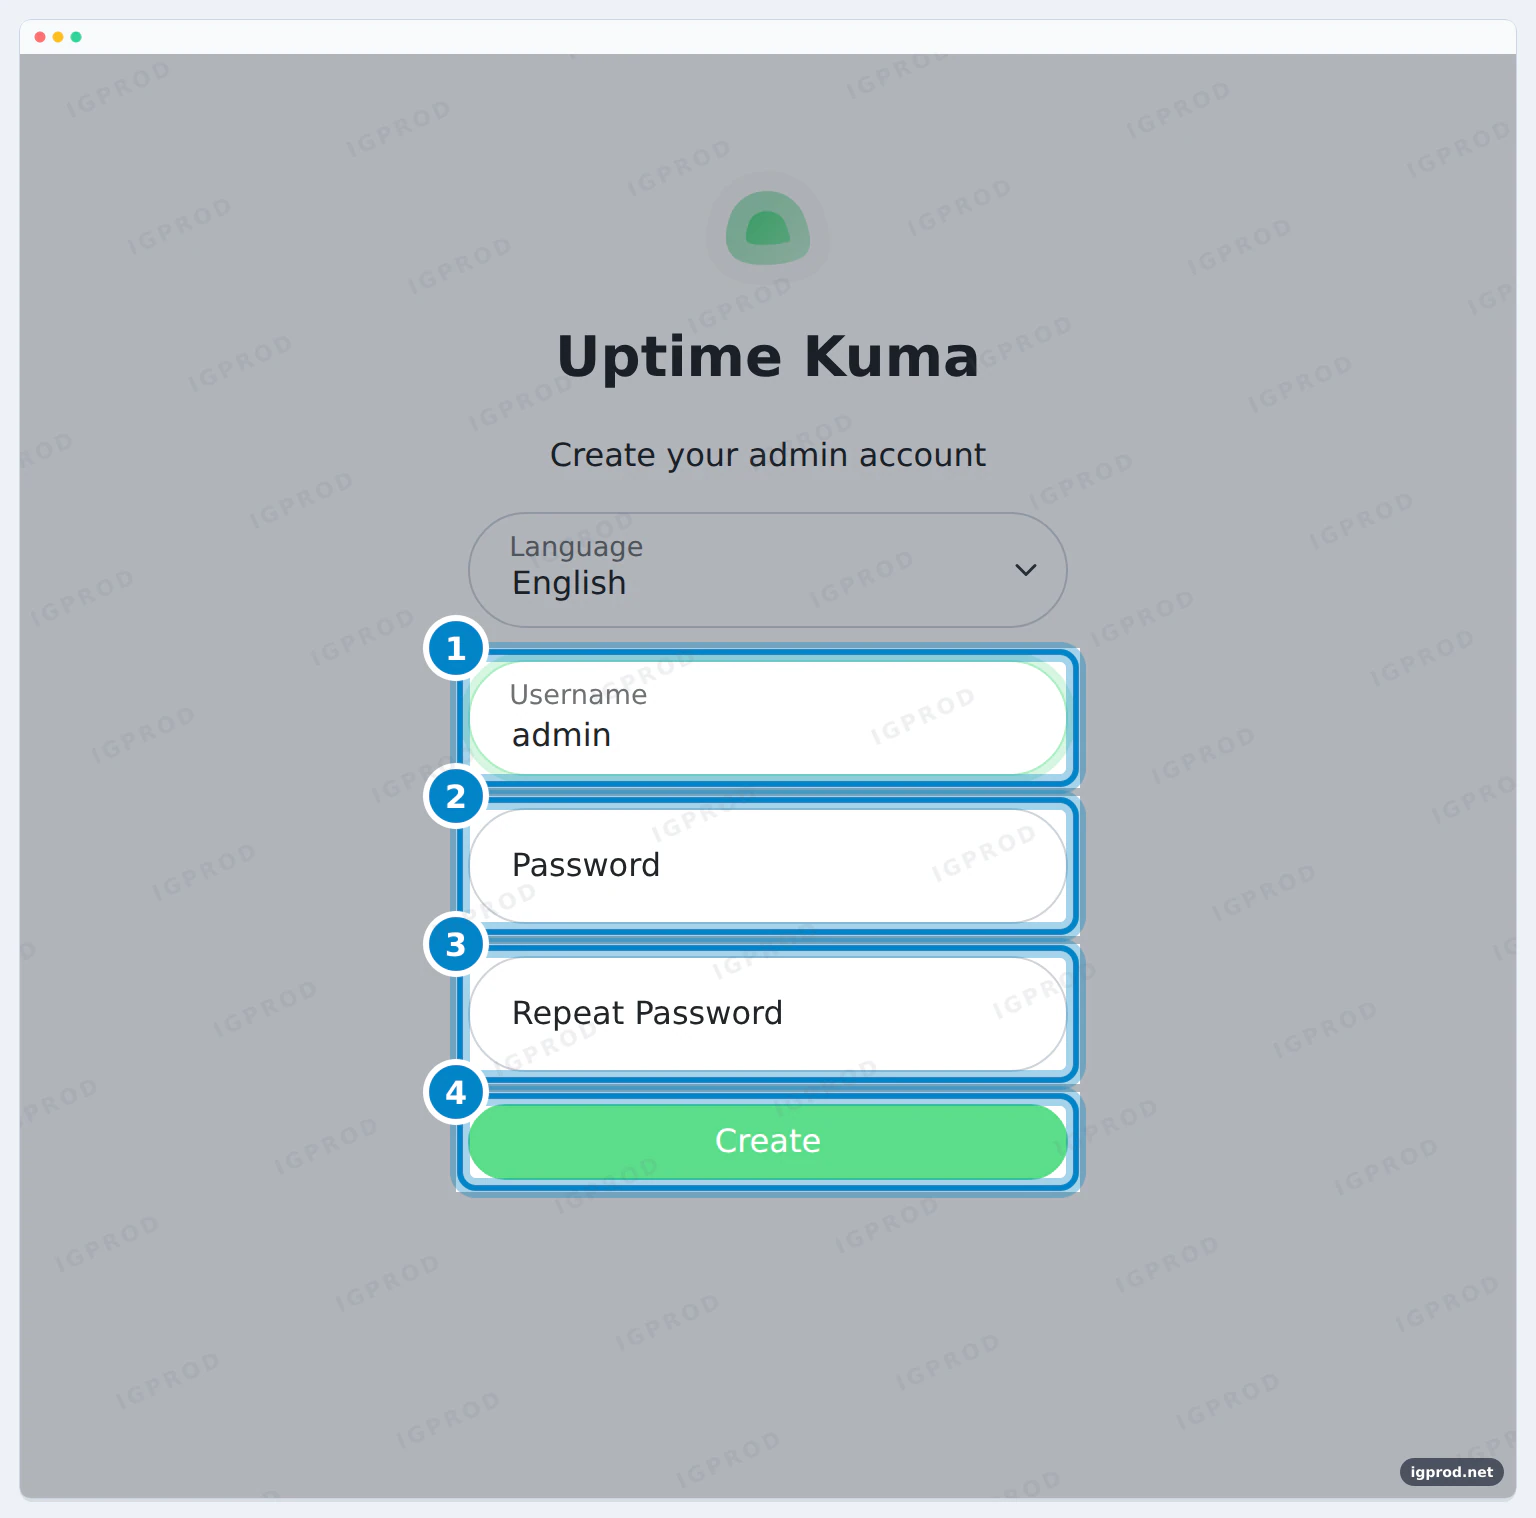
Enter your chosen username, create a unique password, repeat it, then click Create. Store your credentials securely. Successful creation opens the dashboard.
5.4. Add one practice monitor
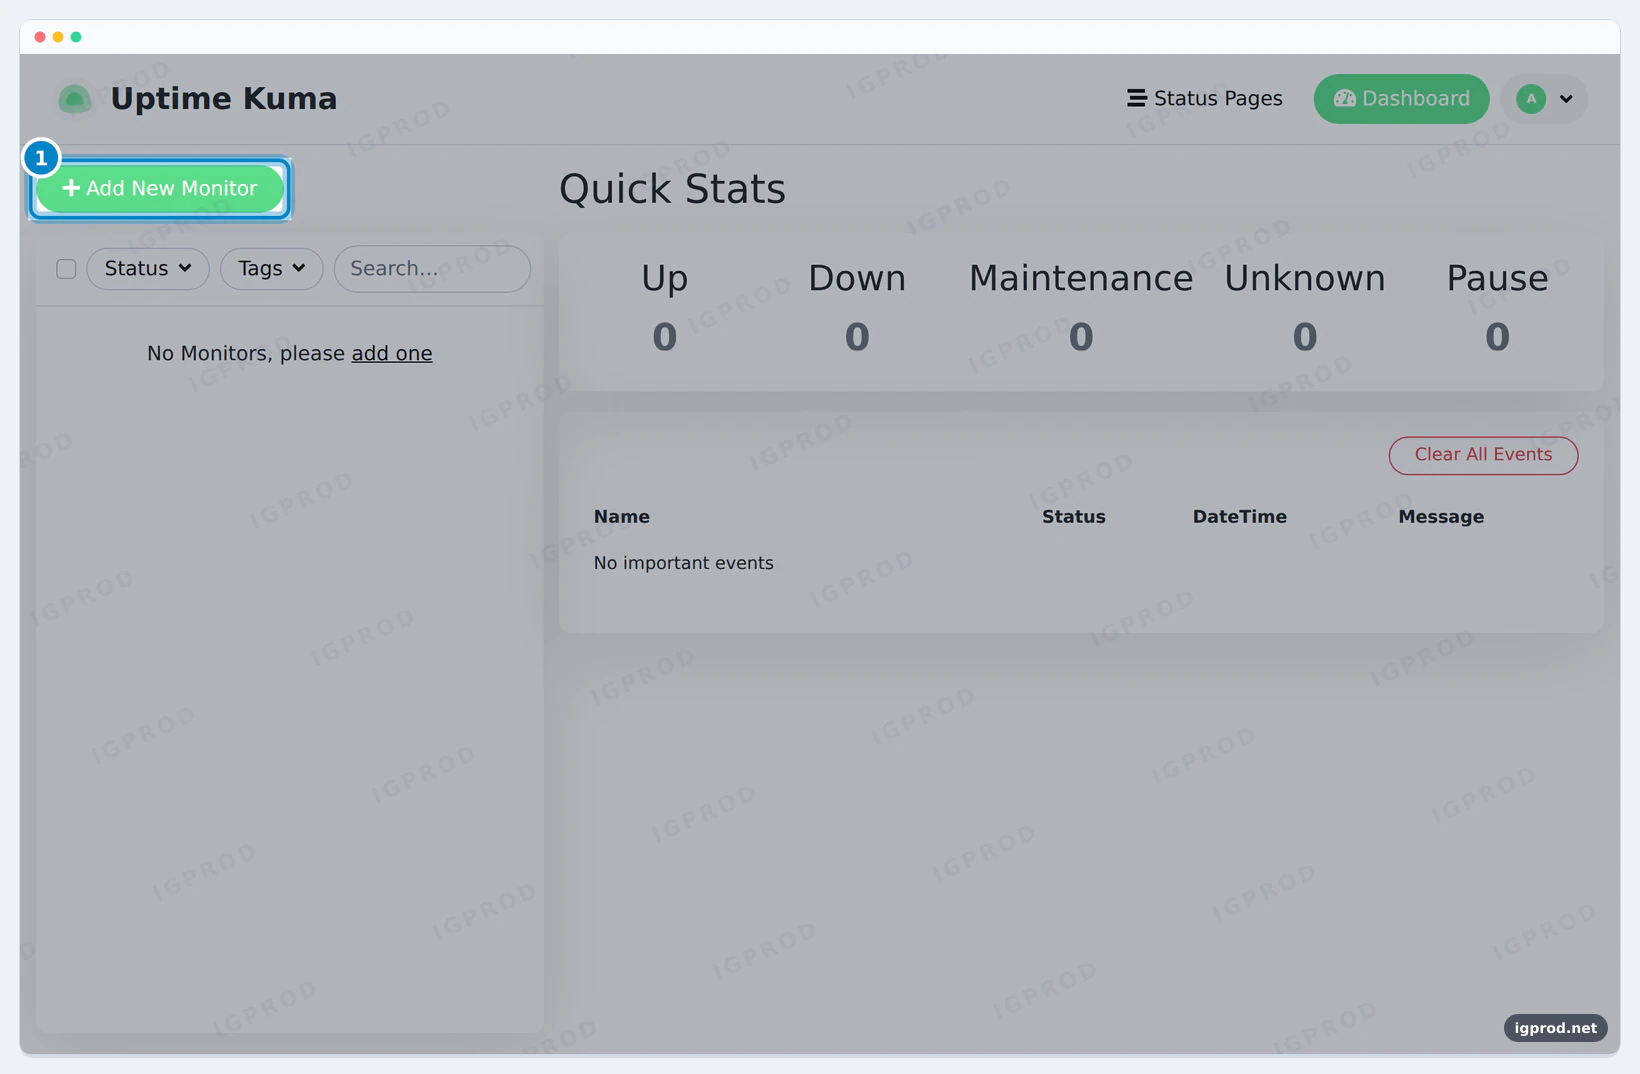
On the dashboard, click Add New Monitor at the highlighted location. The monitor configuration form should open.
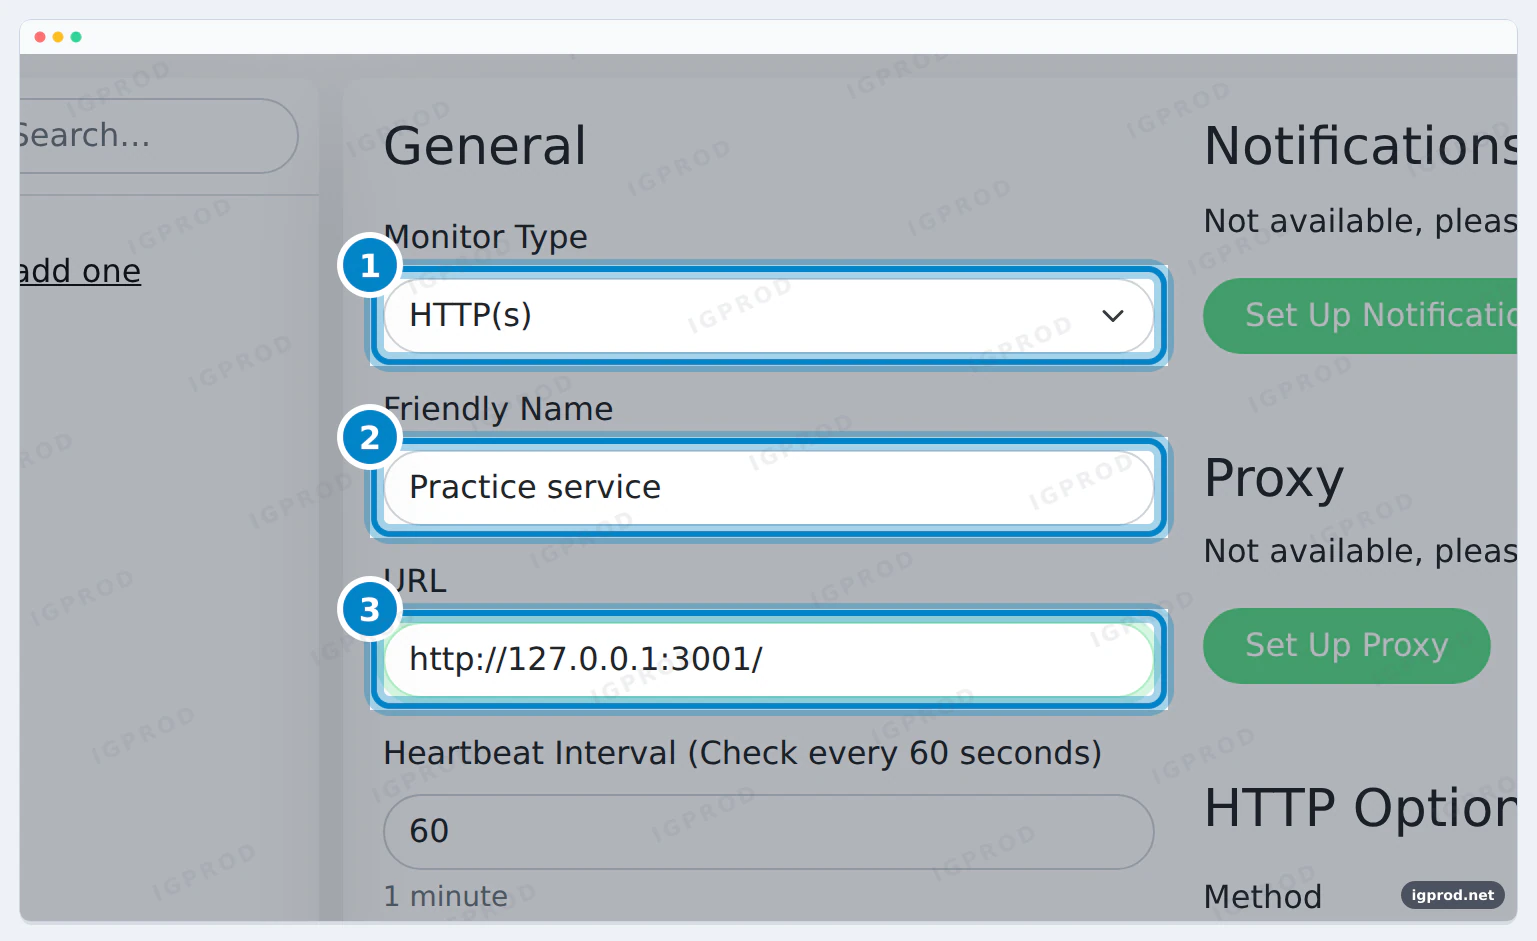
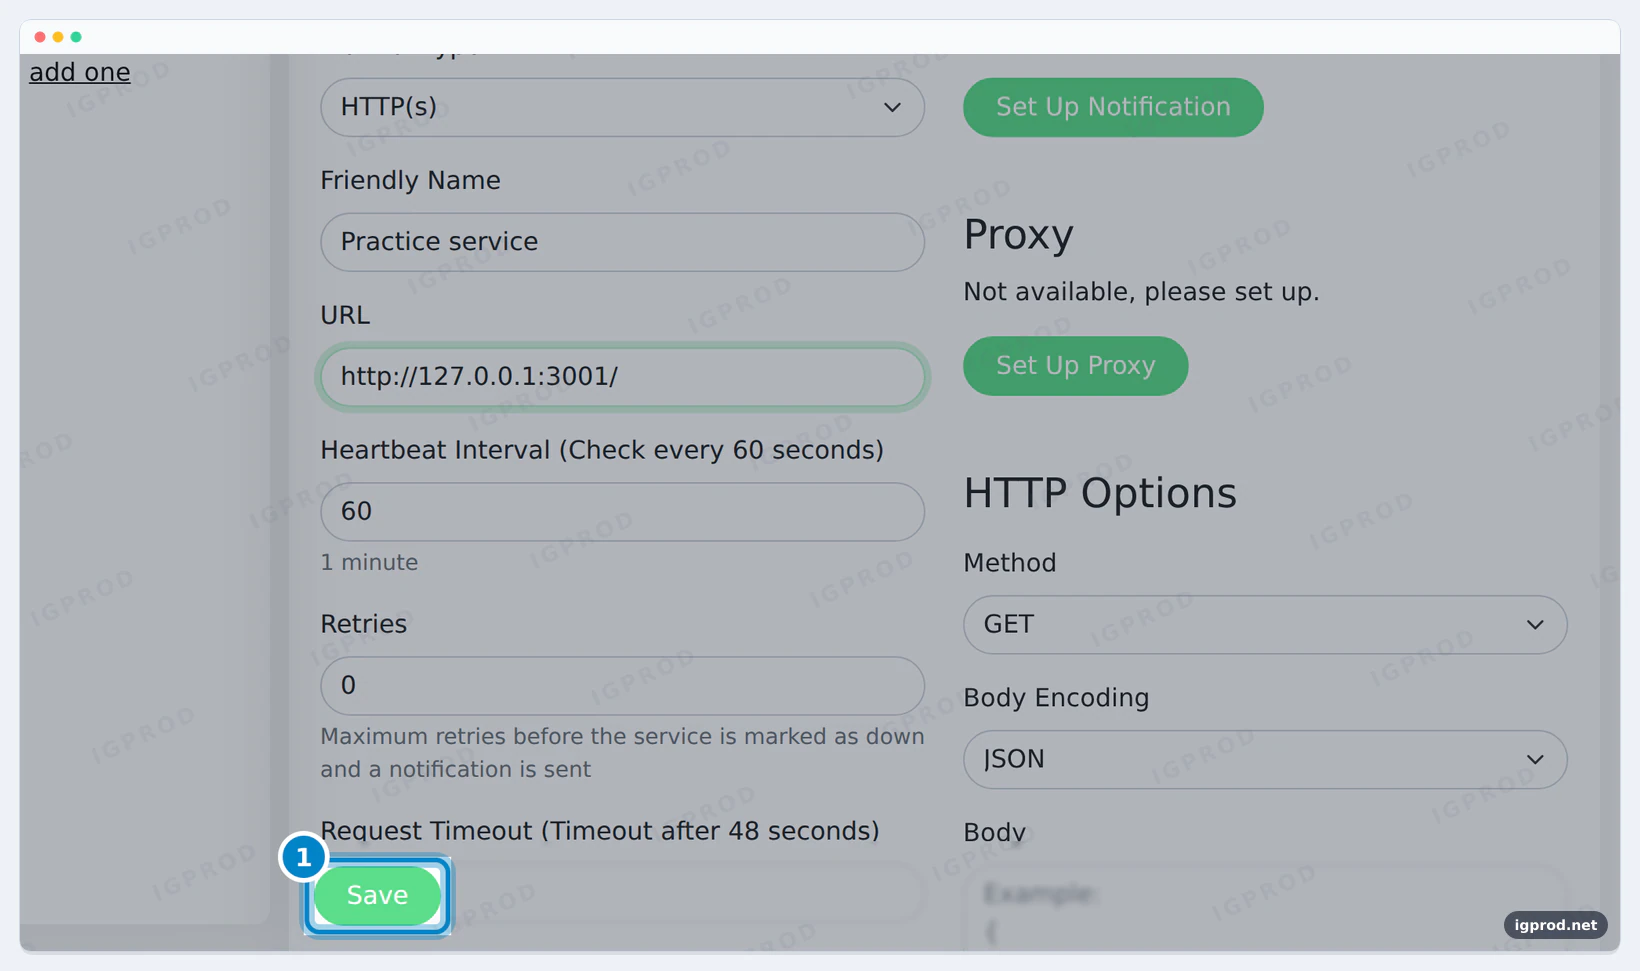
Keep Monitor Type set to HTTP(s). Set Friendly Name to Practice service and URL to http://127.0.0.1:3001/. Keep the default 60-second interval. The form should match the highlighted values below.
5.5. Save and check the result
Click Save at the bottom of the monitor form.
Wait for the first successful check. The monitor should display Up.
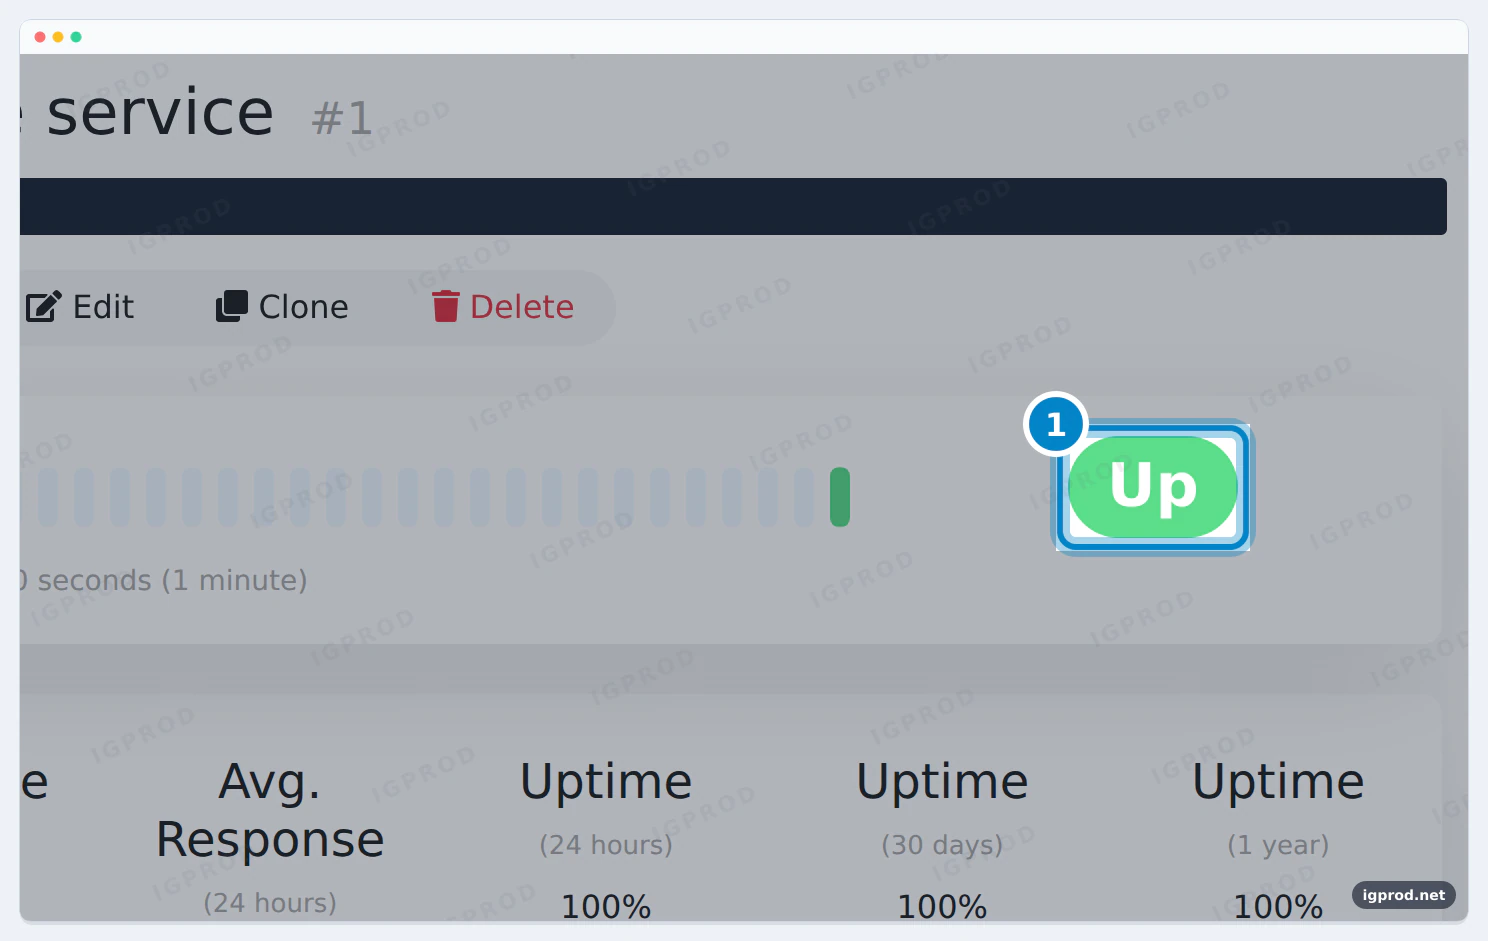
This request runs inside Kuma's container, where loopback reaches Kuma itself. It exercises the monitoring form and HTTP response handling; it does not test the host's published port, authenticated features or internet availability. For real host-outage coverage, monitoring must also run independently of that host.
6. Set an update and recovery routine
Put a maintenance owner and next review date in the worksheet. Before updating, read the chosen release's notes and migration instructions, take a backup using the documented method, and retain the previous configuration and compatible data.
When you have selected a new release, change the image tag in compose.yaml, then run from its directory:
docker compose config --quiet
docker compose pull web
docker compose up -d web
docker compose ps
docker compose logs --tail=50 web
Check application behavior again after the update. Pulling the unchanged 2.5.11 tag does not select a newer release. The official update guide explains recreation with persistent data.
Reverting an image alone may fail after a database migration. Keep the matching pre-update data and version needed for recovery. Avoid docker compose down -v as an update or repair shortcut: its volume-removal option can delete the persistent data you need.
Troubleshooting your first self-hosted service
Beginner reader reports about device access and Docmost's documentation issue show why addresses, ports and product-specific settings need explicit checks.
The container runs, but the browser cannot connect
Run docker compose ps and docker compose logs --tail=50 web from the project directory. Confirm startup has completed and that your browser is on the host or using the intended forward. “Running” alone does not establish readiness.
It works on the host, but not on my phone
The example binds to host loopback intentionally. Your phone cannot use that route. Choose and configure a LAN or private remote route before expecting another device to connect; opening router ports is not a diagnostic step for this exercise.
Startup says the address is already in use
Another process may occupy host port 3001. Change the publication to 127.0.0.1:3002:3001, run docker compose up -d again, and open host port 3002. Keep the monitor's internal URL on port 3001. If only the SSH client's local port conflicts, use -L 3002:127.0.0.1:3001 in the forwarding command instead.
My settings disappeared after recreating the app
Check whether you used the original Compose directory, project and volume mapping. A different project can create a fresh volume. Preserve the original storage while investigating; do not prune volumes or delete data to make setup reappear.
A proxy cannot reach the application
Check where the proxy runs. Containers sharing a Compose network use service names and container ports. A host process uses the published host address and port. Inside a proxy container, localhost refers to that proxy container. Use Docker's networking documentation to match both ends.
Another app reports a missing or short secret
Read that product's rules and replace its placeholders consistently. For example, Docmost requires an APP_SECRET of at least 32 characters and documents generating it with openssl rand -hex 32. This is a Docmost requirement; do not add it to Kuma's Compose file.
FAQ
What does self-hosted mean, and can I use a VPS?
It means you operate the application on infrastructure you control. A rented VPS qualifies; you do not need hardware at home. You remain responsible for the application, access and recovery.
What is a good first self-hosted service?
Choose one useful app with data you can afford to recreate. The optional Uptime Kuma exercise gives you a small account-and-monitor workflow before you commit important data or add other users.
Do I need Docker or a NAS to start self-hosting?
No. Use a deployment method supported by your app on compatible hardware. This example uses Docker Compose, but a NAS and Docker are not universal requirements.
Do I need a domain name or public IP address?
No for host-only practice. LAN and private remote access have their own routing requirements. Public HTTPS access usually adds hostname, certificate and access-policy decisions; plan them separately.
Is self-hosting free?
Check the application's license. Even with free software, account for hardware or server rental, electricity, storage, backups and maintenance time. There is no universal saving compared with a hosted subscription.
Is a Docker volume a backup?
No. A volume provides persistent storage through container replacement. A backup provides a separate recoverable copy, and a restore rehearsal proves that copy can bring the application back.
Sources
- Docker: installation
- Docker: Linux Compose plugin
- Docker: publishing ports
- Docker: Compose networking
- Docker: persistent volumes and backups
- Docker: Compose command reference
- Uptime Kuma: official project
- Uptime Kuma: installation and storage requirements
- Uptime Kuma: Docker tags
- Uptime Kuma: release 2.5.11
- Uptime Kuma: v2 migration and data backups
- Uptime Kuma: update instructions
- Bitwarden: self-hosting operations checklist
- Chatwoot: Docker deployment
- Cloudflare: Tunnel overview
- Cloudflare: Access for published self-hosted apps
- OpenSSH: forwarding options
- Docmost: installation and secret requirements
- Reader problem: reaching a service from another device
- Reader problem: Docmost installation documentation

Leave a comment
Your email address will not be published. Required fields are marked *