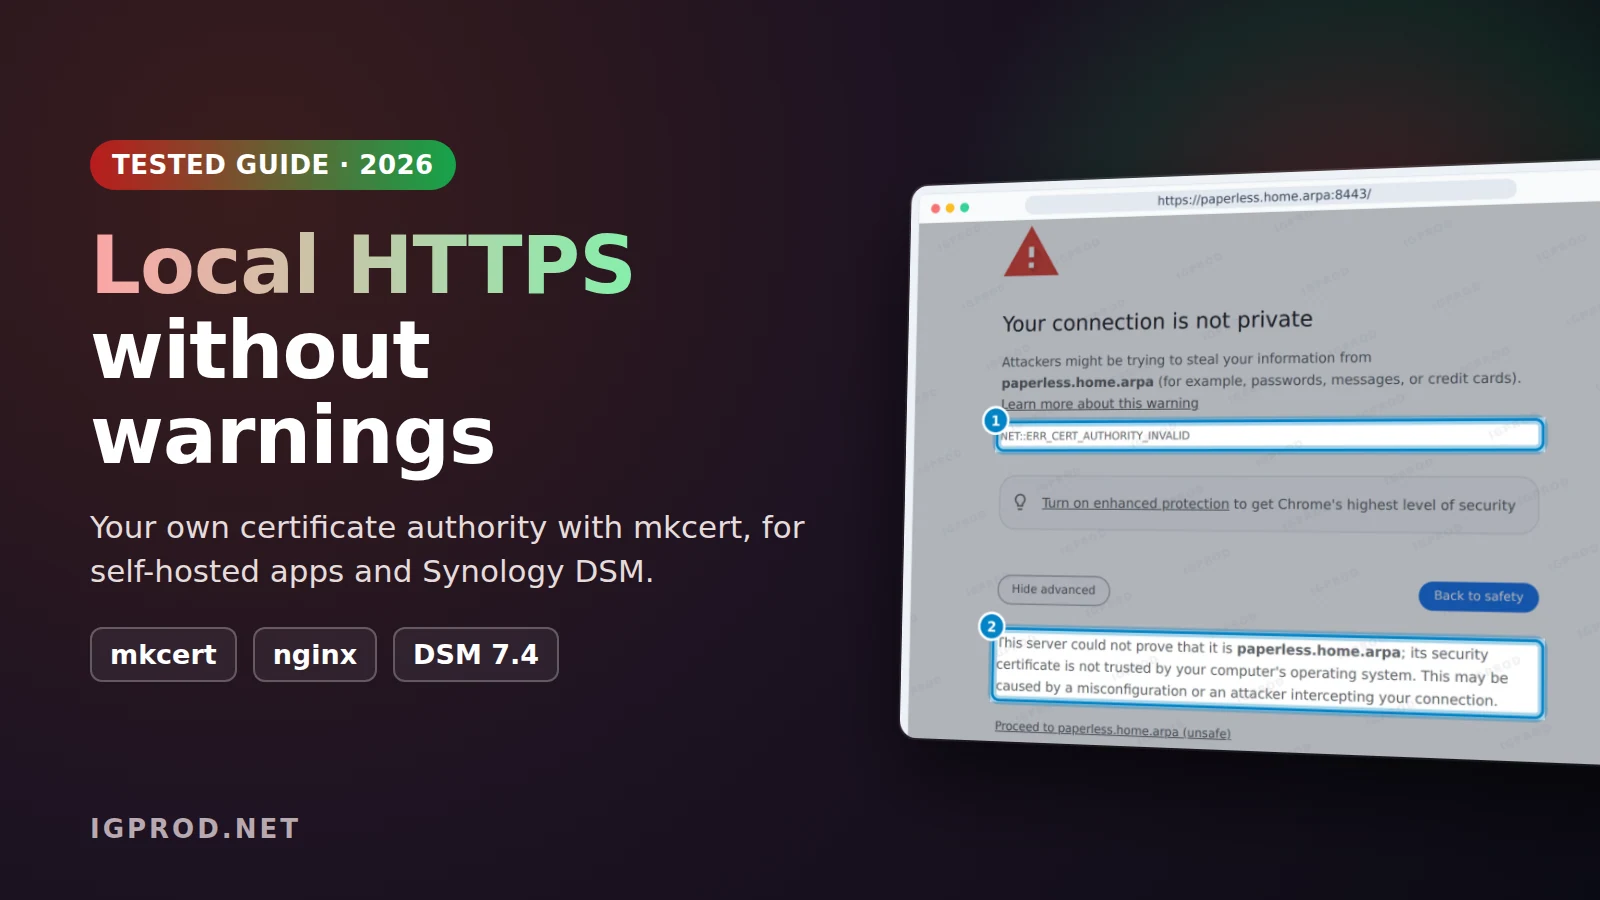
You open a self-hosted app, or your Synology NAS, over HTTPS, and Chrome stops you: Your connection is not private, with the code NET::ERR_CERT_AUTHORITY_INVALID. The connection is encrypted, but your browser does not know who signed the certificate. So it cannot tell your server from an attacker.
This guide removes the warning the clean way. You make your own small certificate authority (CA) with mkcert, trust it once on each device, and use its certificates in a reverse proxy and in Synology DSM. You need no public domain and no open port.
We tested every step on 13 November 2026: mkcert 1.4.4 on Linux, Chromium 158, nginx 1.30 in front of a Paperless-ngx test instance, and DSM 7.4.1 for the import. Our example names are nas.home.arpa and paperless.home.arpa.
Why Chrome says NET::ERR_CERT_AUTHORITY_INVALID
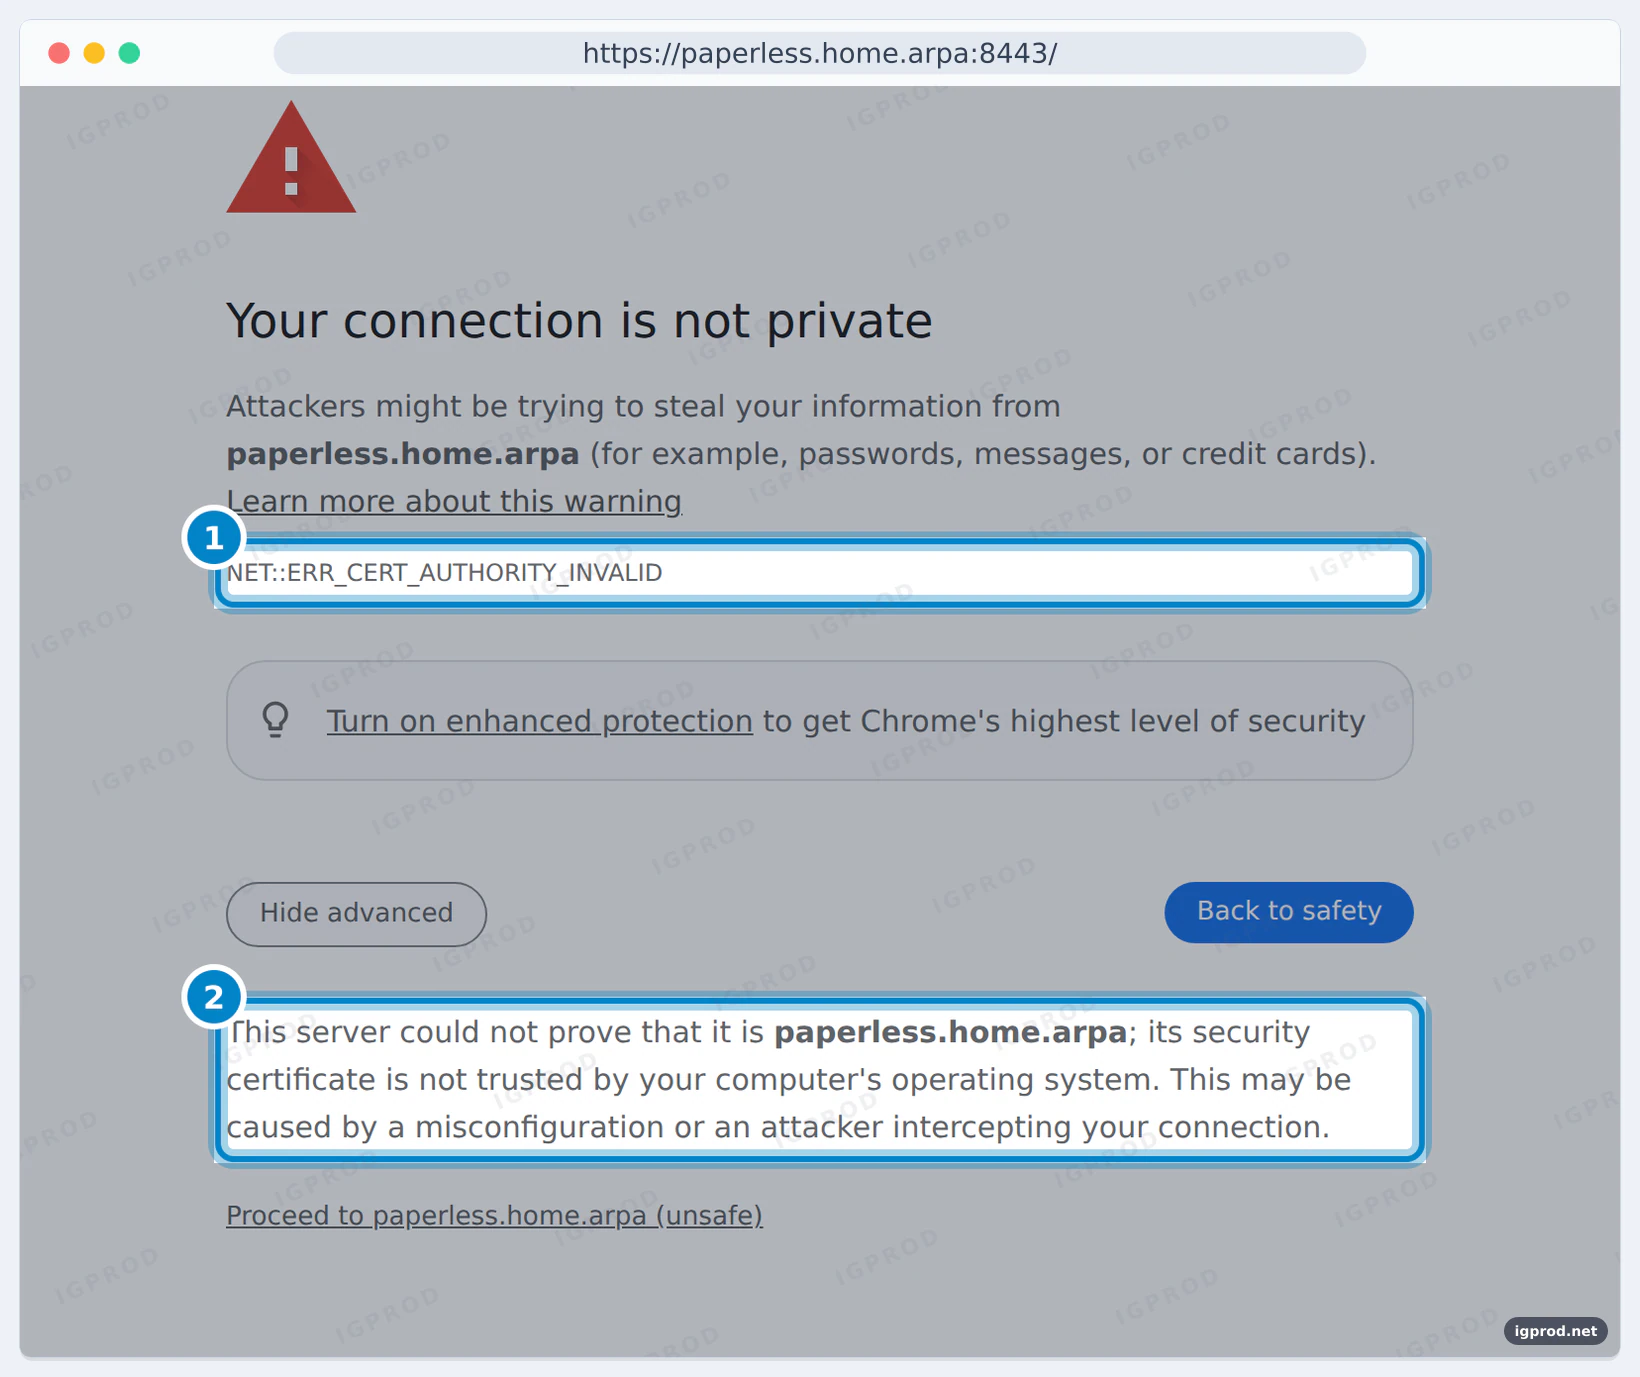
A certificate authority signs every HTTPS certificate. Your browser and your system trust a list of public authorities. A certificate signed by another authority, or signed by itself (a self-signed certificate), gives this error.
The link Proceed to paperless.home.arpa (unsafe) opens the page, but only in that browser. And you learn to click through a warning that must stop you on the day a server is not yours. Phone apps often refuse such certificates. Three ways out:
| Option | What your devices must trust | Good for |
|---|---|---|
| Self-signed certificate (OpenSSL) | Each certificate, on each device, again after each renewal | One quick test |
| Your own CA (mkcert) | The CA, once per device | All the names on your home network |
| Let's Encrypt | Nothing: browsers already trust it | Public domain names that you own |
For local names such as nas.home.arpa, Let's Encrypt cannot help: it only signs public domain names. If you own a domain, its DNS challenge can sign a name such as nas.example.com that points to a local address. For names that exist only at home, your own CA is the right tool.
Step 1: Install mkcert
mkcert is a free, open-source tool by Filippo Valsorda. It makes a local CA and certificates, one command each. Version 1.4.4, from April 2022, is still the latest release.
On Linux, install certutil first: mkcert needs it to add the CA to Chrome and Firefox. Then take the binary of the GitHub release:
sudo apt install libnss3-tools
curl -fsSLo mkcert https://github.com/FiloSottile/mkcert/releases/download/v1.4.4/mkcert-v1.4.4-linux-amd64
chmod +x mkcert
sudo mv mkcert /usr/local/bin/
mkcert -versionv1.4.4On Windows, the mkcert documentation installs it with Chocolatey (choco install mkcert) or Scoop. On macOS, it uses Homebrew: brew install mkcert, and brew install nss if you use Firefox. We tested Linux only.
Step 2: Create your local CA
mkcert -installCreated a new local CA 💥
The local CA is now installed in the system trust store! ⚡️
The local CA is now installed in the Firefox and/or Chrome/Chromium trust store (requires browser restart)! 🦊mkcert made two files: rootCA.pem, the public certificate of your CA, and rootCA-key.pem, its private key. It added the CA to the system trust store, and to the store that Chrome and Firefox use on Linux. Restart the browser afterwards. This command shows the folder of the two files. In our lab, it is /lab/ca, because we set the CAROOT variable. Without it, mkcert uses a folder in your user profile.
mkcert -CAROOT/lab/caKeep rootCA-key.pem private. The mkcert documentation warns that this file "gives complete power to intercept secure requests from your machine". With it, anybody can make certificates that all your devices trust. Never copy it to a server, a phone, or a backup that other people can read. Your servers need only the certificates of step 3. Your devices need only rootCA.pem.
On Linux, you can check that the CA is in the store of Chrome:
certutil -d sql:$HOME/.pki/nssdb -LCertificate Nickname Trust Attributes
SSL,S/MIME,JAR/XPI
mkcert development CA 198242690859218843222856102243342372985 C,,Step 3: Make a certificate for your names
List every name and address that you type in the browser to reach your server:
mkcert nas.home.arpa paperless.home.arpa nas.local 192.168.1.50Created a new certificate valid for the following names 📜
- "nas.home.arpa"
- "paperless.home.arpa"
- "nas.local"
- "192.168.1.50"
The certificate is at "./nas.home.arpa+3.pem" and the key at "./nas.home.arpa+3-key.pem" ✅
It will expire on 13 February 2029 🗓home.arpais reserved for home networks by RFC 8375, so it never collides with a real website.nas.localis the kind of name that mDNS (Bonjour) gives to devices on many home networks.192.168.1.50stands for the IP address of your server. Put your own, if you also open the server by its address.
mkcert writes the certificate nas.home.arpa+3.pem and its key nas.home.arpa+3-key.pem in the current folder. "+3" means three names more than the first one. Here is what the certificate contains:
openssl x509 -in nas.home.arpa+3.pem -noout -subject -issuer -startdate -enddate -ext subjectAltName,keyUsage,extendedKeyUsagesubject=O = mkcert development certificate, OU = root@1265ffa8bbf0
issuer=O = mkcert development CA, OU = root@e6a6e9747436, CN = mkcert root@e6a6e9747436
notBefore=Nov 13 18:16:03 2026 GMT
notAfter=Feb 13 18:16:03 2029 GMT
X509v3 Key Usage: critical
Digital Signature, Key Encipherment
X509v3 Extended Key Usage:
TLS Web Server Authentication
X509v3 Subject Alternative Name:
DNS:nas.home.arpa, DNS:paperless.home.arpa, DNS:nas.local, IP Address:192.168.1.50Browsers only read the names in Subject Alternative Name. The certificate is valid until 13 February 2029, two years and three months. The CA itself is valid for ten years:
openssl x509 -in "$(mkcert -CAROOT)/rootCA.pem" -noout -subject -enddatesubject=O = mkcert development CA, OU = root@e6a6e9747436, CN = mkcert root@e6a6e9747436
notAfter=Nov 13 18:14:09 2036 GMTThe subject of the certificate has no common name (CN). Browsers do not need one, but Synology DSM then shows the certificate without a name (step 6).
Step 4: Serve your app over HTTPS with nginx
Give the certificate and its key to the reverse proxy in front of your app. In our lab, nginx served the Paperless-ngx test instance on port 8443:
server {
    listen 8443 ssl;
    server_name paperless.home.arpa nas.home.arpa;

    ssl_certificate     /certs/nas.home.arpa+3.pem;
    ssl_certificate_key /certs/nas.home.arpa+3-key.pem;

    client_max_body_size 100M;

    location / {
        proxy_pass http://127.0.0.1:8000;
        proxy_set_header Host $host:$server_port;
        proxy_set_header X-Forwarded-Proto https;
        proxy_set_header X-Forwarded-For $proxy_add_x_forwarded_for;
        proxy_http_version 1.1;
        proxy_set_header Upgrade $http_upgrade;
        proxy_set_header Connection "upgrade";
    }
}
listen 8443 ssl: HTTPS on port 8443, for every device of your network. Our lab usedlisten 127.0.0.1:8443 ssl;, because the test browser ran on the same machine.ssl_certificateandssl_certificate_key: the two files of step 3. Our nginx container read them from its/certsfolder.proxy_pass: the address of your app. Paperless-ngx listens on port 8000. Our nginx used the host network, so127.0.0.1is the machine itself.Hostkeeps the name and the port that the visitor typed.X-Forwarded-Proto httpstells the app that the visitor uses HTTPS.- The last three lines let WebSocket connections through. Apps such as Paperless-ngx use them for live updates.
Some apps must know their HTTPS address. For Paperless-ngx, set PAPERLESS_URL, for example https://paperless.home.arpa:8443.
Your devices must also find the names. Add them to the DNS of your router or of your Pi-hole, or to the hosts file of each computer: /etc/hosts on Linux and macOS, C:\Windows\System32\drivers\etc\hosts on Windows. One line per address:
192.168.1.50 nas.home.arpa paperless.home.arpaIn our lab, we gave the names to the browser directly. With the CA of step 2 in its store, Chrome opened the page without a warning:
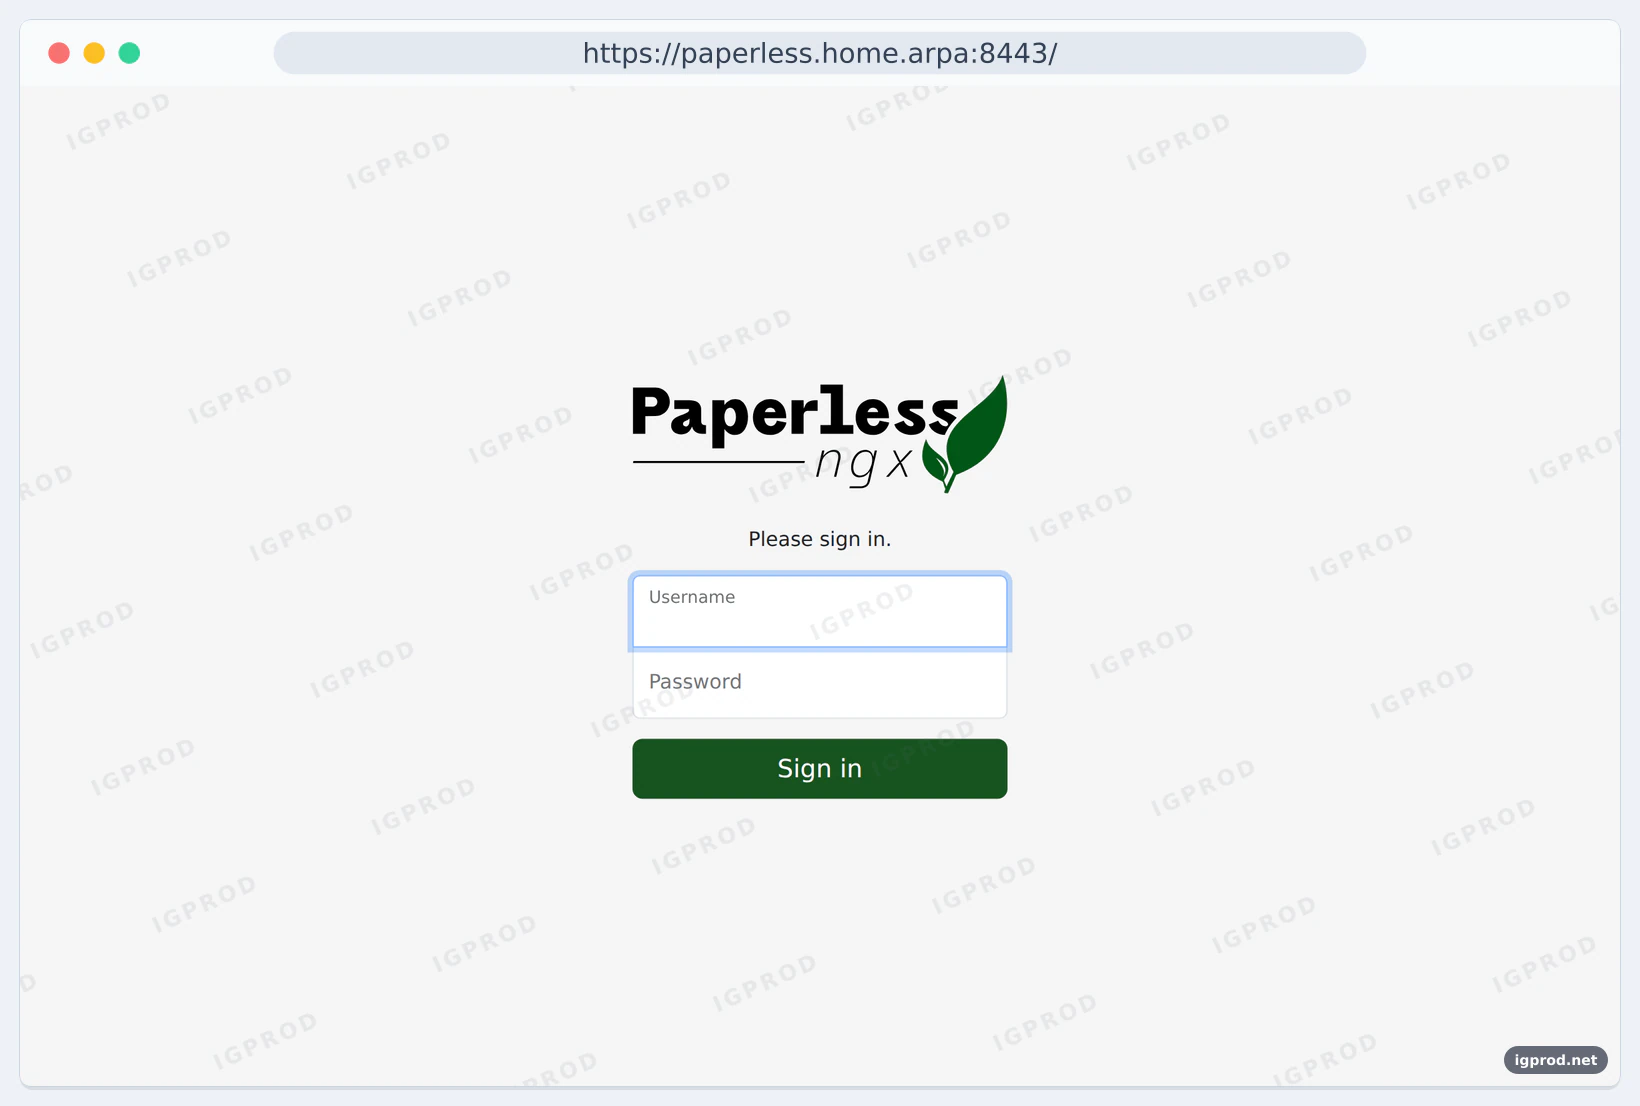
Command-line tools use the system store or their own. curl refused the certificate when it did not know the CA, and accepted it when we gave it rootCA.pem. The name was not in our DNS, so we also added --resolve paperless.home.arpa:8443:127.0.0.1 to both commands. This option is a quick way to test before you change your DNS:
curl -I https://paperless.home.arpa:8443/curl: (60) SSL certificate problem: unable to get local issuer certificate
More details here: https://curl.se/docs/sslcerts.htmlcurl -I --cacert rootCA.pem https://paperless.home.arpa:8443/HTTP/1.1 302 Found
Server: nginx/1.30.6
Date: Fri, 13 Nov 2026 21:27:17 GMTStep 5: Trust the CA on your other devices
Each computer, phone or tablet that opens your services must trust your CA once. Copy only rootCA.pem, never the key.
Other computers
The mkcert documentation gives this method: install mkcert on the other computer, put rootCA.pem in a folder, point CAROOT to that folder and run mkcert -install. Installing the CA does not need its key.
export CAROOT="$HOME/home-ca"   # the folder with rootCA.pem
mkcert -install
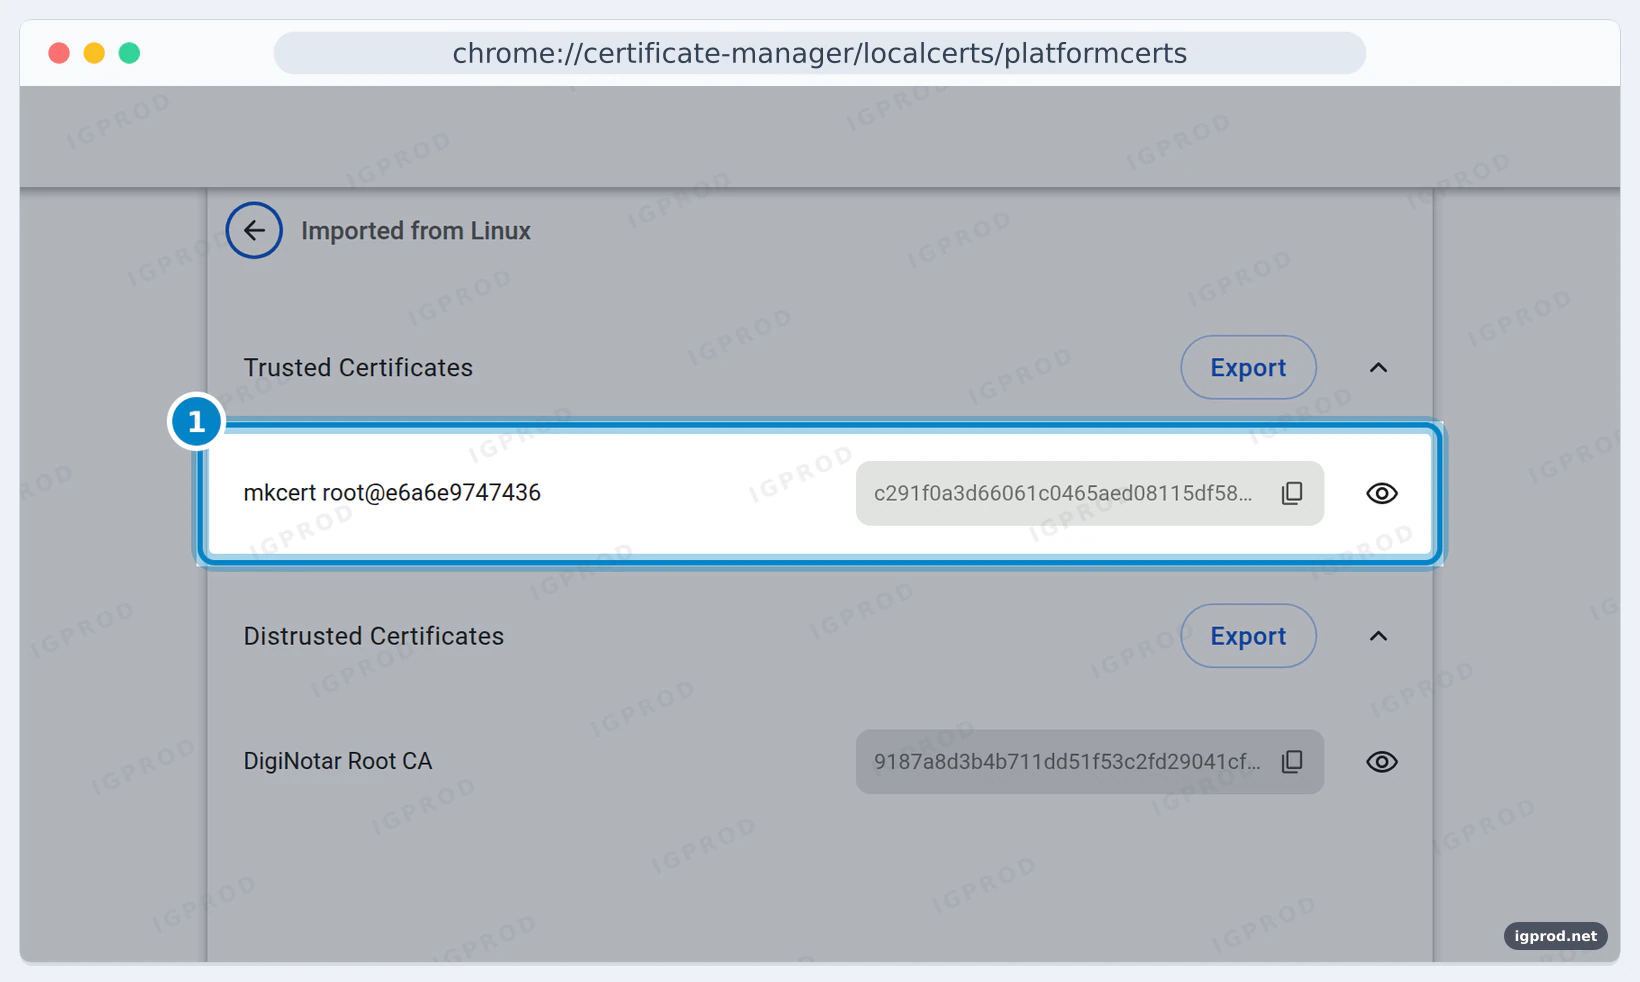
In Chrome, open chrome://certificate-manager to see the result. On Linux, the CA appears under Imported from Linux:
iPhone and iPad
Send rootCA.pem to the device, for example with AirDrop or by email, and open it. Install the profile in Settings > Profile Downloaded. Then turn on full trust for it in Settings > General > About > Certificate Trust Settings, as Apple explains.
Android
Install rootCA.pem as a CA certificate in the security settings of the phone. The menu names depend on the phone. Chrome then accepts your certificates, but many apps ignore CAs that users installed: the mkcert documentation notes that an app must allow them. We did not test phones in this lab.
Step 6: Use the certificate on Synology DSM
DSM can use your mkcert certificate for its own HTTPS pages (port 5001) and for its other services. Copy the two .pem files of step 3 to the computer with your browser. In DSM, open Control Panel > Security > Certificate and click Add:
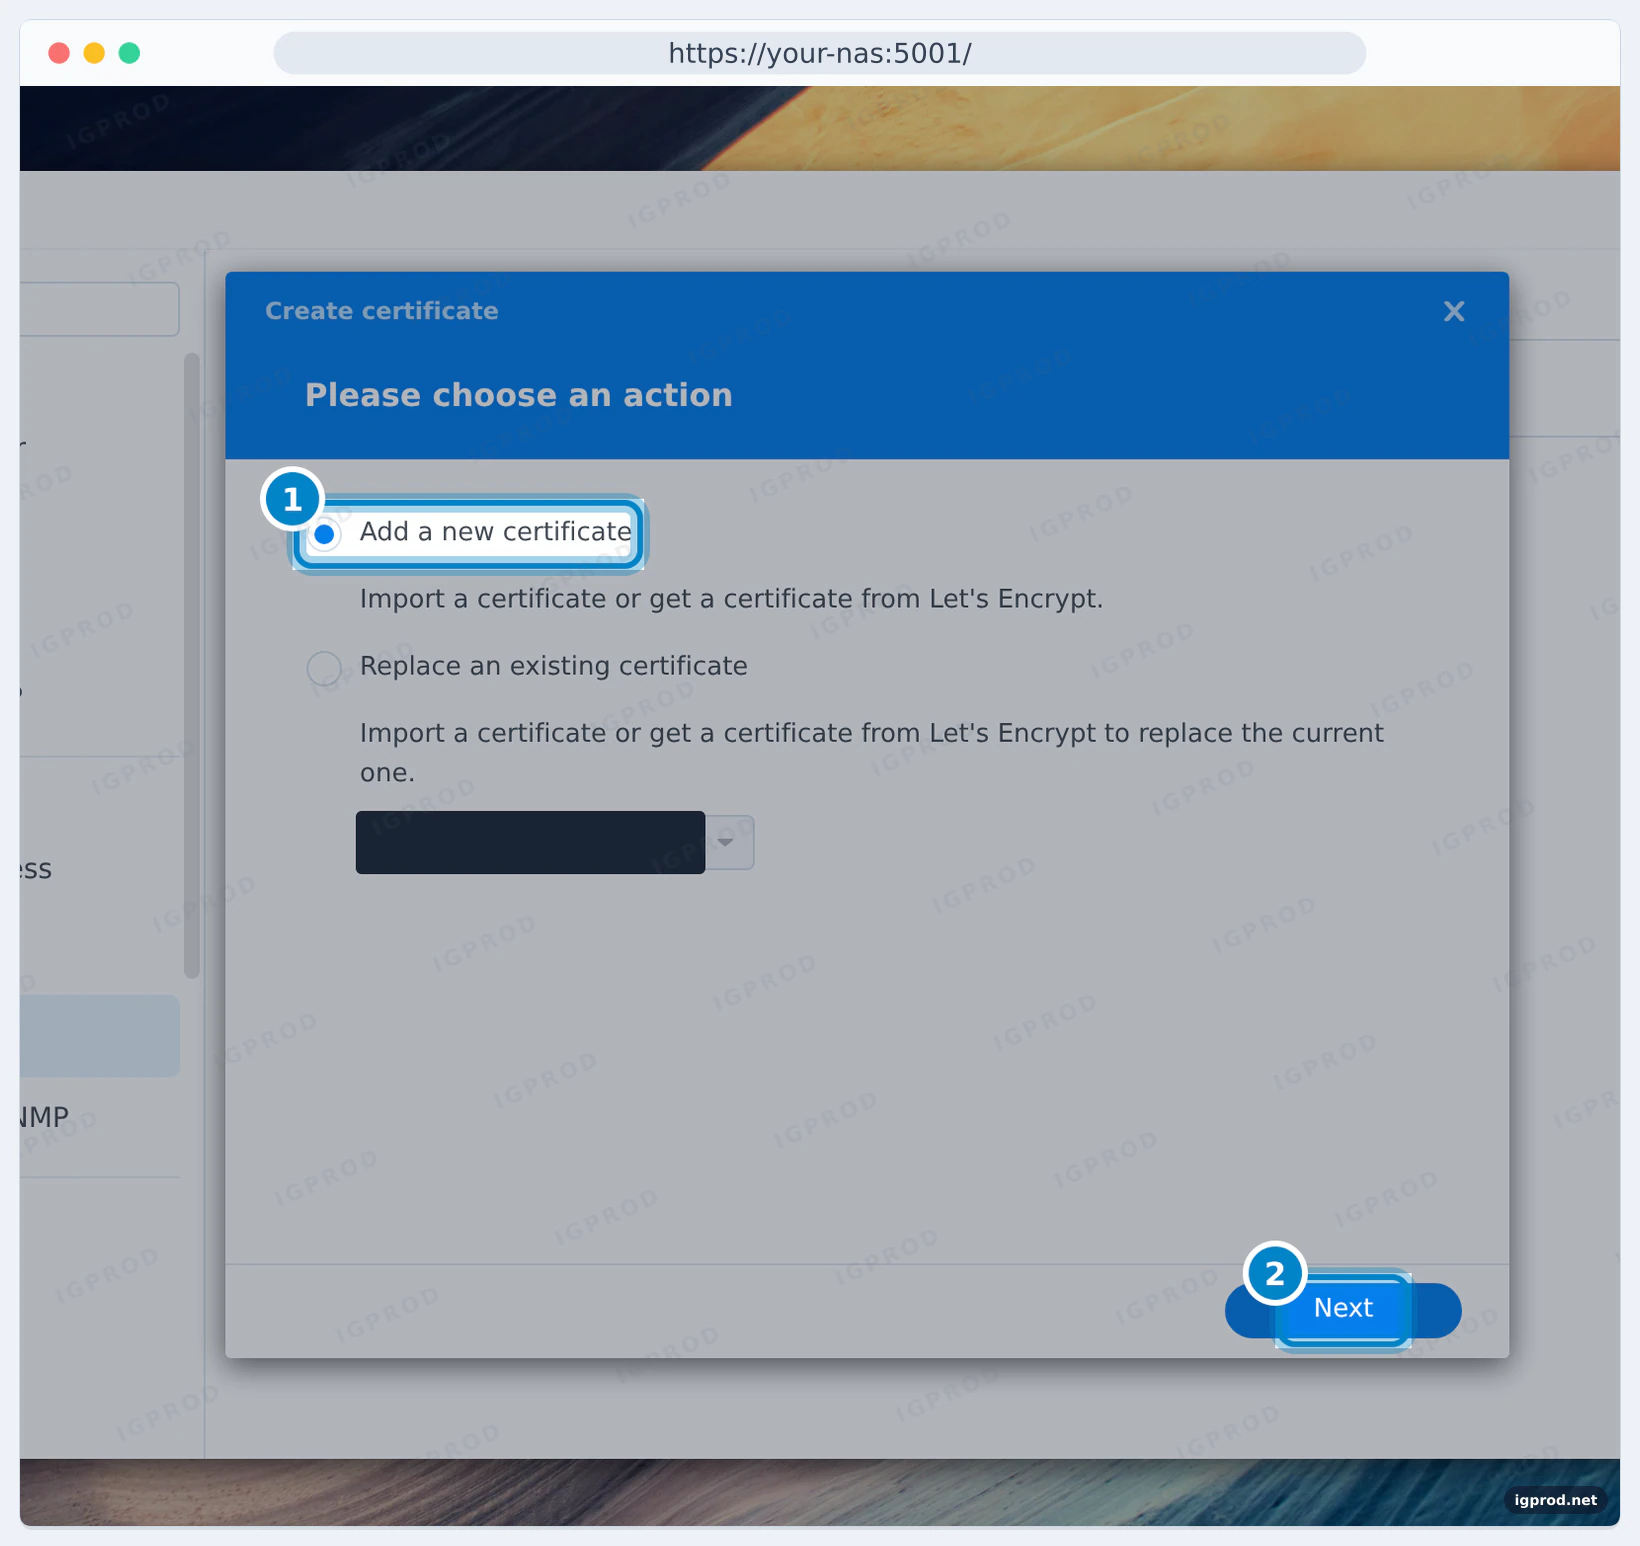
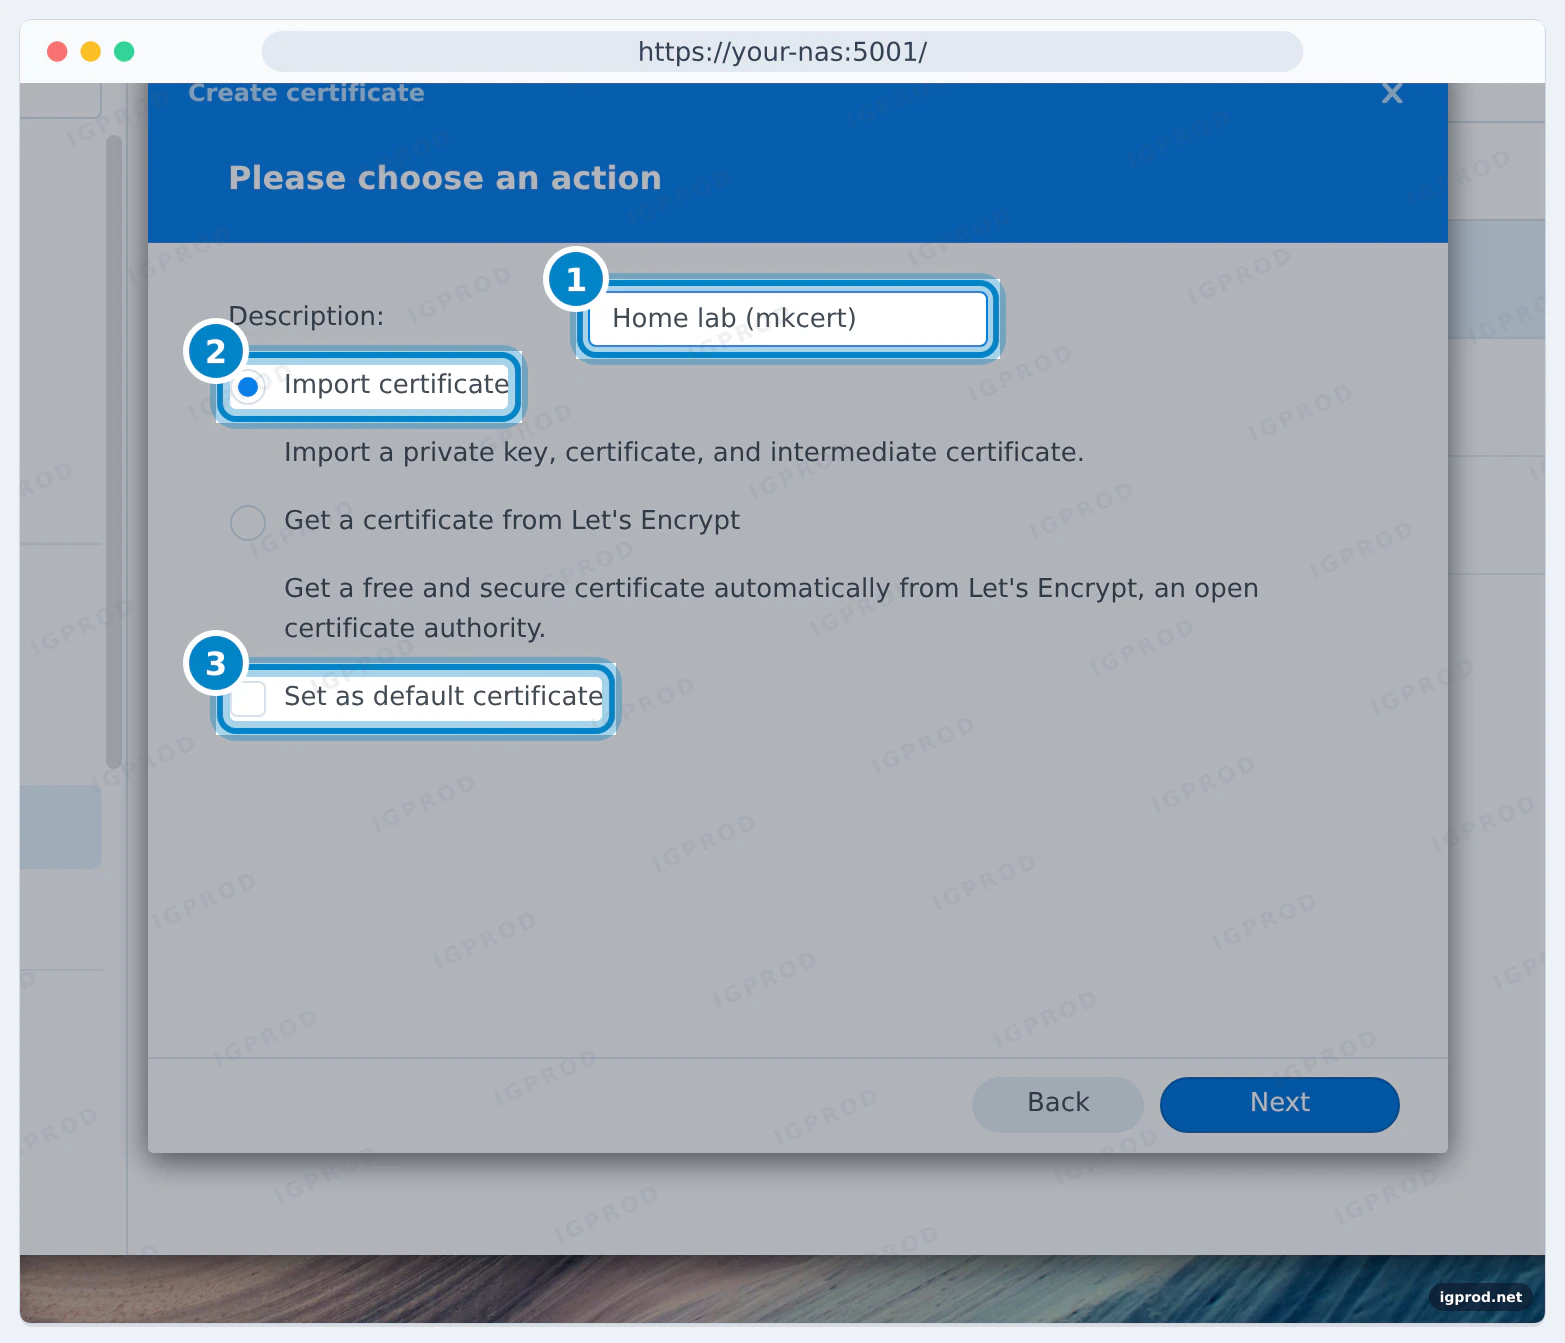
In DSM 7.4.1, this wizard offered two sources only: import a certificate, or get one from Let's Encrypt. We found no option to create a self-signed certificate there, so mkcert is a simple way to get one for local names.
Set as default certificate would use it for every service at once. Turn it on only when every device that opens DSM trusts your CA. Click Next and choose the two files:
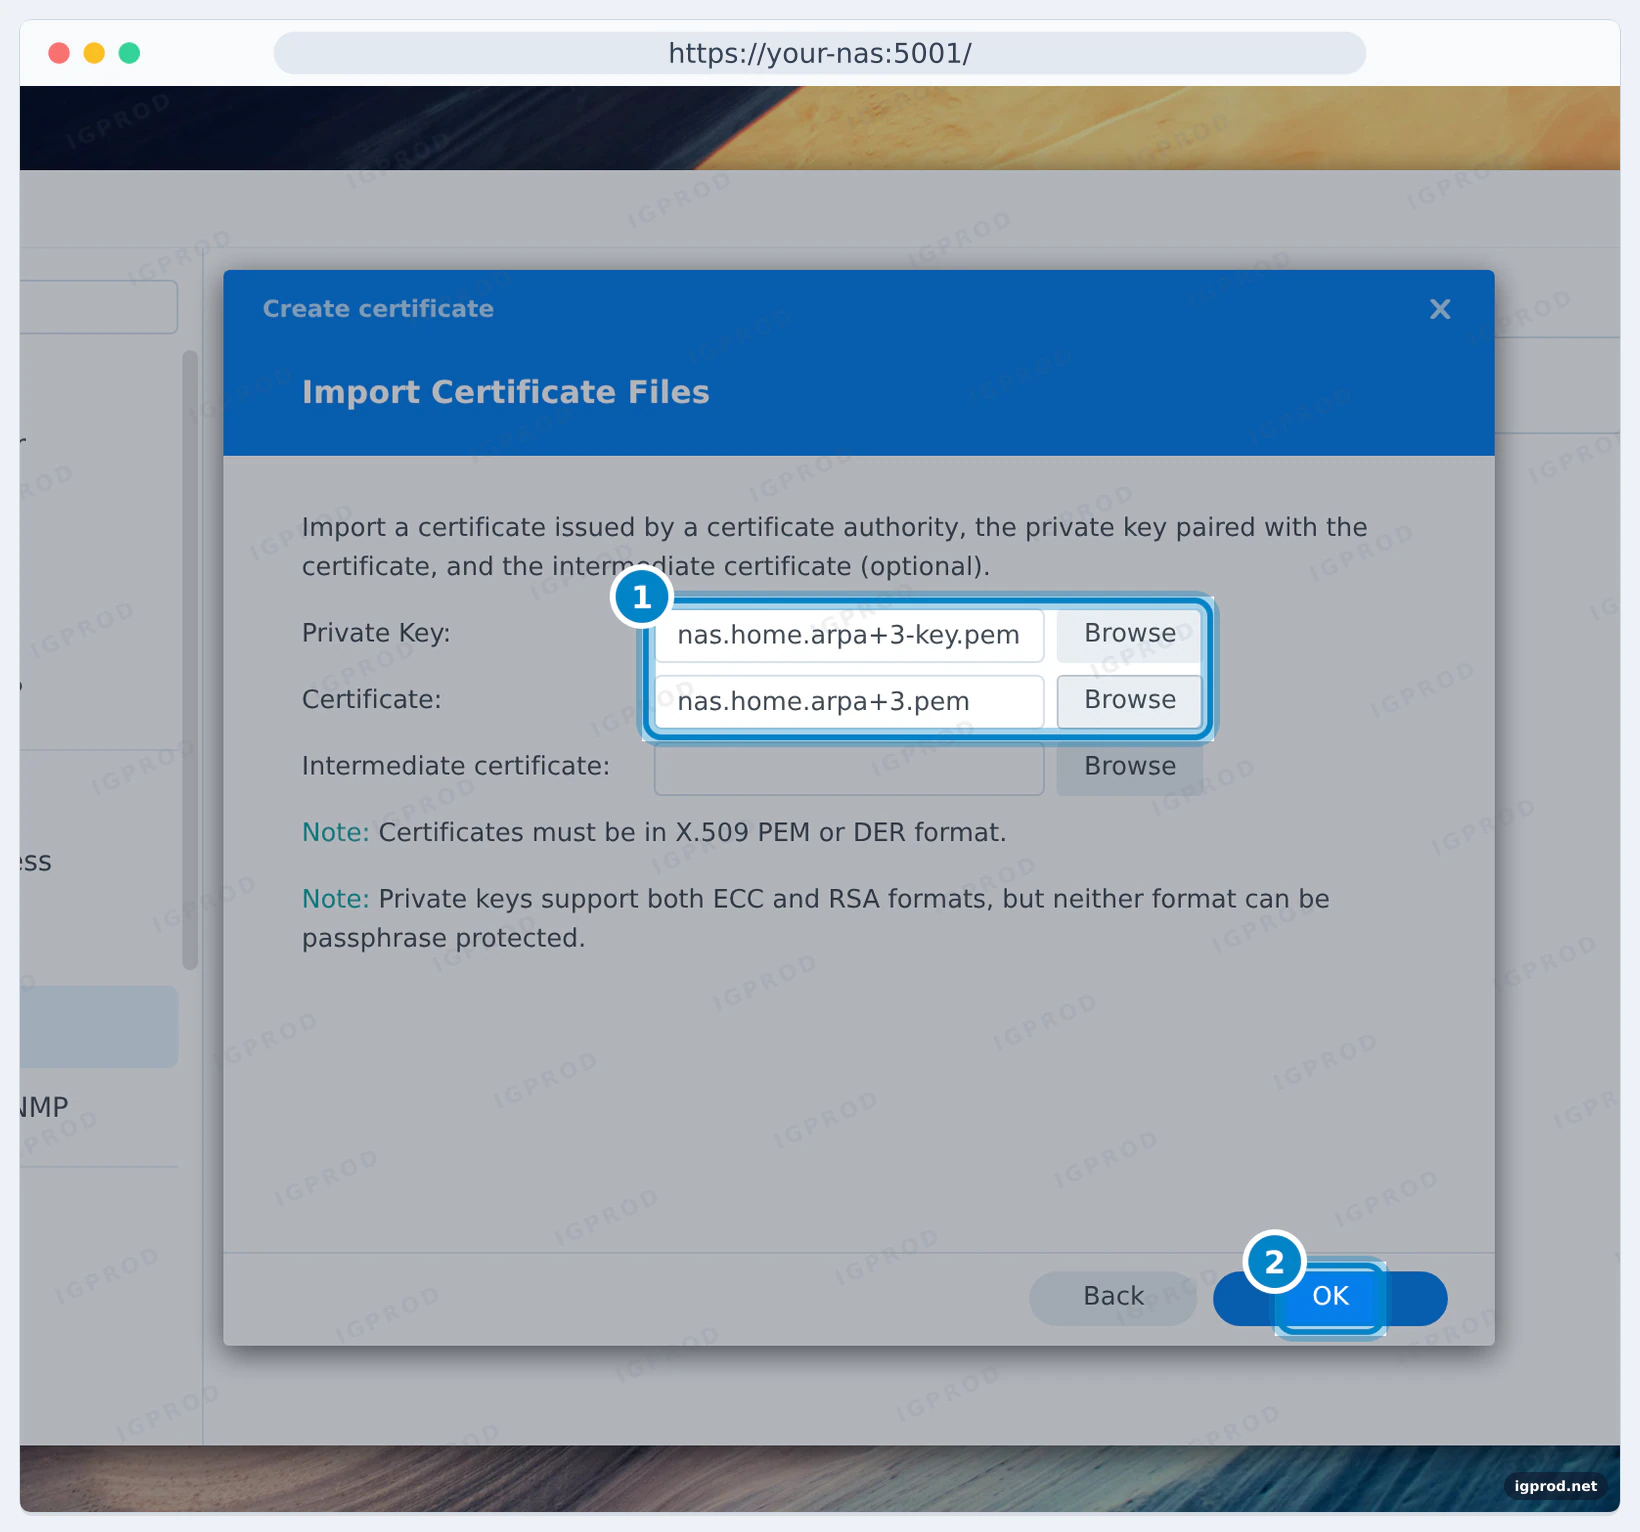
DSM accepted the mkcert files as they are: the key is an RSA key without a passphrase, which matches the note of DSM. The certificate appeared in the list:
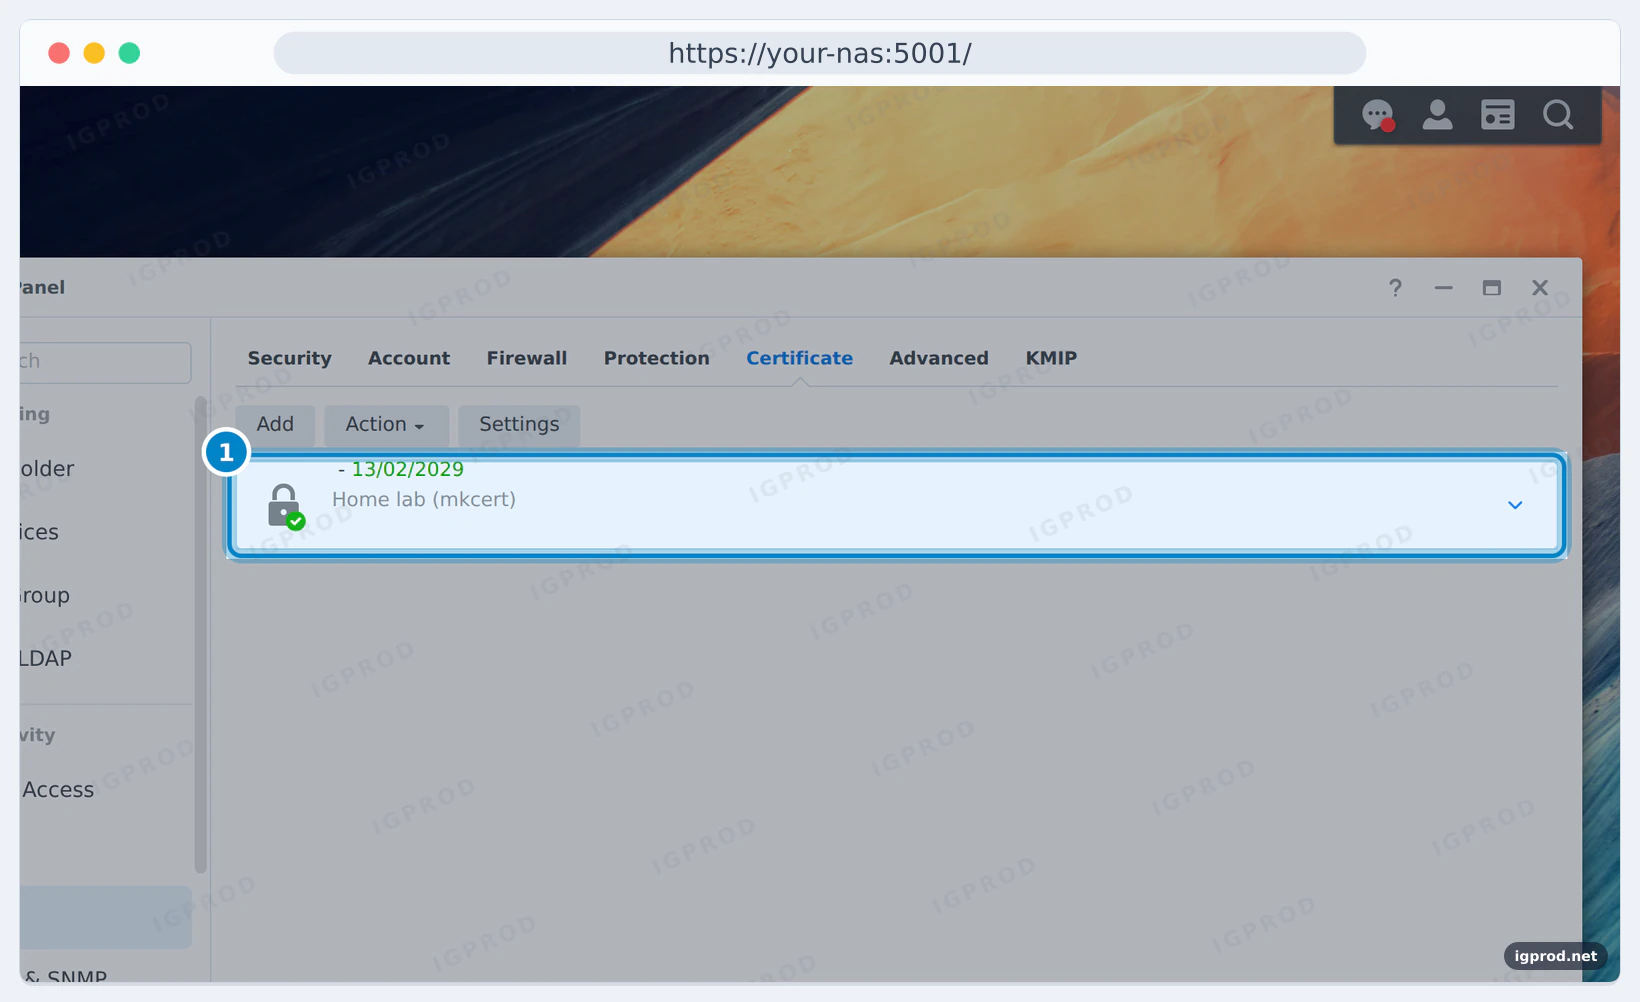
Next, the Settings button lets you choose which services use which certificate, such as the DSM desktop. We stopped after the import and deleted the test certificate: our test NAS keeps its own certificates.
When DSM uses the certificate, open it with one of its names, for example https://nas.home.arpa:5001. With an address that is not in the certificate, the browser warns again (see Troubleshooting).
The self-signed alternative: one certificate with OpenSSL
If you need one certificate and no CA, OpenSSL makes a self-signed certificate. We tested this command with OpenSSL 3.0.13:
openssl req -x509 -newkey rsa:2048 -nodes -keyout nas-selfsigned.key -out nas-selfsigned.crt -days 365 -subj "/CN=nas.home.arpa" -addext "subjectAltName=DNS:nas.home.arpa,IP:192.168.1.50"openssl x509 -in nas-selfsigned.crt -noout -subject -issuer -enddate -ext subjectAltNamesubject=CN = nas.home.arpa
issuer=CN = nas.home.arpa
notAfter=Nov 13 21:29:01 2027 GMT
X509v3 Subject Alternative Name:
DNS:nas.home.arpa, IP Address:192.168.1.50Subject and issuer are the same: the certificate signs itself. Browsers show NET::ERR_CERT_AUTHORITY_INVALID until you trust this exact certificate on each device, and again after each renewal. -addext needs OpenSSL 1.1.1 or later. -nodes leaves the key without a passphrase, which DSM requires.
Troubleshooting
NET::ERR_CERT_COMMON_NAME_INVALID
The CA is trusted, but the name that you typed is not in the certificate. We opened our proxy as files.home.arpa, a name that the certificate does not have:
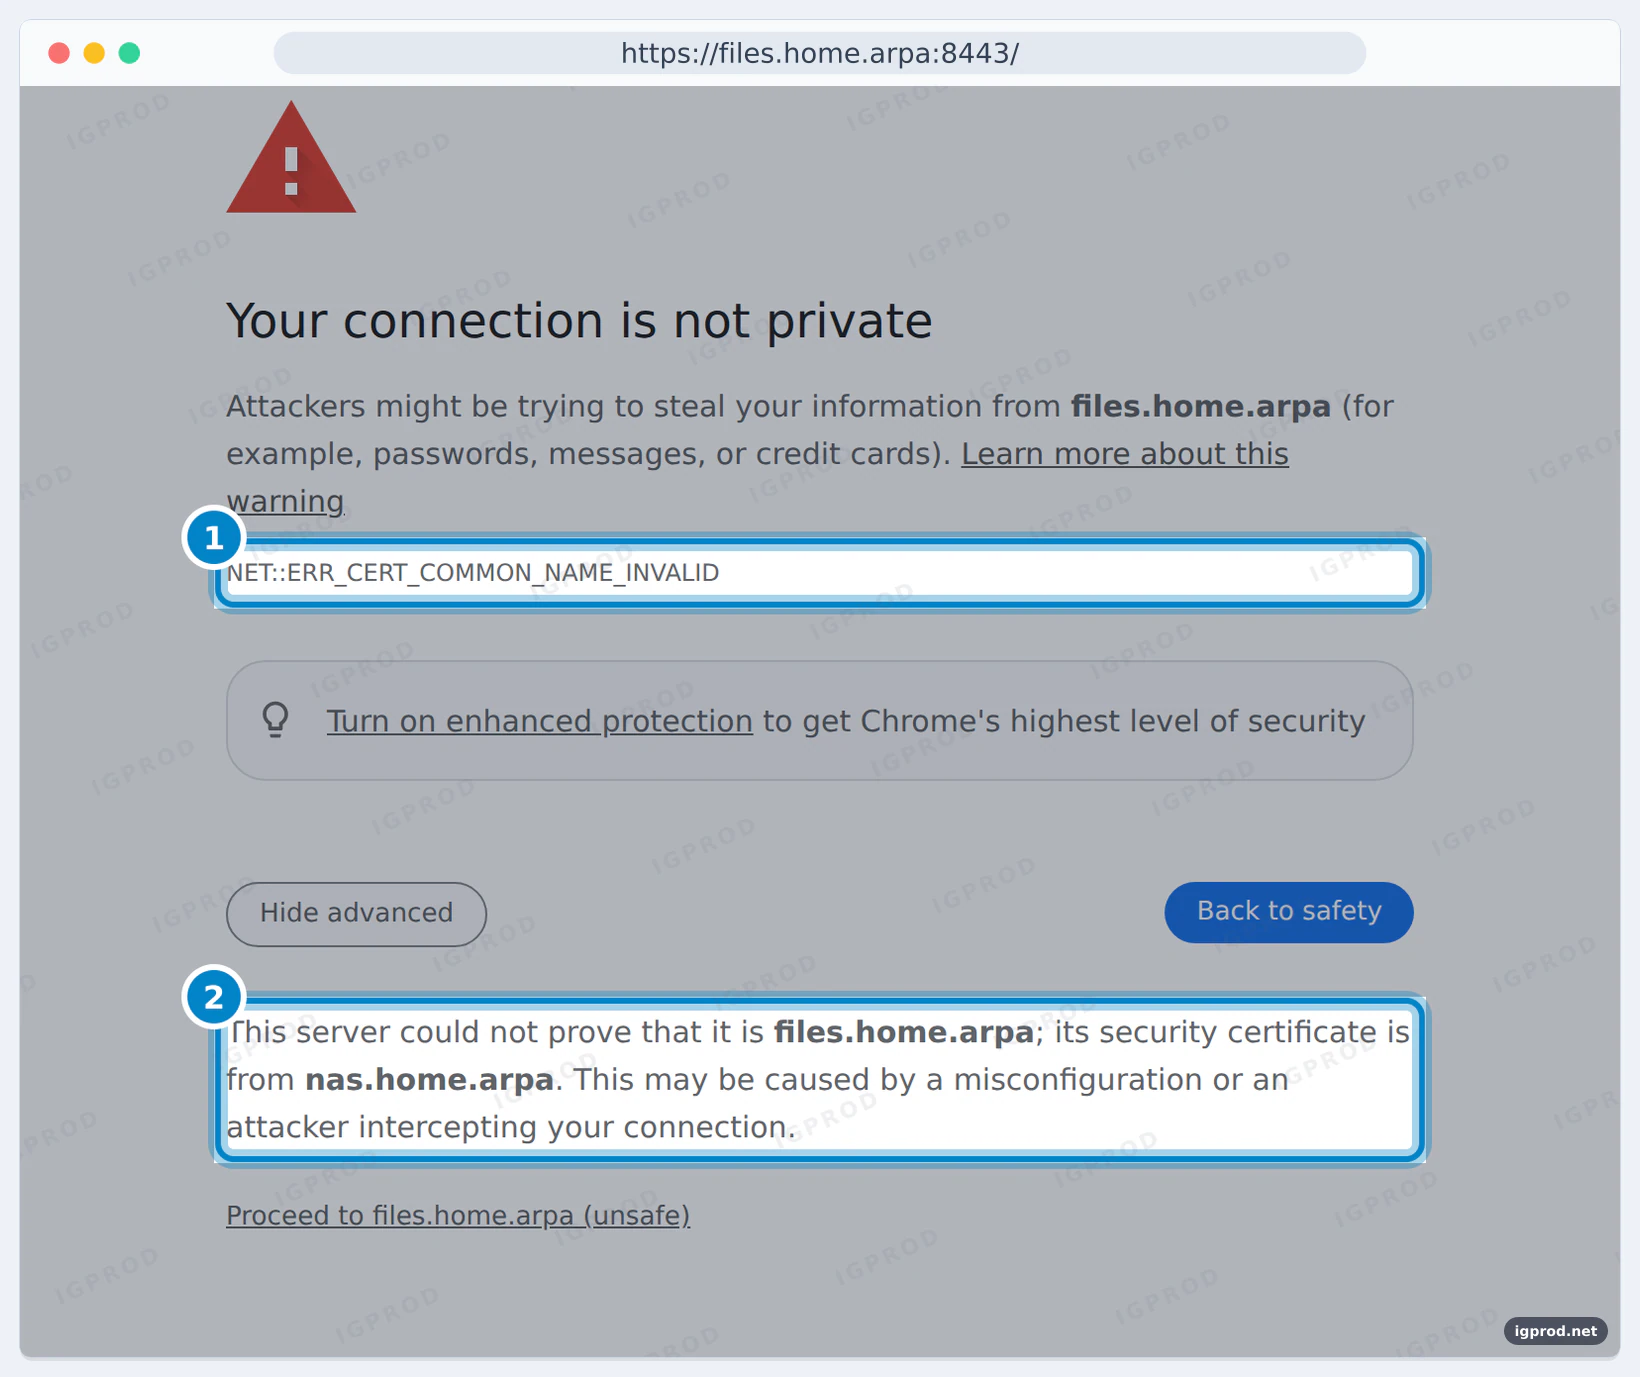
Make a new certificate with every name (step 3), put it in place of the old one, and reload the proxy.
Still NET::ERR_CERT_AUTHORITY_INVALID after mkcert -install
- Restart the browser: it reads its trust store when it starts.
- On Linux, install
libnss3-toolsbeforemkcert -install, then run it again. Withoutcertutil, mkcert cannot add the CA to Chrome and Firefox. - Check that the server sends the mkcert certificate. Here, the proxy sends ours (in our lab, the name points to 127.0.0.1):
openssl s_client -connect 127.0.0.1:8443 -servername paperless.home.arpa </dev/null 2>/dev/null | openssl x509 -noout -issuer -ext subjectAltNameissuer=O = mkcert development CA, OU = root@e6a6e9747436, CN = mkcert root@e6a6e9747436
X509v3 Subject Alternative Name:
DNS:nas.home.arpa, DNS:paperless.home.arpa, DNS:nas.local, IP Address:192.168.1.50"unable to get local issuer certificate" in curl or scripts
The tool does not use the store where mkcert put the CA. Give it the CA, as with curl --cacert rootCA.pem in step 4. For Node.js, the mkcert documentation uses the NODE_EXTRA_CA_CERTS variable.
Frequently asked questions
What does NET::ERR_CERT_AUTHORITY_INVALID mean?
Chrome does not trust the authority that signed the certificate of the site. On your own network, it usually means a self-signed certificate, or a certificate from a CA that this device does not know yet.
Is it safe to click "Proceed (unsafe)"?
On your own server, at home, it opens the page, but it turns off the check that protects you from a fake server. Trust your CA instead: then a real warning means a real problem.
How long are mkcert certificates valid?
Our certificate of 13 November 2026 is valid until 13 February 2029, two years and three months. The CA is valid for ten years. To renew a certificate, run the same mkcert command again and replace the files.
Can I use mkcert for a public website?
No. Your visitors do not trust your CA. For a public domain, use Let's Encrypt, as in our guide to create Let's Encrypt SSL certificates on Linux.
Can Synology DSM make a self-signed certificate?
The Add wizard of DSM 7.4.1 had no option for it in our test: it imports a certificate, or gets one from Let's Encrypt. Make the certificate with mkcert or OpenSSL and import it.
What is the difference between a self-signed certificate and mkcert?
A self-signed certificate signs itself, so each device must trust each certificate. mkcert makes a CA: each device trusts the CA once, and then every certificate that it signs.
Related guides
- How to create Let's Encrypt SSL certificates on Linux
- Fix Nginx Proxy Manager real IP behind Docker and Cloudflare
- How to SSH into a Synology NAS: enable SSH, root and SSH keys
- Create a Cloudflare Tunnel and expose your services with Synology
- Self-hosting for beginners: plan your first service
Sources

Leave a comment
Your email address will not be published. Required fields are marked *