
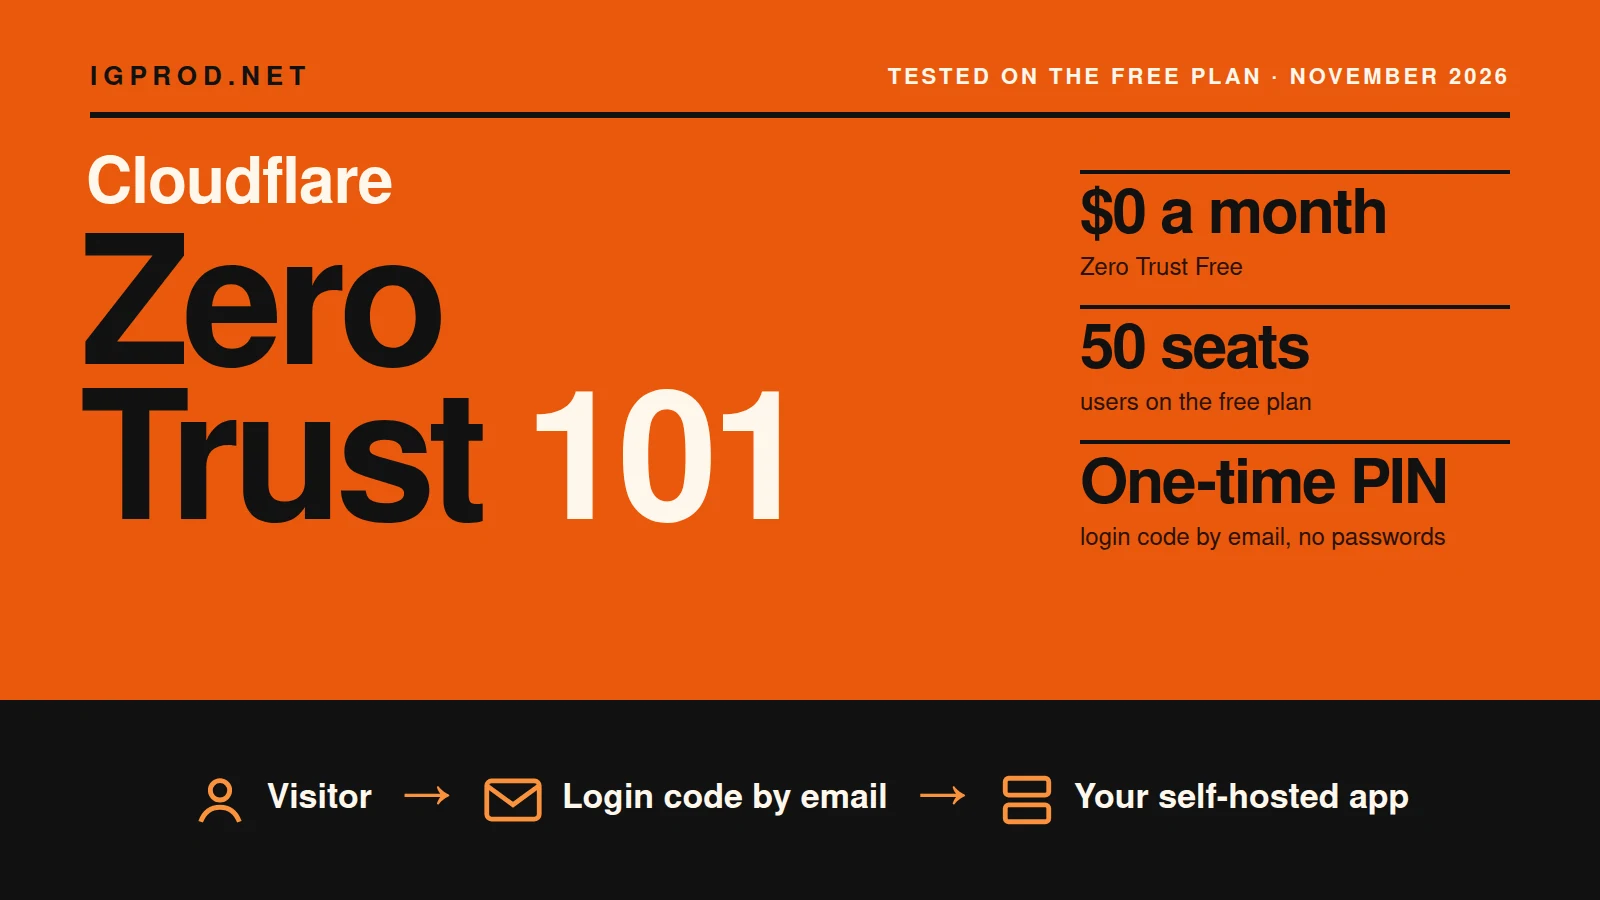
Cloudflare Zero Trust puts a login page in front of a web app. Visitors reach the app through Cloudflare, and Cloudflare Access lets in only the people your policy allows. You do not open a port, run a VPN or add a login to the app itself.
This guide sets it up from zero on the free plan, as a home lab or a small team would: turn on Zero Trust, pick a team name, add the one-time PIN login (a code sent by email), write an Allow policy and protect one self-hosted app. Then we test it as an allowed visitor and as a stranger, and we read the logs.
We did every step on 14 November 2026 in the current Cloudflare dashboard, with a test account and the test host test.nexaforge.si. The screenshots come from that test.
What you need
- A domain on Cloudflare. The app's hostname must go through Cloudflare: a proxied DNS record (orange cloud) or a Cloudflare Tunnel route. Our test host is a proxied record.
- A payment card on the Cloudflare account. The free plan costs $0, but its checkout asks for a payment method.
- An email inbox for each person who will sign in.
Cloudflare Zero Trust free plan: what you get in 2026
The plan page we saw on 14 November 2026 lists three plans. A seat is one person who signs in.
| Plan | Price | Main limits and extras |
|---|---|---|
| Zero Trust Free | $0 per seat per month | "Best for home labs and proofs of concept for businesses." 50 seats, 24-hour log retention, 5 Digital Experience Monitoring tests, 2 API CASB and SSPM integrations, community support. |
| Zero Trust Standard | $7 per seat per month | No seat limit, 30 days of logs, 30 monitoring tests, notifications and alerting, 25 DNS filtering locations, ticket support. |
| Zero Trust Enterprise | Custom | 90-day logs and Logpush, all CASB integrations, custom egress IPs, custom DLP profiles, enterprise support. |
All plans include Access for web apps, device traffic filtering (DNS, network and HTTP), identity provider integrations, and API and Terraform access. For one admin and a few family members or colleagues, Free is enough.
Step 1: Turn on Zero Trust and choose the free plan
- In the Cloudflare dashboard, open Zero Trust in the sidebar. The old address one.dash.cloudflare.com now opens the same pages inside the main dashboard.
- On Welcome to Cloudflare Zero Trust, select Get started.
- On Choose a plan, select Select plan under Zero Trust Free.
- The checkout shows Activate Zero Trust Free, "Protect up to 50 users at no cost" and Due today $0/month. It uses the card on the account, or asks for one. Tick the two boxes (the terms, and the permission to charge usage above the free limits), then select Activate Zero Trust Free.
- On Purchase complete, select Continue to Zero Trust.
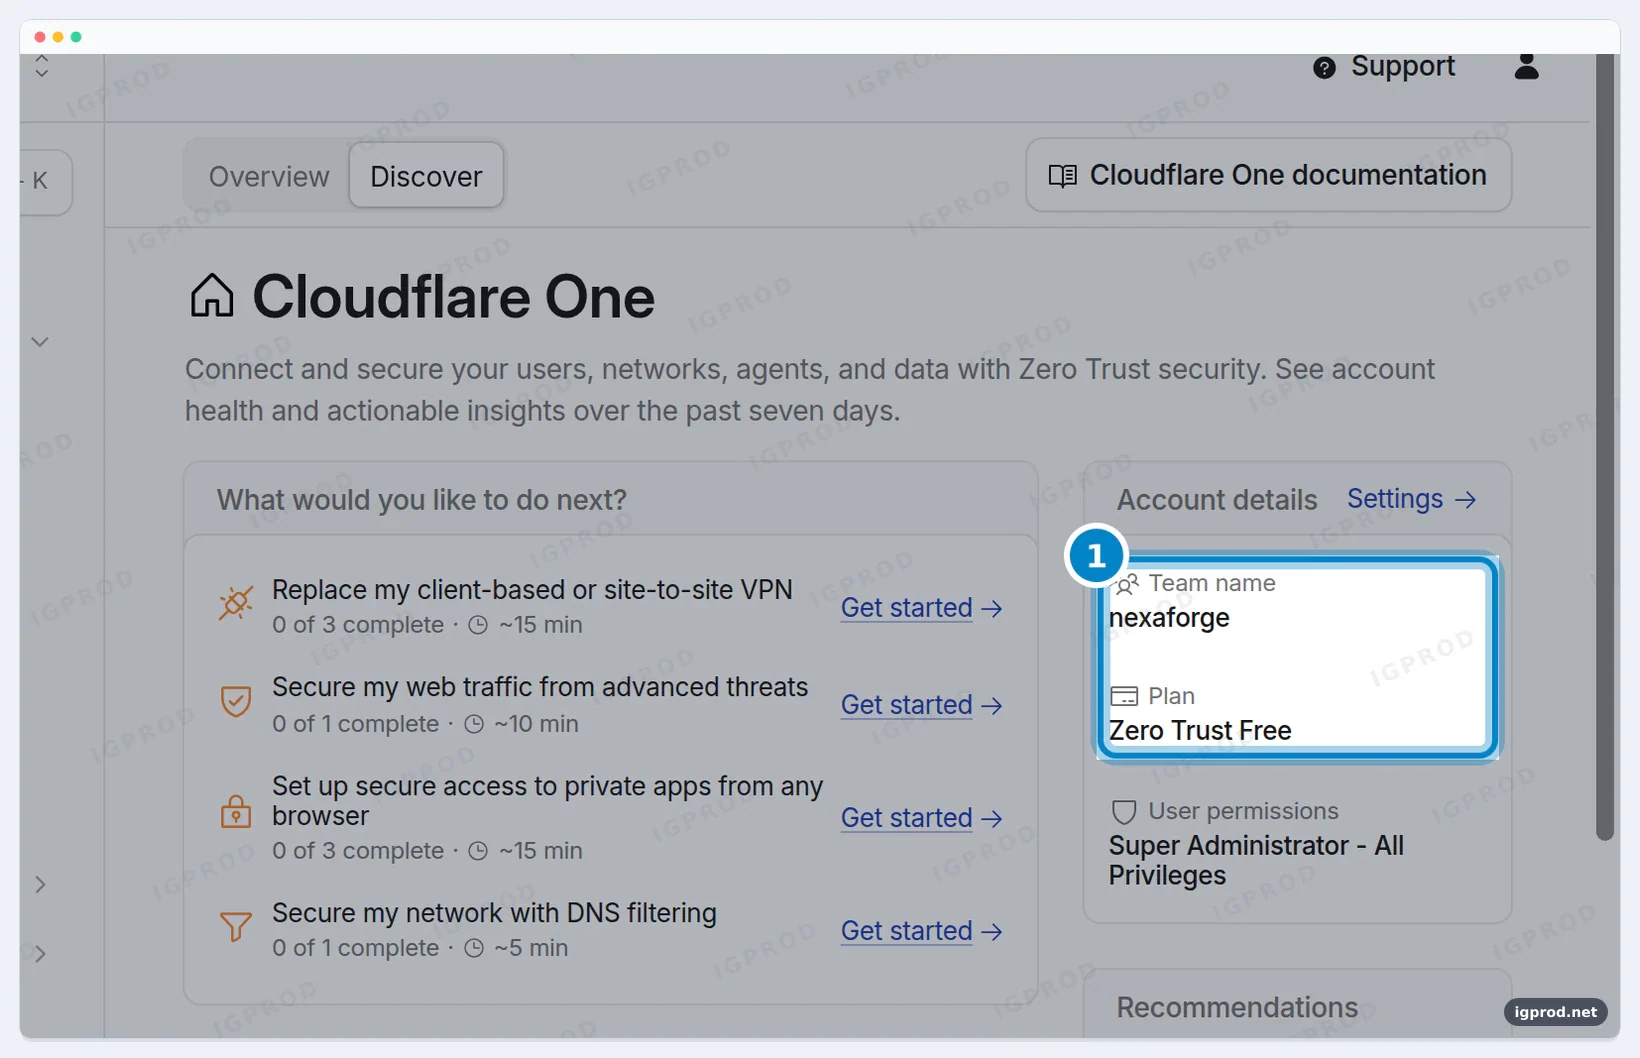
The home page is now called Cloudflare One. Under Account details it shows the team name and the plan.
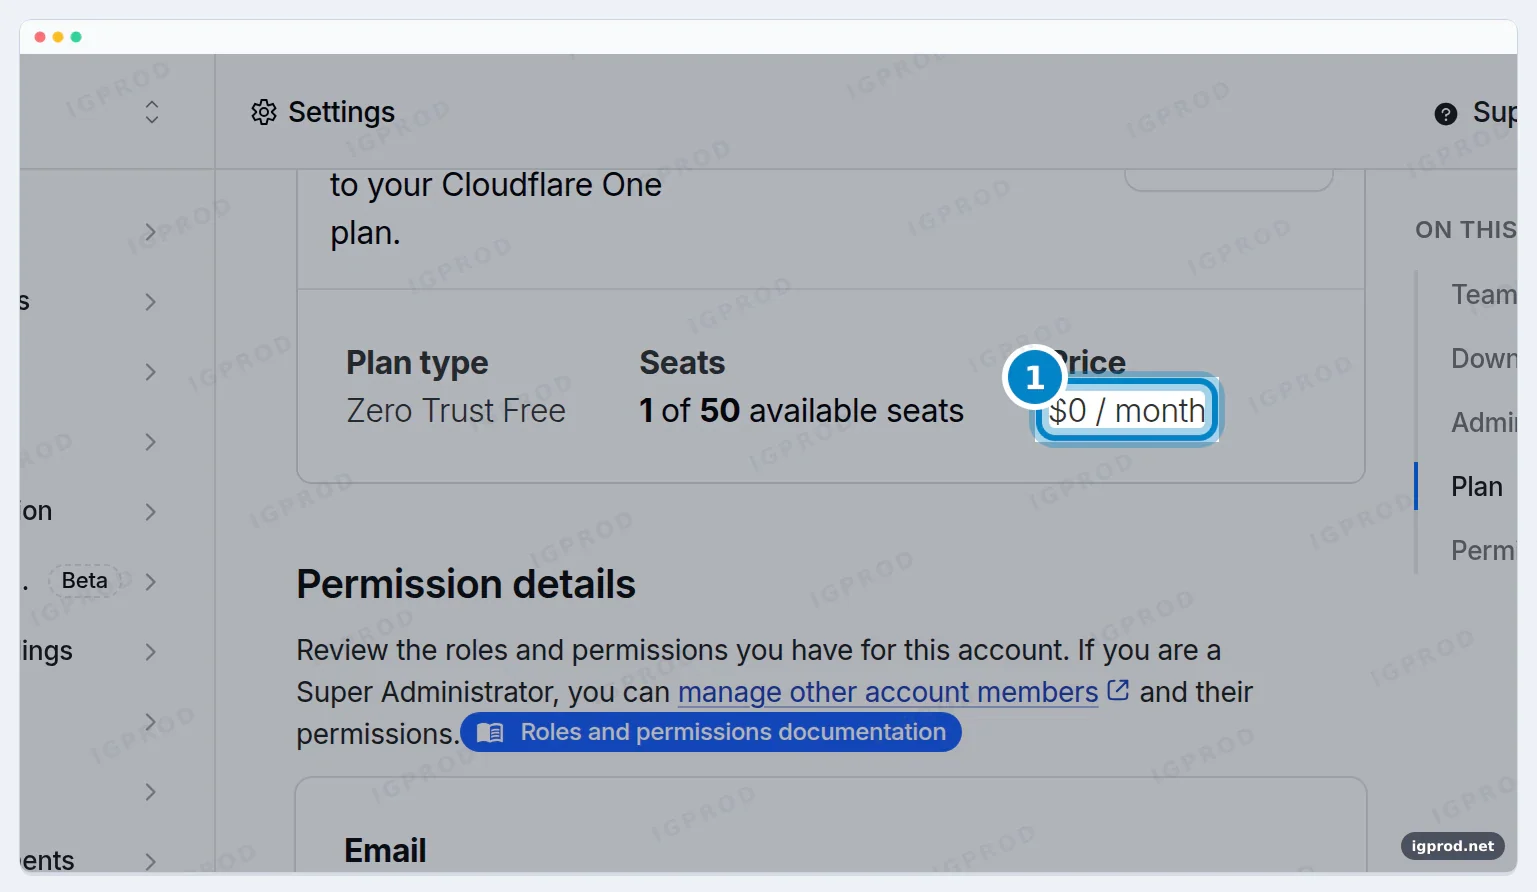
Settings shows the same plan with the seats. Ours read 0 of 50 before the first login and 1 of 50 after it.
Step 2: Give your team a real name
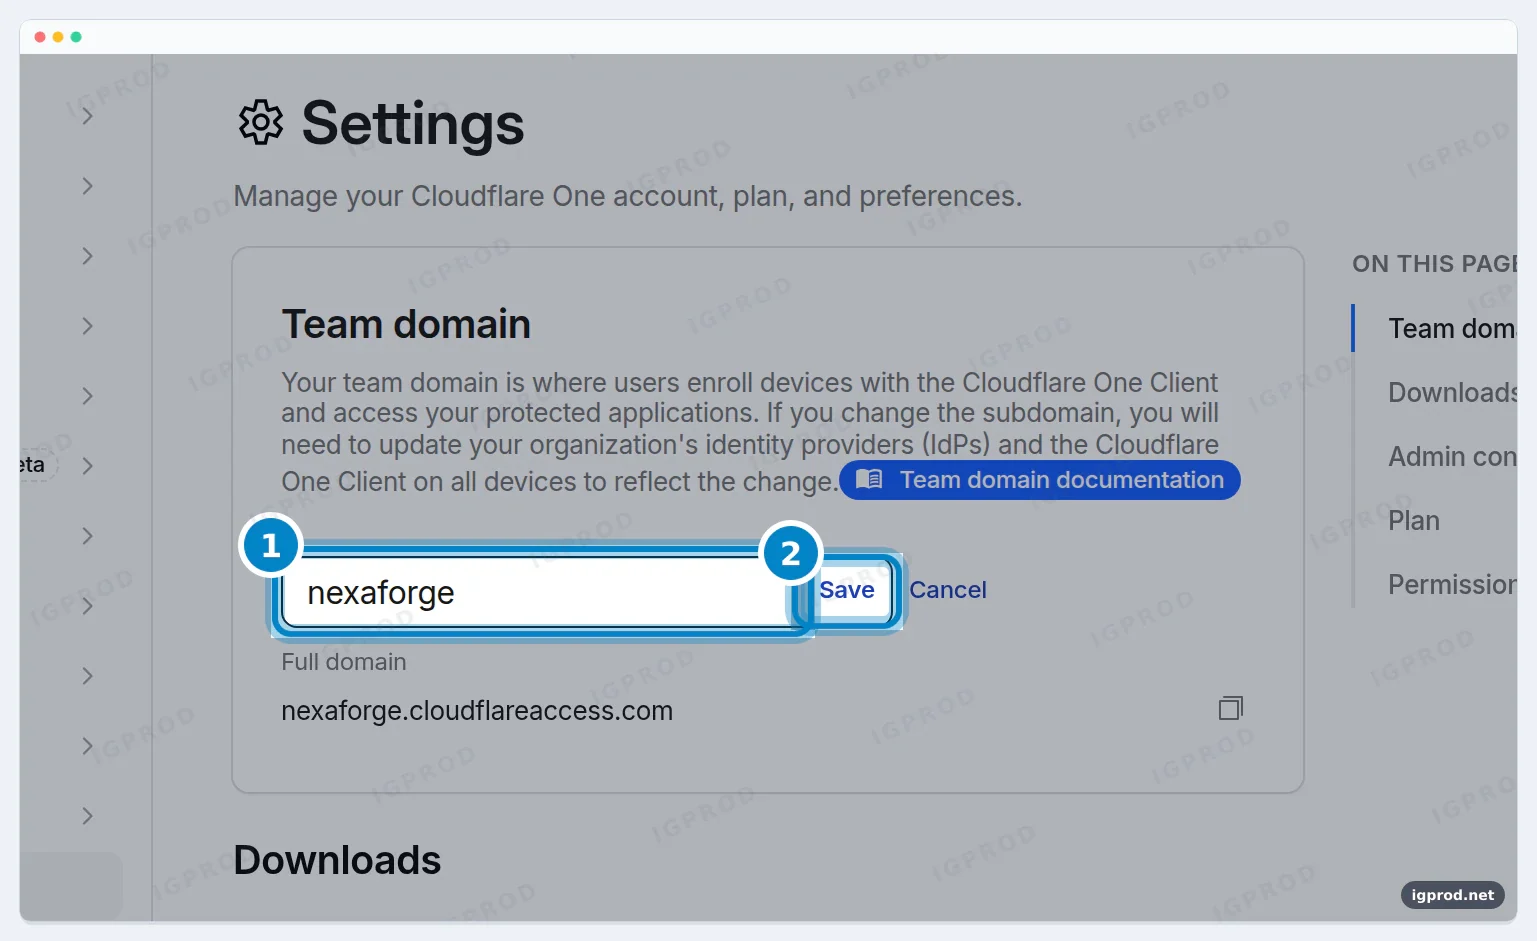
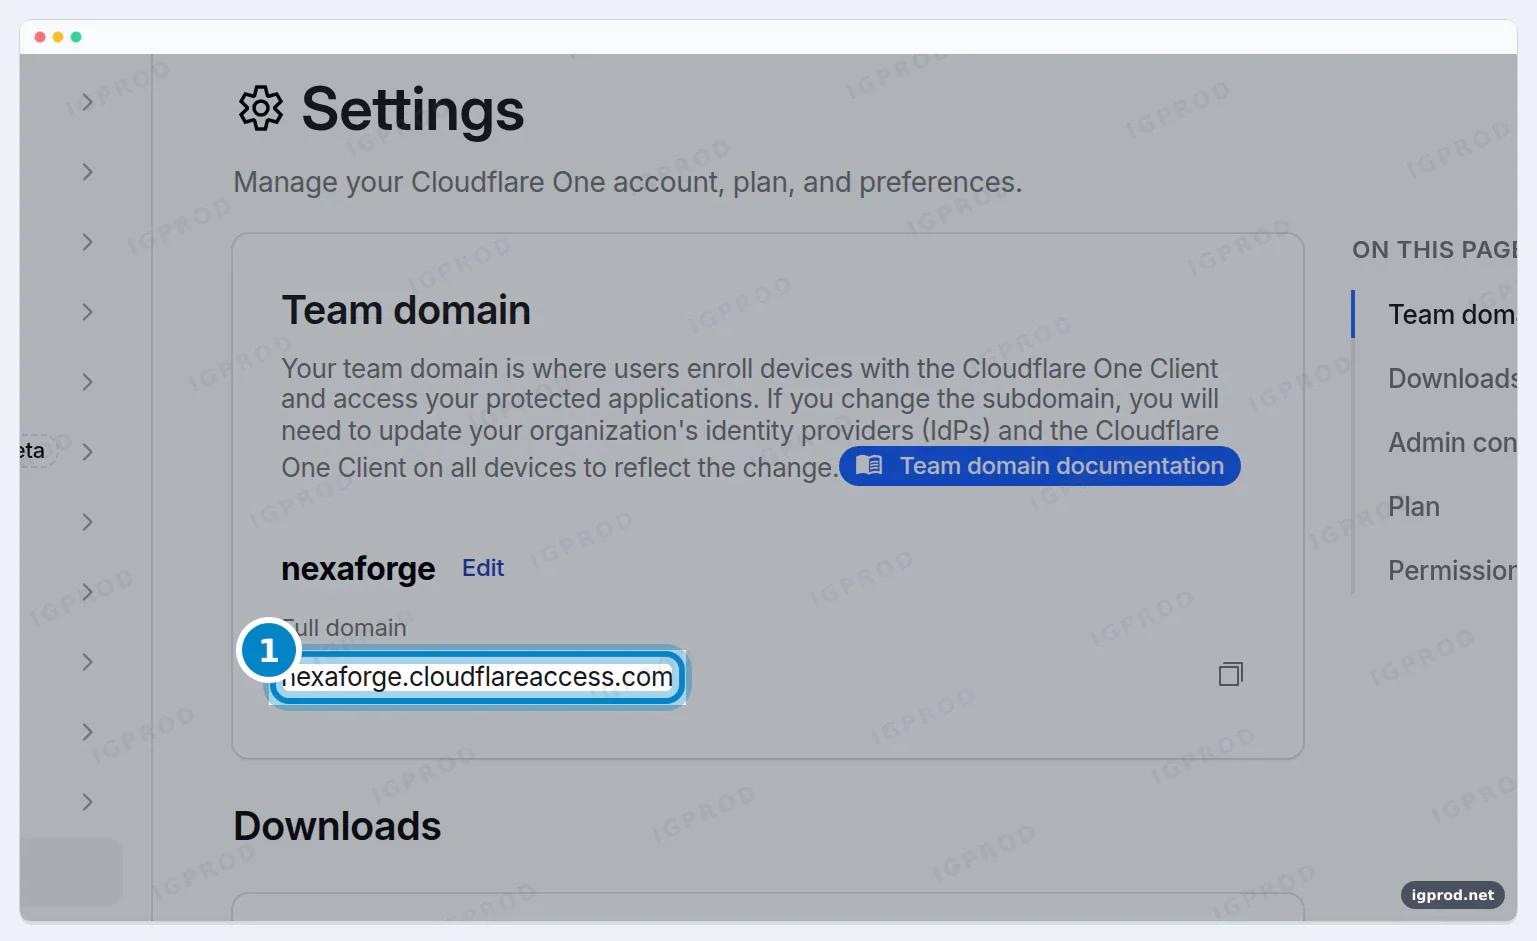
Cloudflare gives a new organization a random team name. Ours was soft-flower-8ca0. The team name is the first part of the team domain, <team>.cloudflareaccess.com, and your visitors see that address on the login page.
- Go to Zero Trust > Settings.
- Under Team domain, select Edit, type the new name and select Save.
- A dialog shows the new domain and a warning: devices with the Cloudflare One Client and connected identity providers must use the new domain, and the Access login page may need an update. Select Confirm team domain change.
Change the name on the login page too
After the change, our login page still showed the old random domain at the top. The login page has its own organization name, and it kept the first one. To fix it:
- Go to Reusable components > Custom pages.
- Under Access login page, select Manage.
- In Your organization's name, type the name your visitors should see, then select Save.
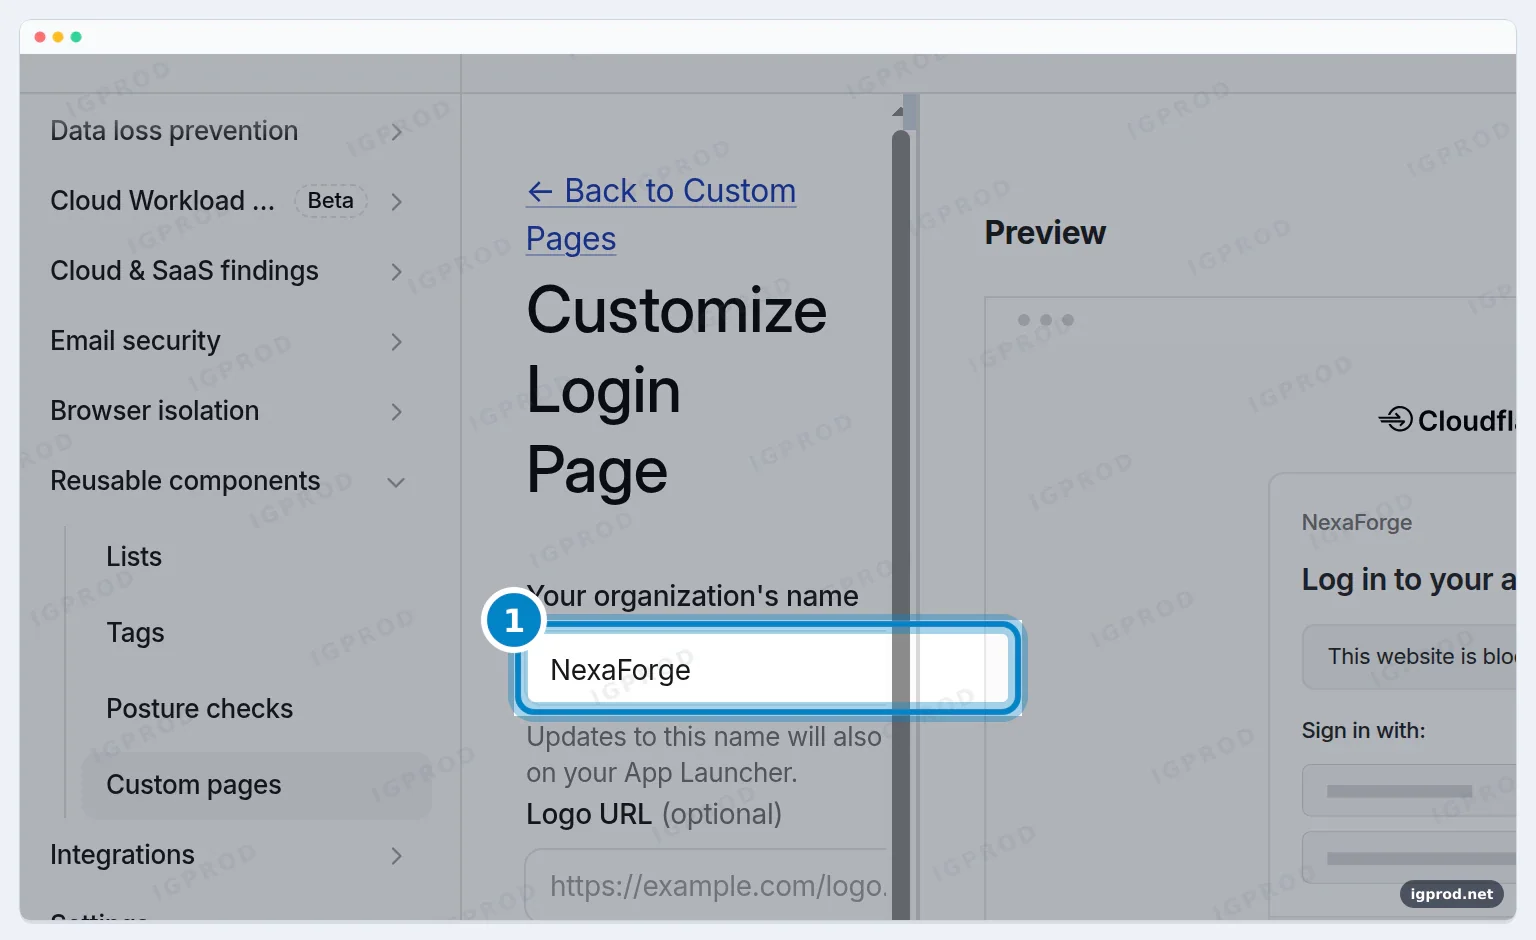
The same page also takes a logo URL, a header text and a message under the login form.
Step 3: Add the one-time PIN login
One-time PIN is the simplest login. The visitor types an email address and gets a 6-digit code. Nobody needs a Google, GitHub or company account.
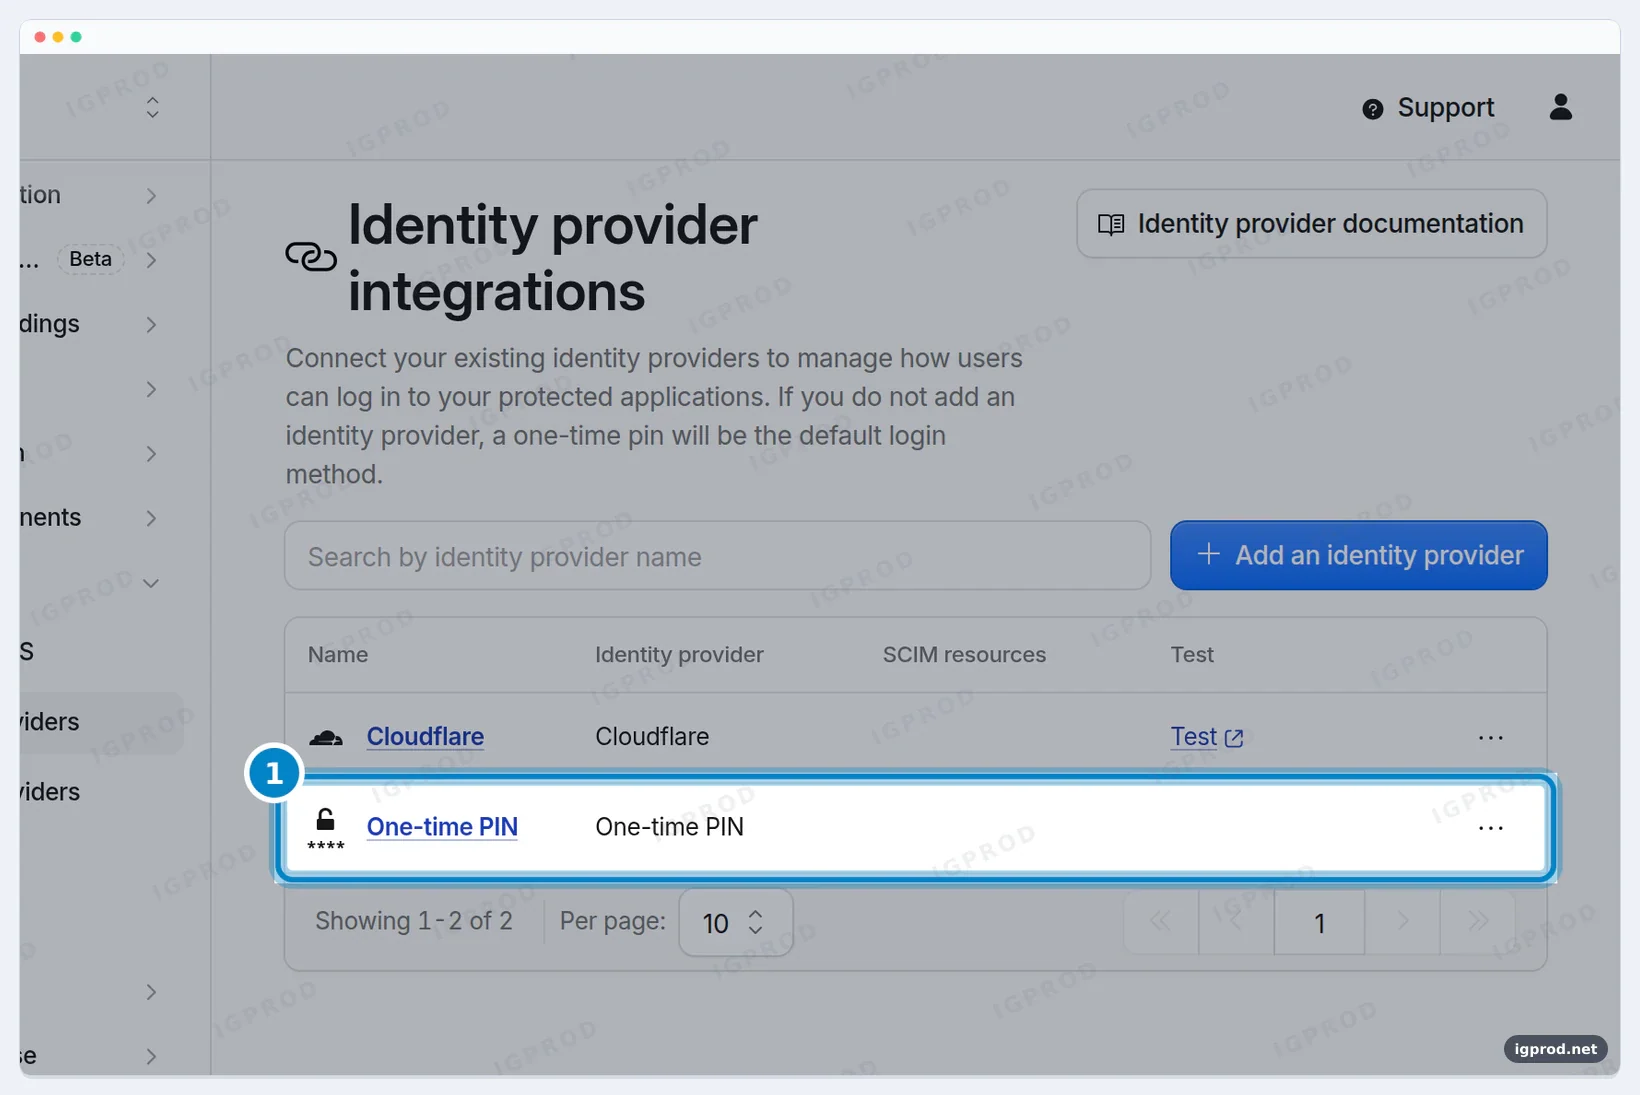
Our new account listed one identity provider, named Cloudflare, and the page says that a one-time PIN is the default when you add no provider. We added One-time PIN anyway, so that we can choose it as the only login method of the app in step 5.
- Go to Integrations > Identity providers.
- Select Add an identity provider.
- Select One-time PIN. There is no form: Cloudflare adds it at once.
The codes come from [email protected]. If a mail filter holds them, let the sender domain notify.cloudflare.com through, as Cloudflare's documentation says.
Step 4: Write an Allow policy
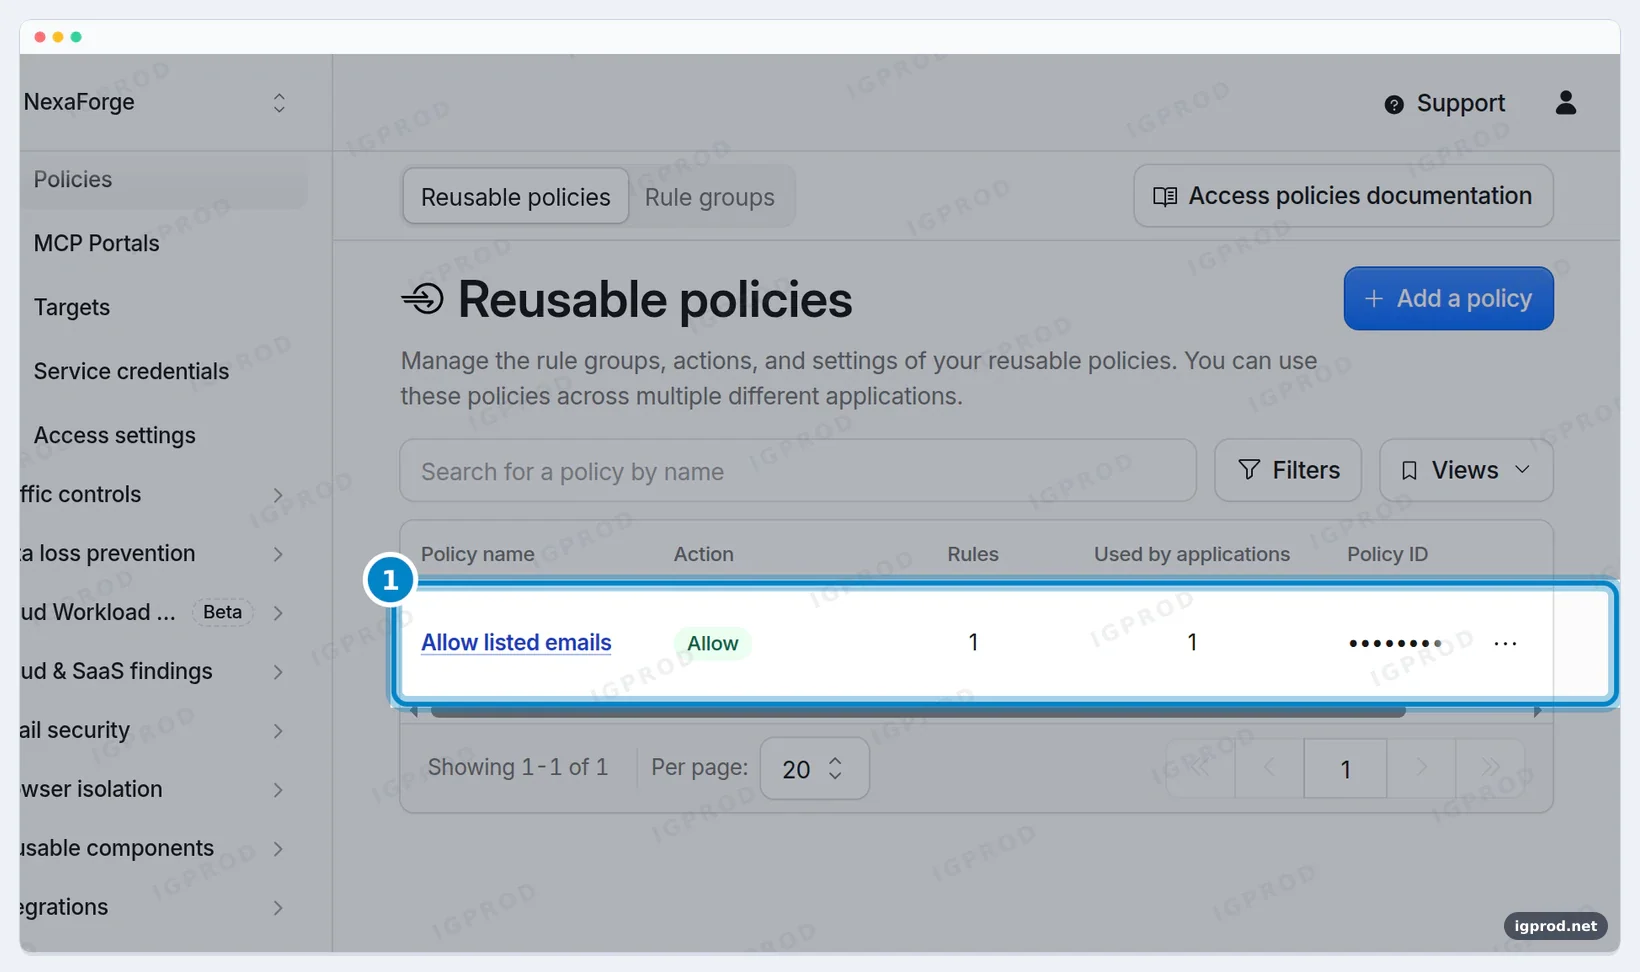
A policy says who gets in. Access policies are reusable: you write one, then add it to as many apps as you need. The page allows up to 50 policies.
- Go to Access controls > Policies and select Add a policy.
- Under Include, set Selector to Emails and type each allowed address. Press Enter after each one.
- Under Policy details, give the policy a name (ours is
Allow listed emails) and keep Action on Allow. - Keep the policy session duration on Same as application session duration and select Save policy.
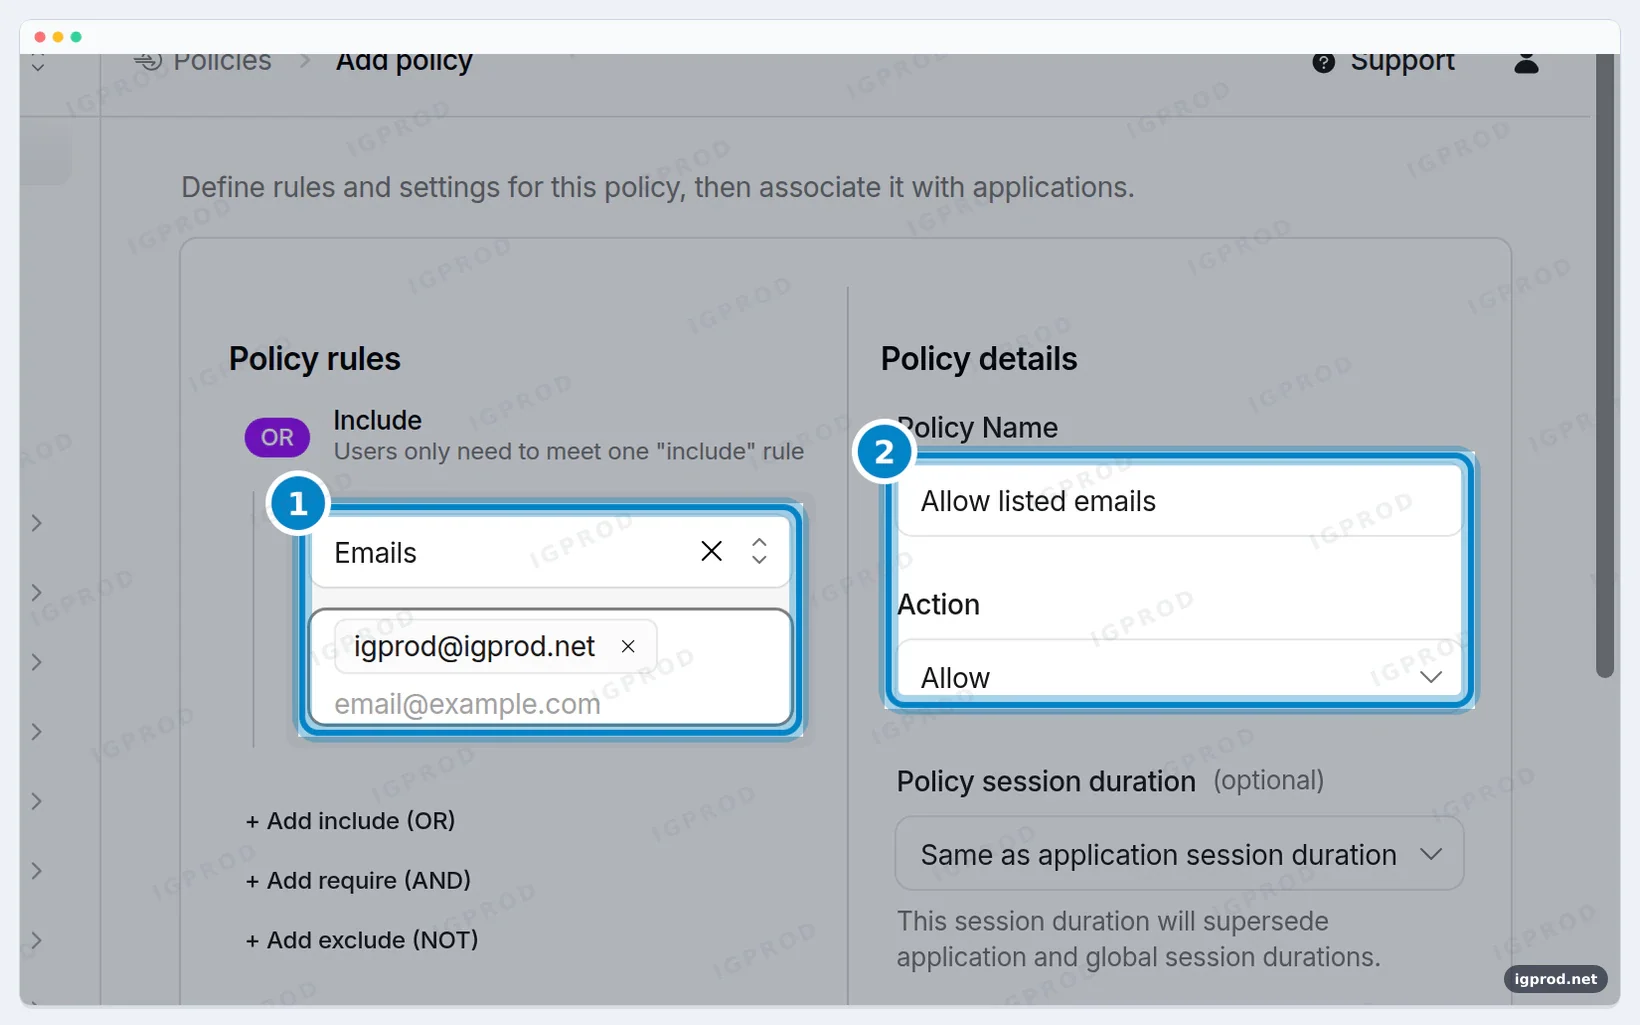
Include rules work as OR: a visitor must match one of them. Require rules work as AND, and Exclude rules as NOT. To let a whole company domain in, choose the selector for emails that end in a domain instead of single addresses.
Step 5: Protect the app with an Access application
- Go to Access controls > Applications and select Create new application.
- Keep Self-hosted and private and select Continue with Self-hosted and private.
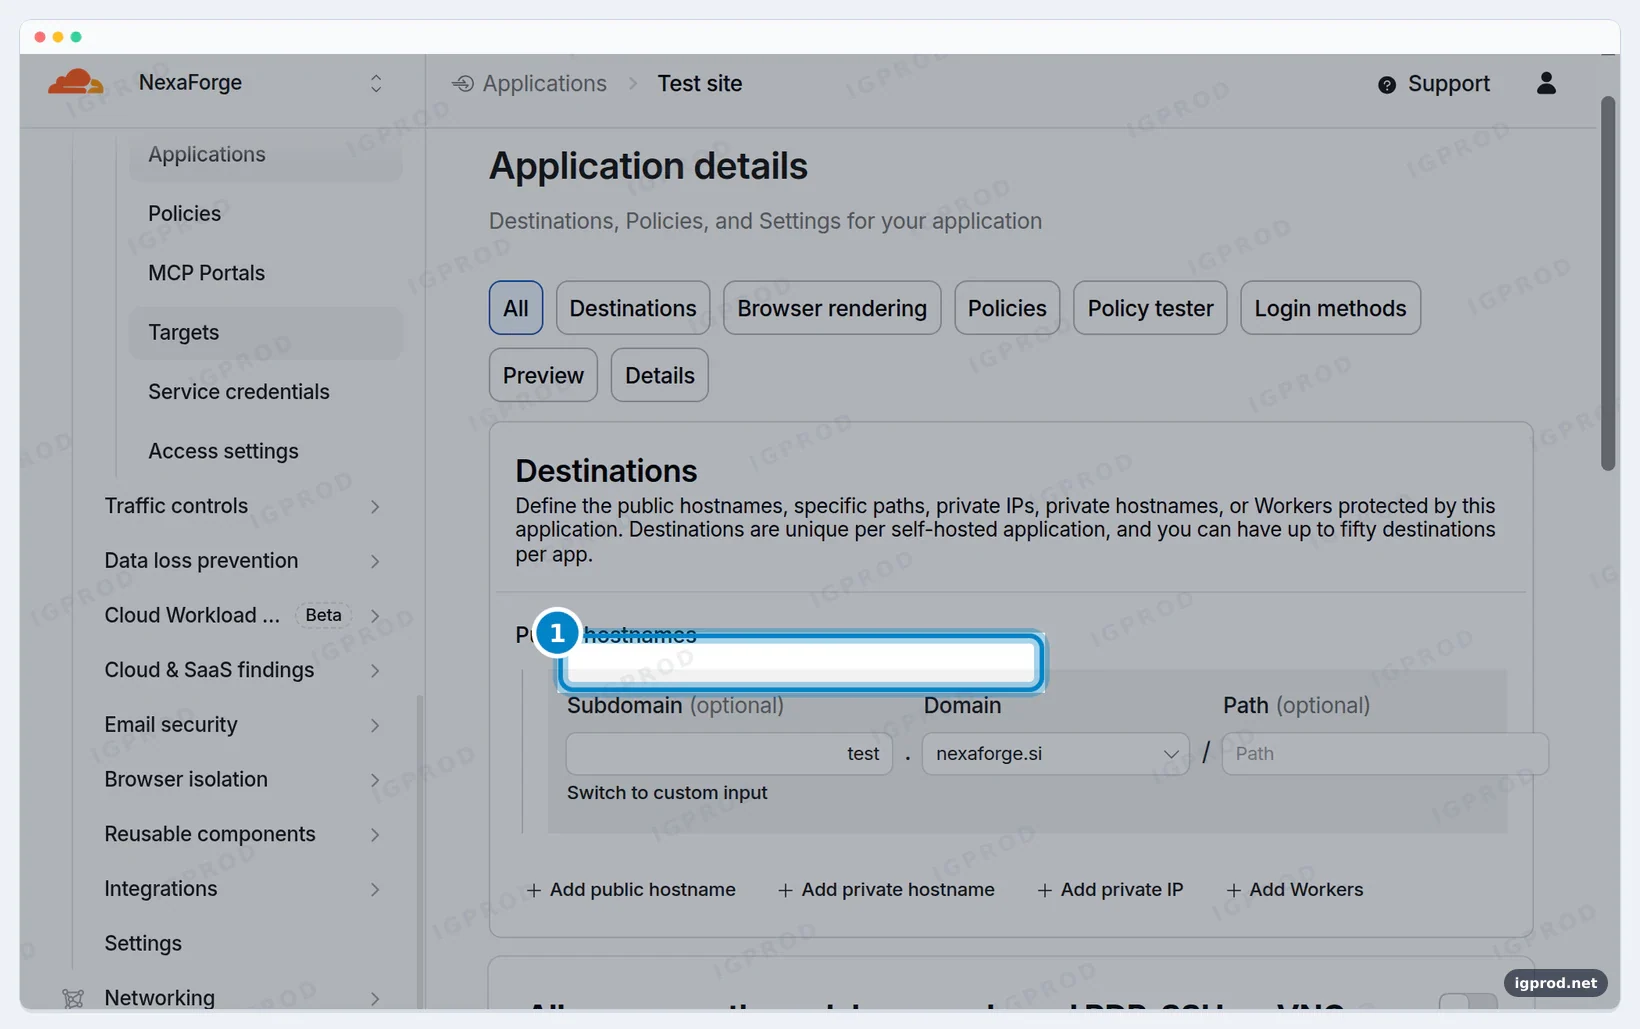
- Under Destinations, type the subdomain and choose the domain. We used
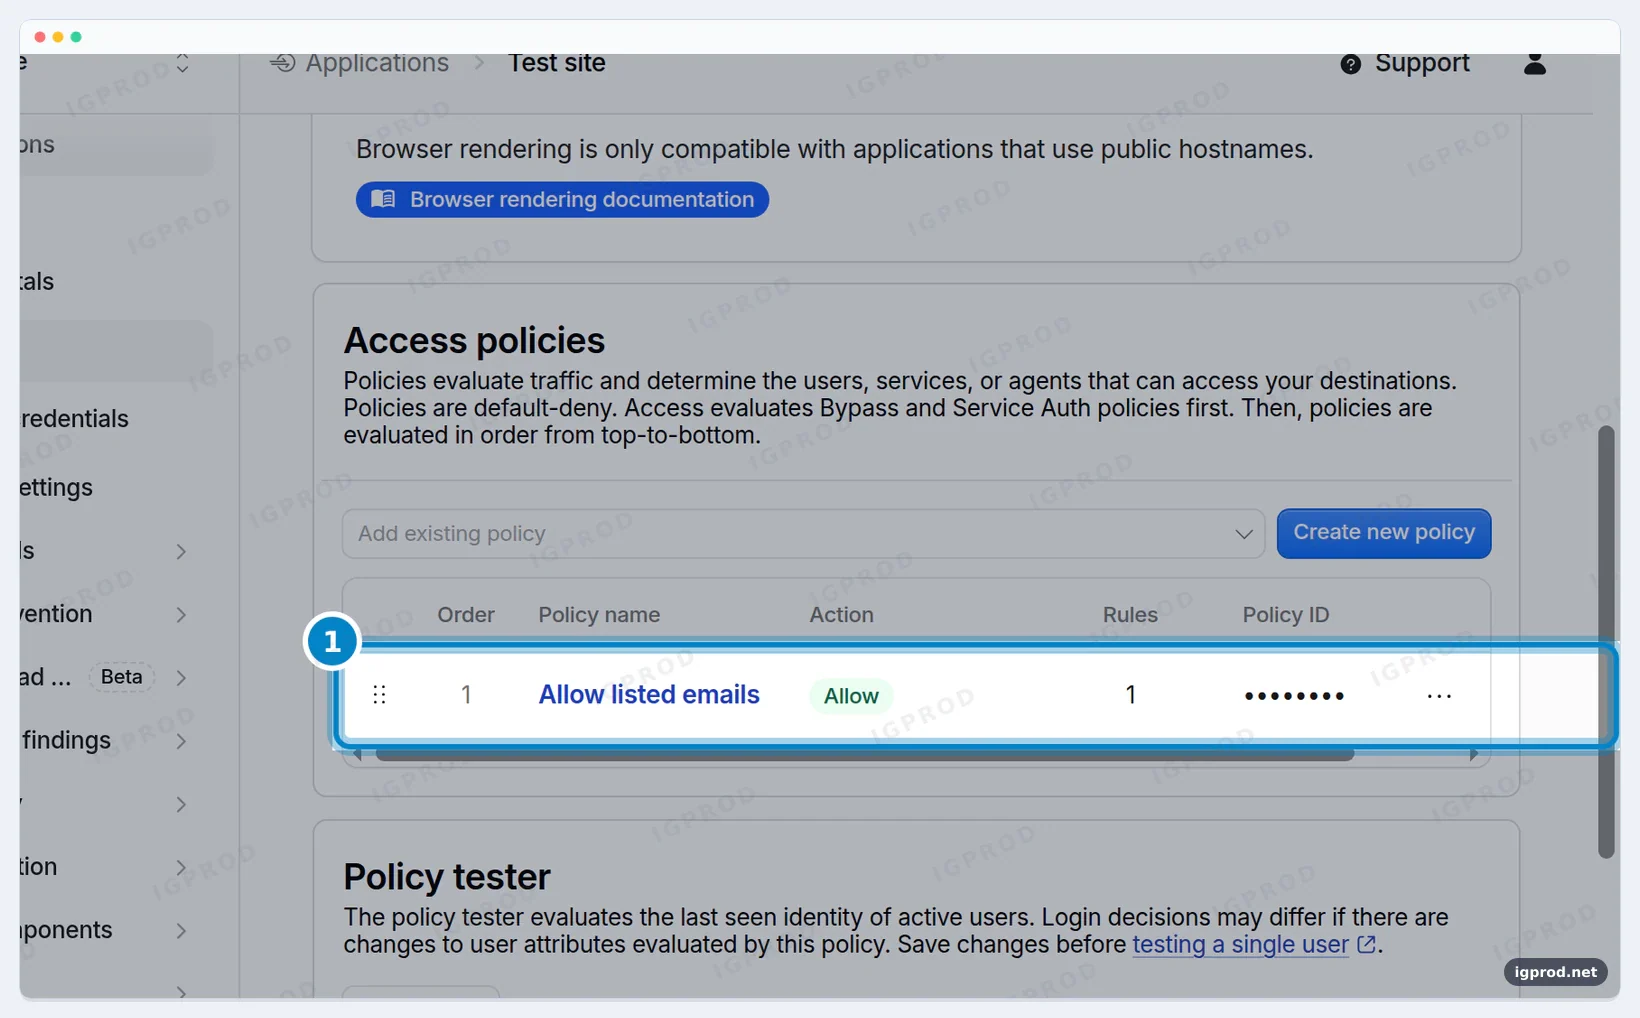
testandnexaforge.si. Leave Path empty to protect the whole hostname, or type a path such asadminto protect only that part. - Under Access policies, open Add existing policy and choose the policy of step 4.
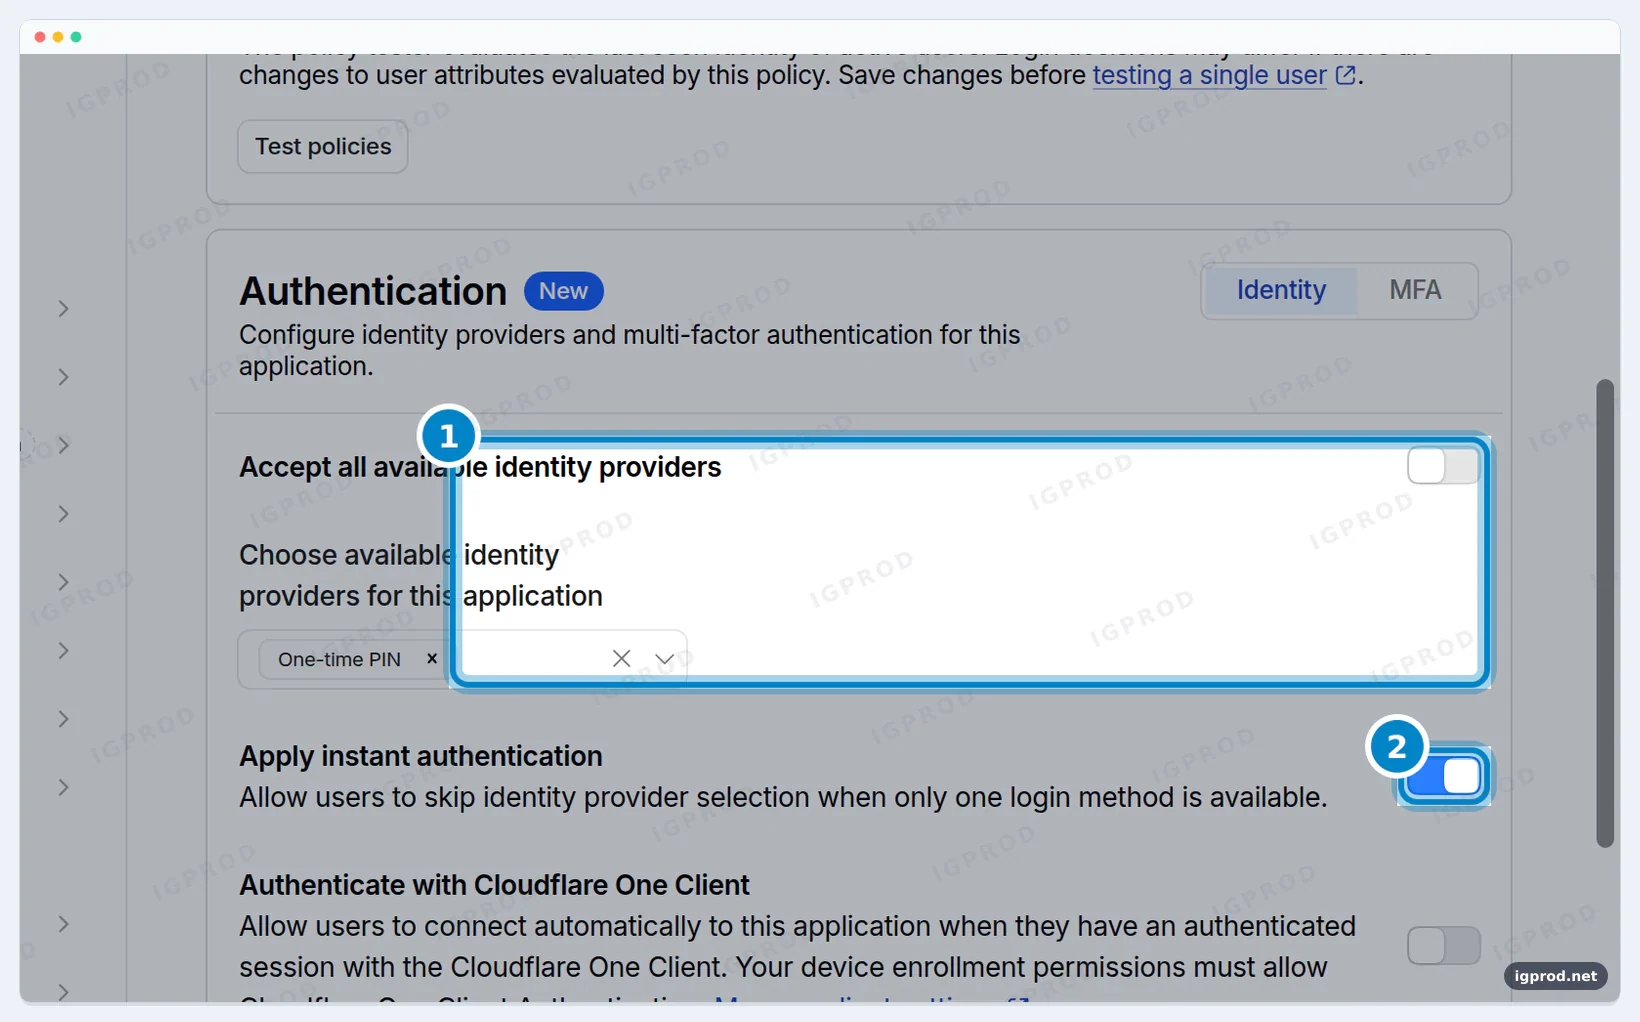
- Under Authentication, turn off Accept all available identity providers, choose One-time PIN, and turn on Apply instant authentication. Visitors then go straight to the email form.
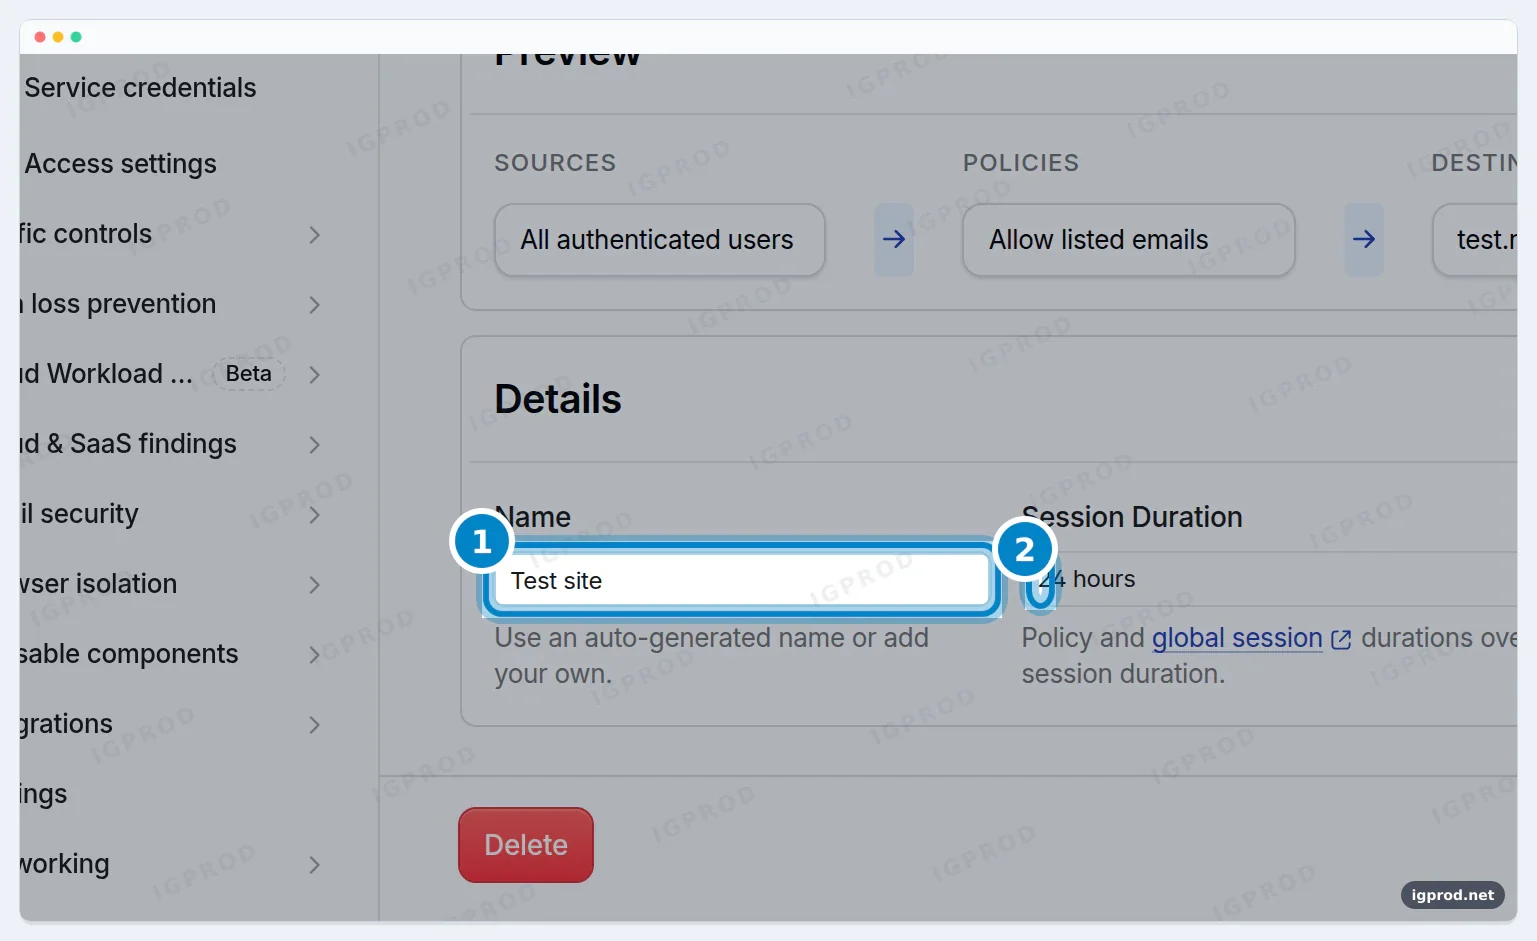
- Under Details, give the app a name. The session lasts 24 hours by default.
- Select Create.
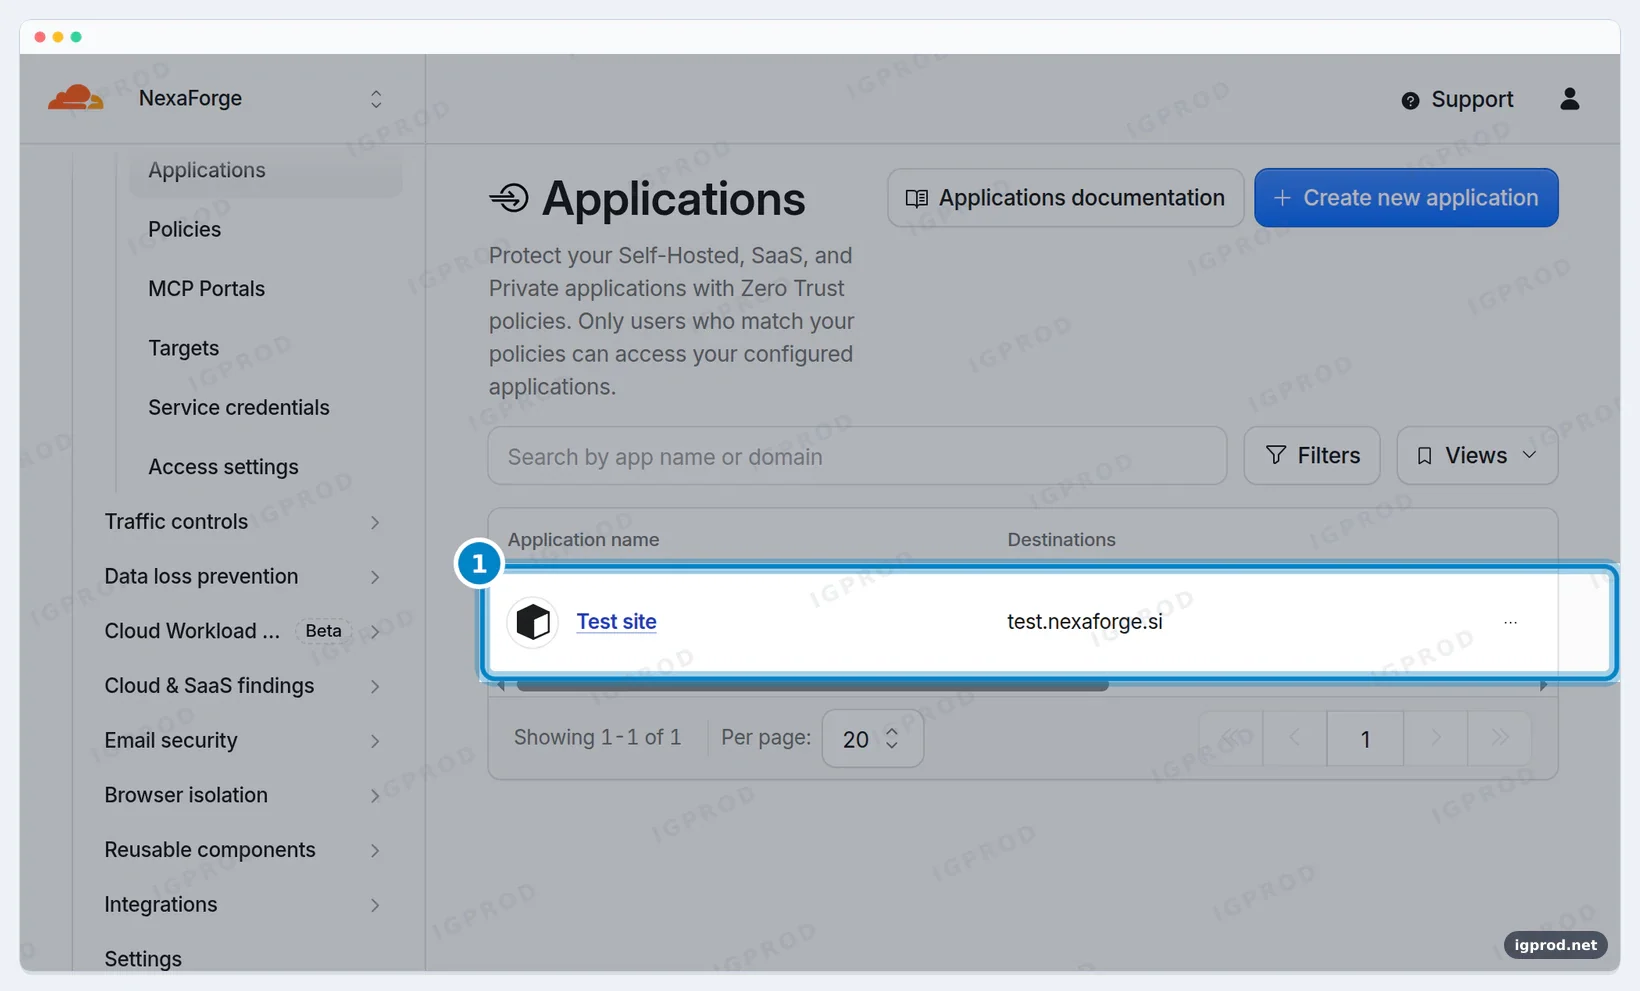
The screenshots below show the saved app.
Step 6: Test it as a visitor
Use a private window or another browser, so that no old cookie gets in the way. A quick check from a terminal already shows the change:
$ curl -sI https://test.nexaforge.si/
HTTP/2 302
date: Sat, 14 Nov 2026 17:37:25 GMT
location: https://nexaforge.cloudflareaccess.com/cdn-cgi/access/login/test.nexaforge.si?kid=…&meta=…&redirect_url=…
set-cookie: CF_AppSession=…; Expires=Sun, 15 Nov 2026 17:37:25 GMT; Path=/; Secure; HttpOnly
www-authenticate: Cloudflare-Access resource_metadata="https://test.nexaforge.si/.well-known/cloudflare-access-protected-resource/"
server: cloudflare
Cloudflare answers with a 302 redirect to the login page on the team domain. The request does not reach your server.
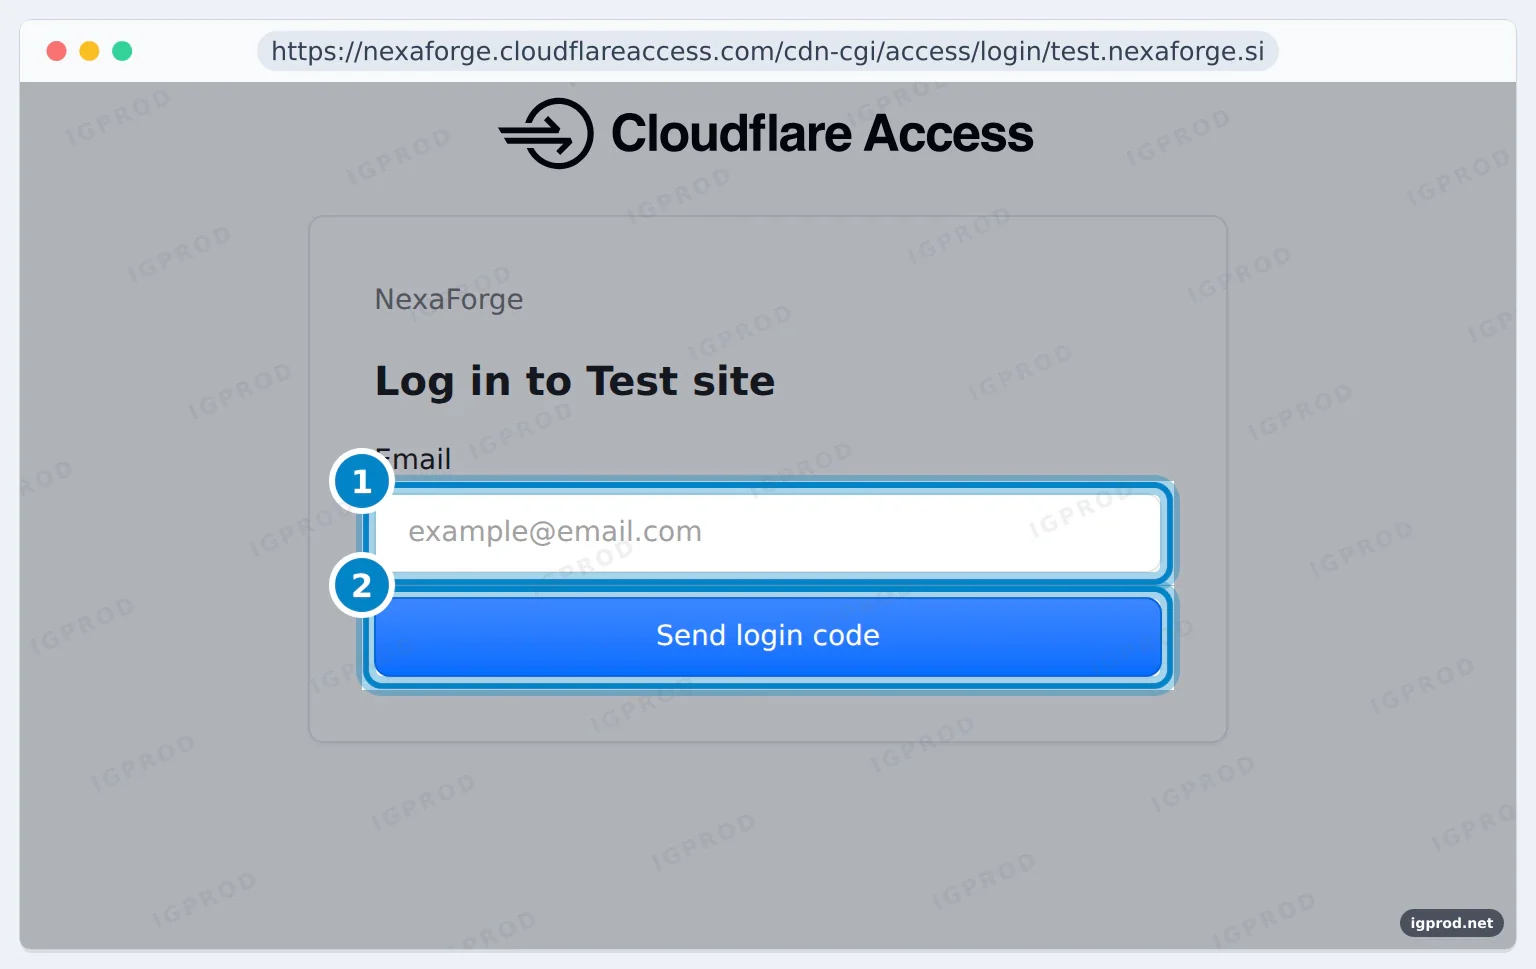
- Open the app's address. The login page shows the organization name and "Log in to" followed by the app name.
- Type an allowed email address and select Send login code.
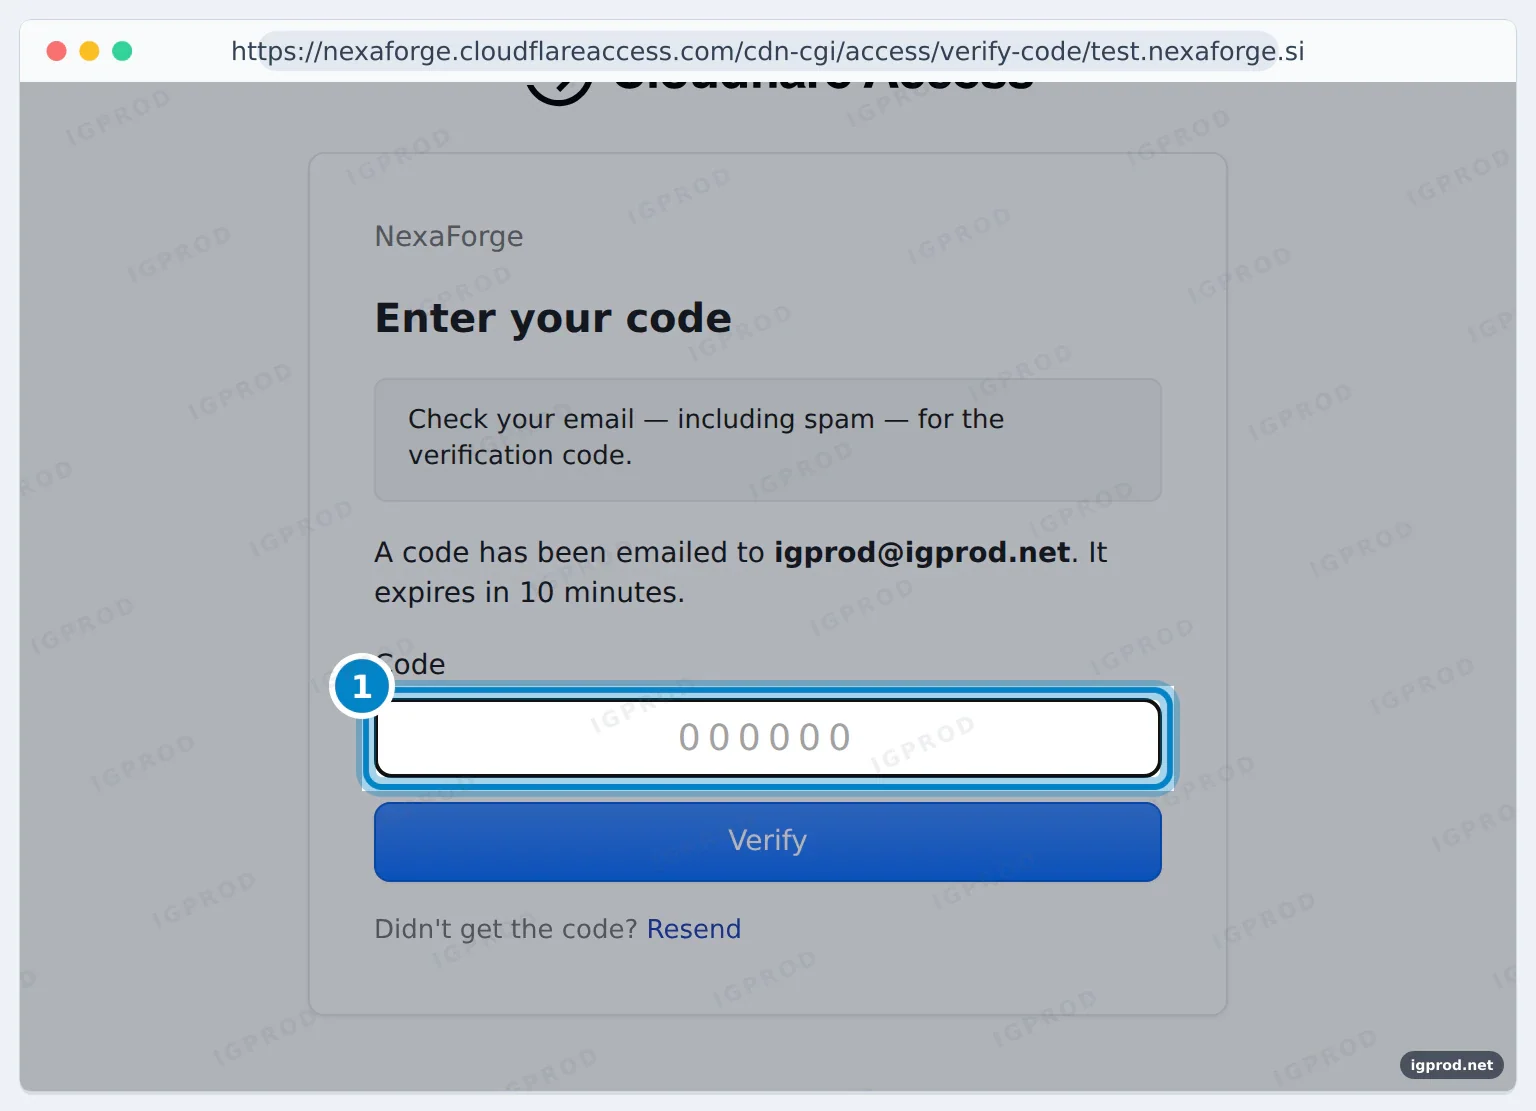
- The next page says that a code was emailed and that it expires in 10 minutes. It also asks you to check the spam folder.
- Type the 6-digit code from the email and select Verify.
In our test the email arrived in about 20 seconds, with the subject "Cloudflare Access login code for test.nexaforge.si". After Verify, the browser went through these addresses and opened the site:
302  https://test.nexaforge.si/
200  https://nexaforge.cloudflareaccess.com/cdn-cgi/access/login/test.nexaforge.si
302  https://nexaforge.cloudflareaccess.com/cdn-cgi/access/verify-code/test.nexaforge.si
200  https://nexaforge.cloudflareaccess.com/cdn-cgi/access/verify-code/test.nexaforge.si
302  https://nexaforge.cloudflareaccess.com/cdn-cgi/access/callback
302  https://test.nexaforge.si/cdn-cgi/access/authorized
200  https://test.nexaforge.si/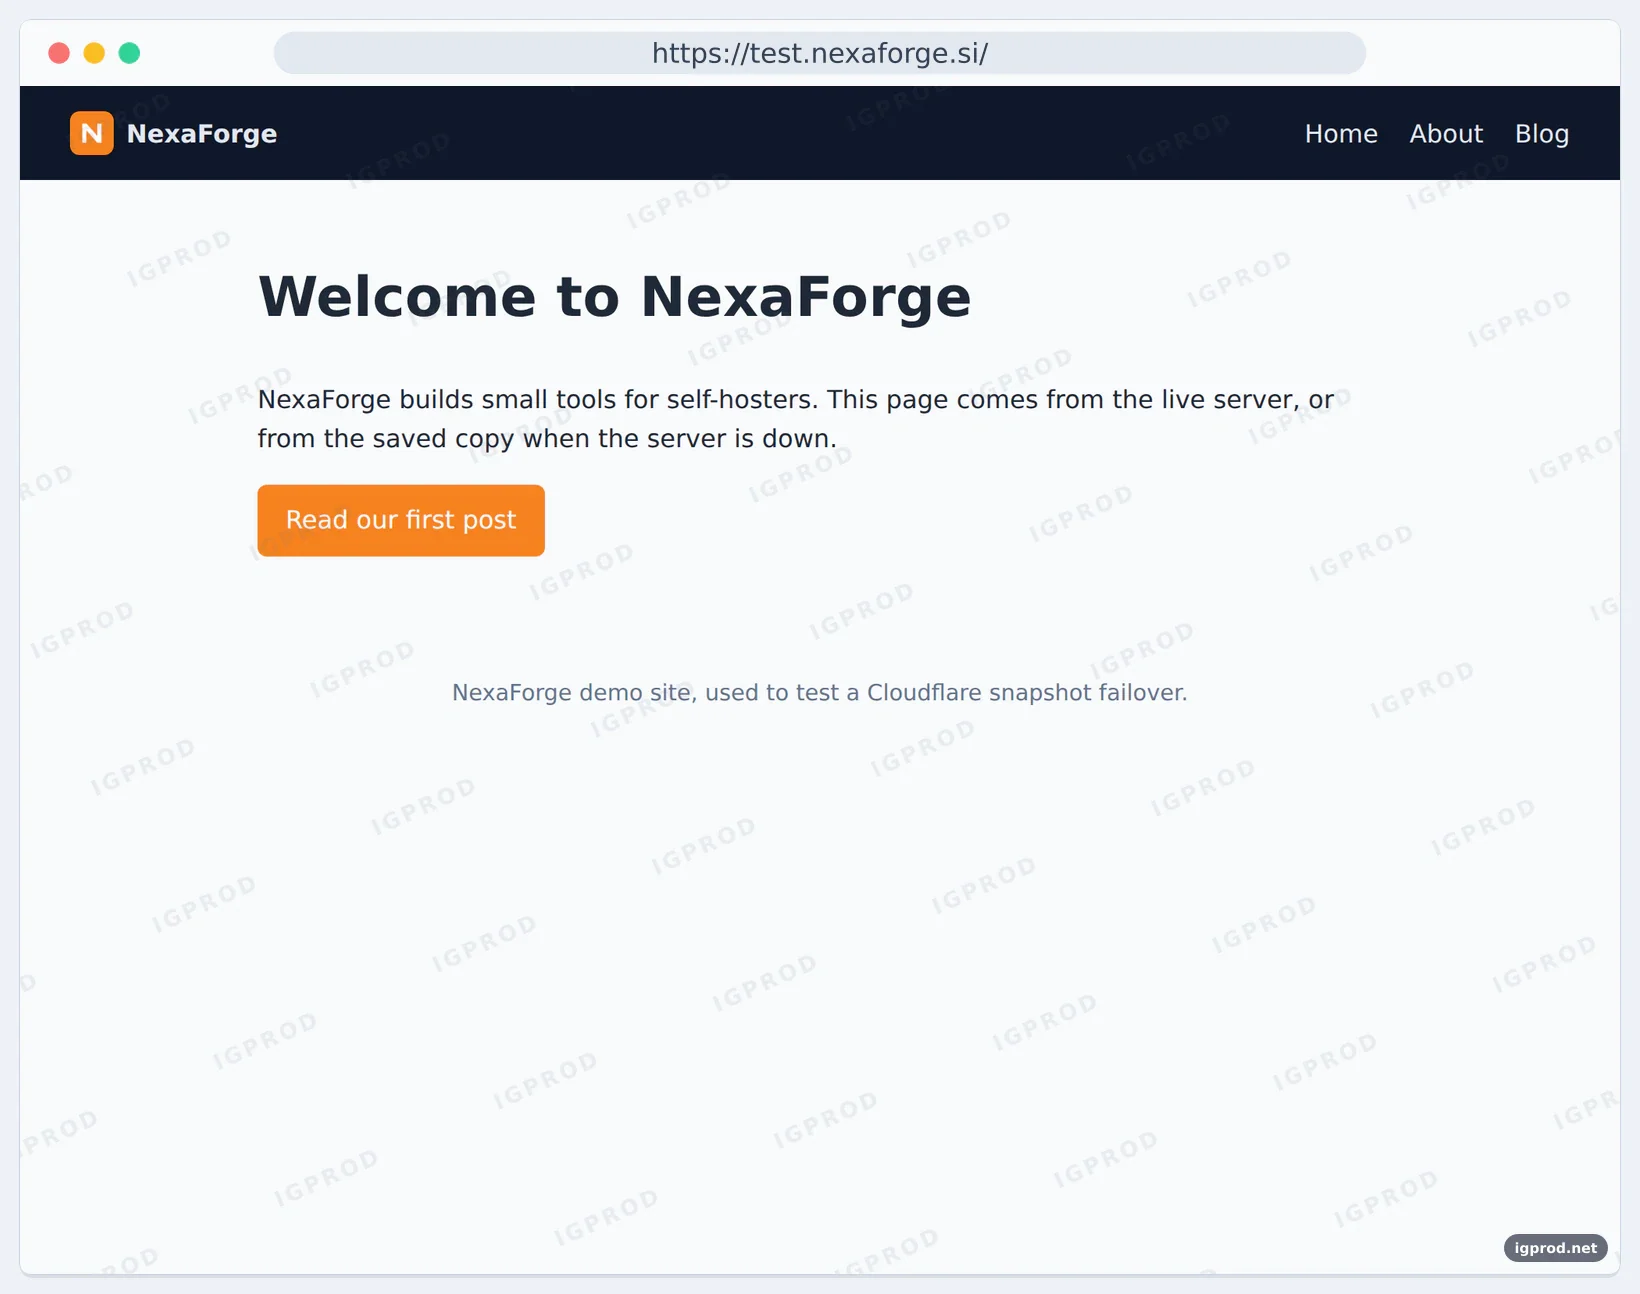
Access keeps the login in cookies named CF_Authorization: one on the app's hostname and one on the team domain. Cloudflare checks the app cookie on every request. Until it expires (24 hours here), the visitor does not see the login page again.
What a visitor who is not allowed sees
We tried a second address that no policy allows. The page looked the same: "A code has been emailed to" the address. No email came, then or 10 minutes later. This is on purpose: Cloudflare sends no code to a blocked address, and the page does not tell a stranger which addresses are allowed. The attempt did not appear in the logs either.
Step 7: See who signed in
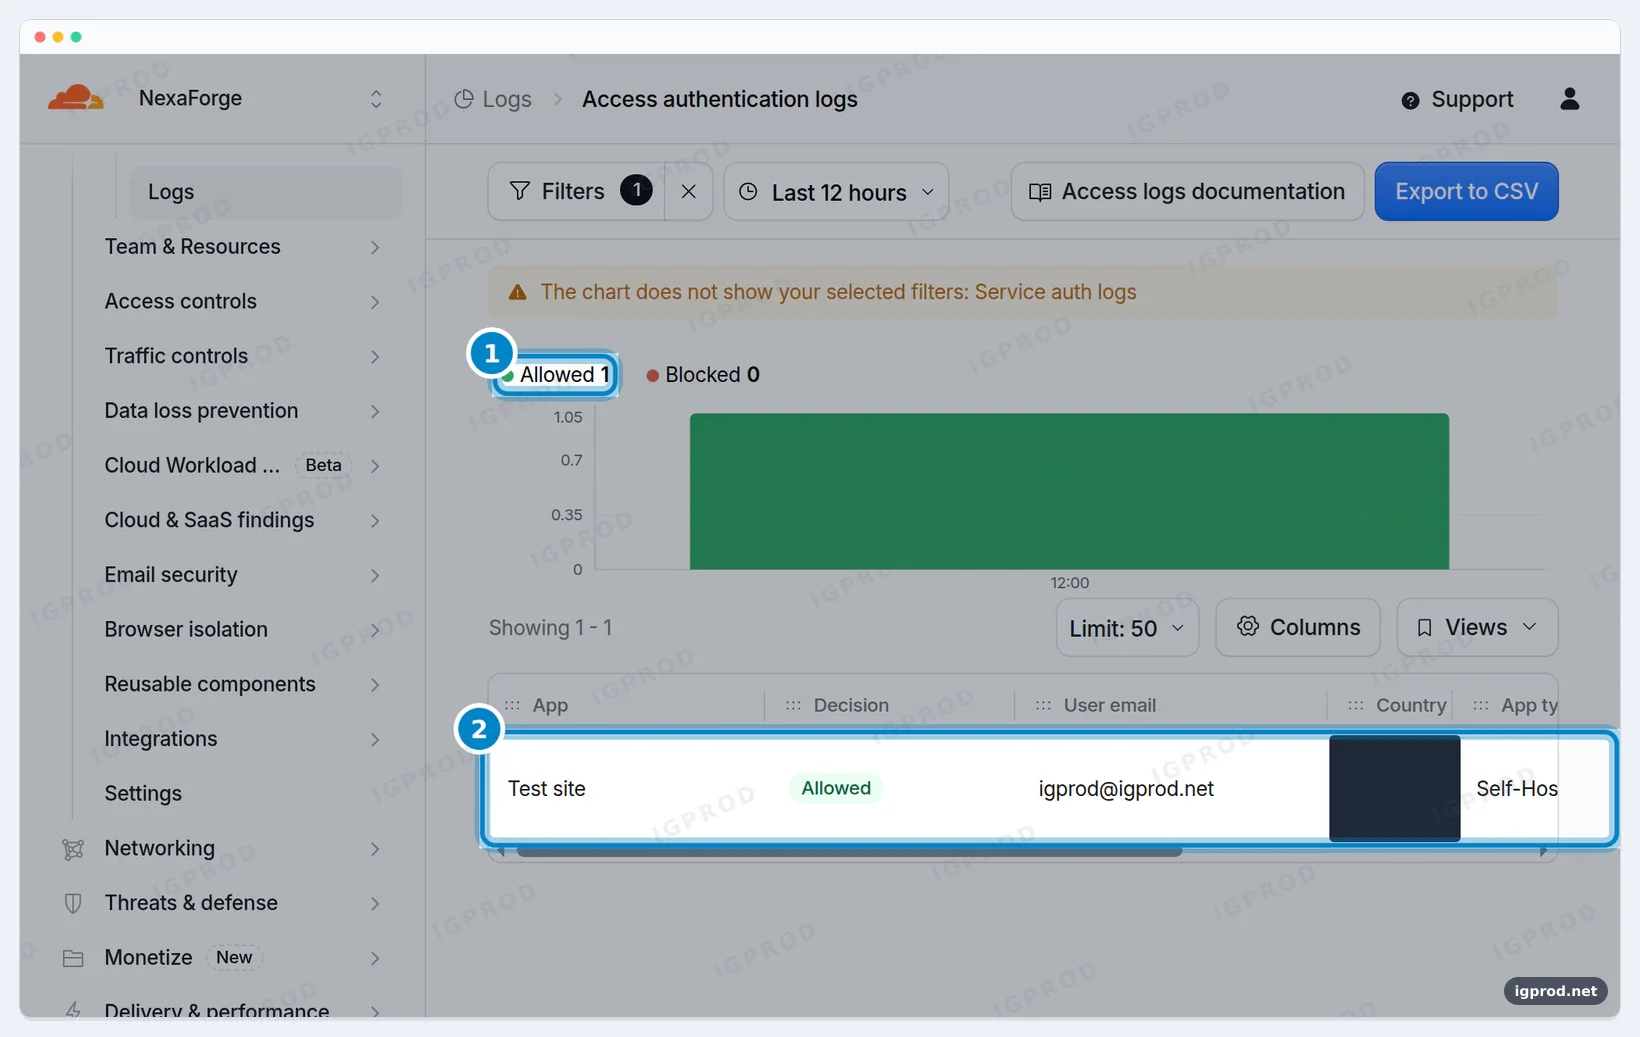
Go to Insights & Logs > Logs and open Access authentication logs. Each line shows the app, the decision (Allowed or Blocked), the email, the country, the app type and the time. On the free plan, these logs stay for 24 hours.
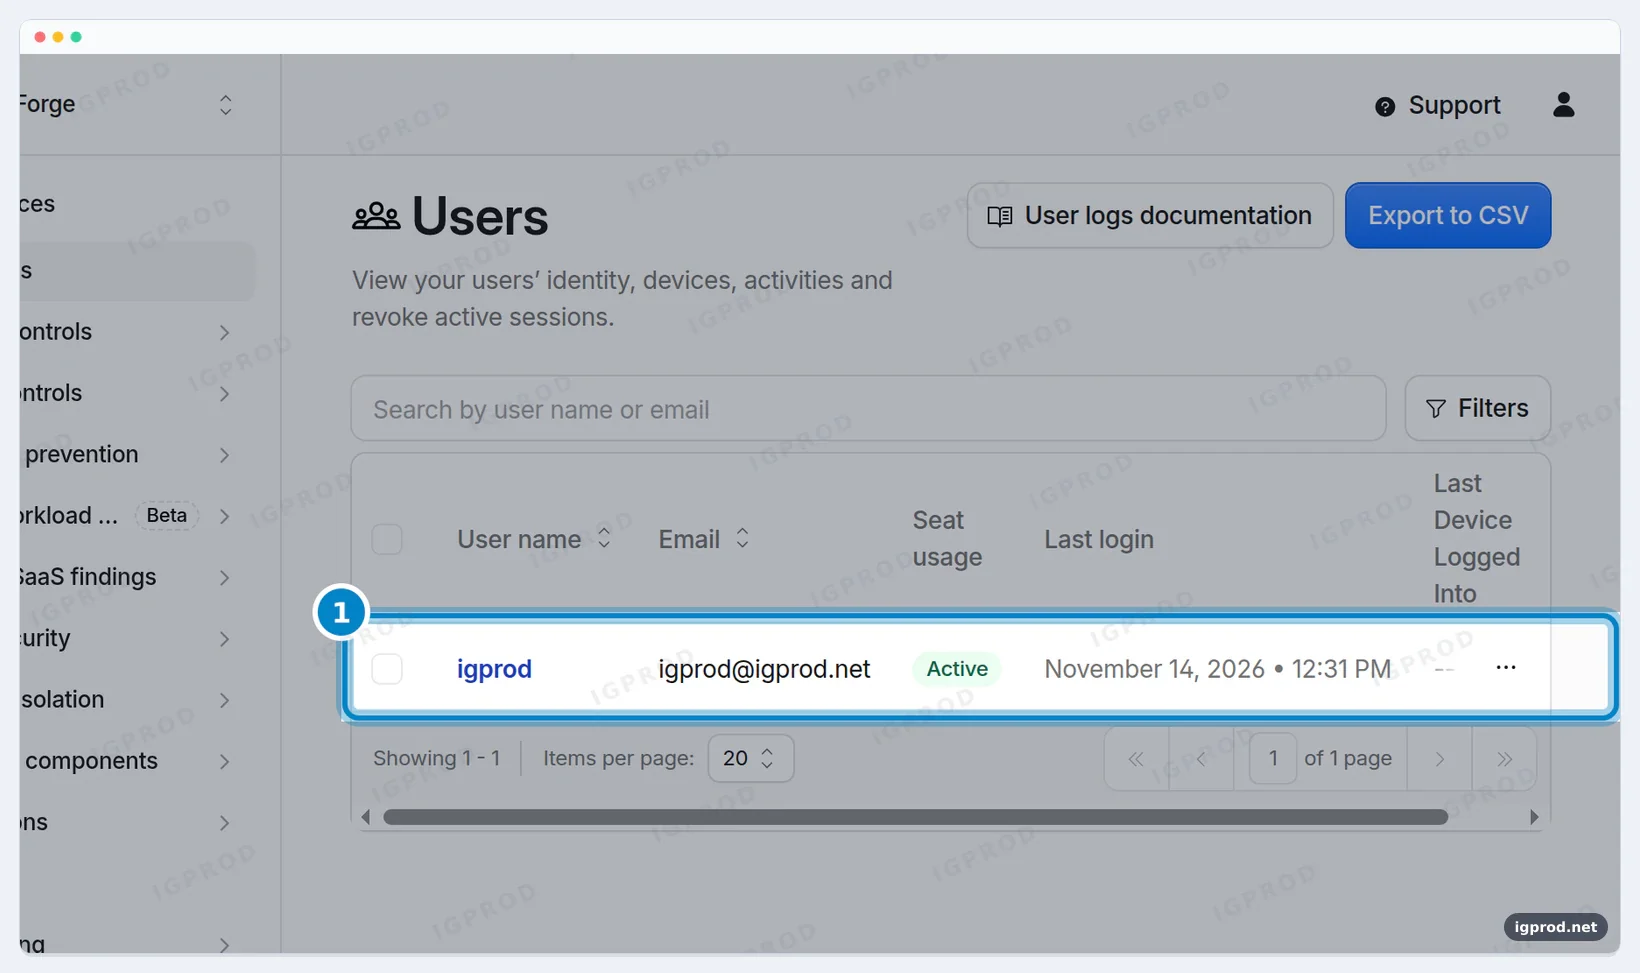
People are listed under Team & Resources > Users. A user who signs in takes a seat. This page also revokes a user's active sessions. To give seats back automatically, Settings > Remove inactive users from seats marks users as inactive after a time you choose.
Use it with a home server
Access checks only the requests that go through Cloudflare. If your app also answers on your public IP address and an open port, a visitor can go around the login page. Cloudflare's documentation says the same: without a tunnel, you must protect your origin IP another way.
At home, the clean setup is a Cloudflare Tunnel. The cloudflared connector runs next to the app and connects out to Cloudflare, so no port stays open on the router. Our guide to creating a Cloudflare Tunnel on a Synology NAS shows that part. Cloudflare recommends creating the Access application before the tunnel route, so the hostname is never public without a login.
Troubleshooting
The code email does not arrive
- Look in the spam folder, as the code page says.
- Check the address against the policy. A blocked address never gets a code, and the page does not say so.
- A code lasts 10 minutes. When we asked for a second code a few minutes after the first one, no new email came, and the first code still worked. Use the code you already have before you ask again.
- If a mail filter holds the email, let
notify.cloudflare.comthrough.
The login page shows a random name such as soft-flower-8ca0
That is the first team name. Change it in Reusable components > Custom pages > Access login page, as in step 2.
The free plan asks for a card
That is normal. The checkout of Zero Trust Free charged $0 but needed a payment method on the account. Above 50 seats, you need a paid plan.
The app still opens without a login
Check the hostname under the app's Destinations. Then check that the DNS record is proxied (orange cloud) or a tunnel route. A DNS-only record or a direct IP address does not go through Cloudflare, so Access never sees the request.
How to remove the protection
Open the app, select Delete and confirm. The dialog says: "If you continue, this application will no longer be protected with Access policies." We did this after the test, and the test host answered without a login again right away.
Frequently asked questions
Is Cloudflare Zero Trust free?
Yes, for up to 50 seats. Zero Trust Free costs $0, keeps logs for 24 hours and needs a payment method at checkout. Zero Trust Standard costs $7 per seat per month and has no seat limit.
What is Cloudflare Access?
Access is the part of Zero Trust that puts a login in front of your apps. After the login, Cloudflare checks the CF_Authorization cookie on every request to the app.
Is Cloudflare One the same as Cloudflare Zero Trust?
Yes. In the 2026 dashboard, the Zero Trust section of the sidebar opens a home page called Cloudflare One, and the documentation is called Cloudflare One docs.
How long is the one-time PIN valid?
10 minutes after the request. A blocked address gets no PIN at all.
How long does a login last?
The application session duration, 24 hours by default. You can change it per app, and a policy can set its own duration.
Do visitors need an app on their device?
Not for a web app. They sign in from the browser. The Cloudflare One Client is for private networks and device rules.
Can I use Google or GitHub instead of an email code?
Yes. Integrations > Identity providers > Add an identity provider lists Google, GitHub, Microsoft Entra ID, Okta, Facebook, LinkedIn, Passkeys, SAML, OpenID Connect and more.
Can I protect only part of a site, such as /admin?
Yes. Type the path in the Path field of the app's destination. The rest of the hostname stays open.
Related guides
- Create a Cloudflare Tunnel and expose your services with Synology
- Change Cloudflare nameservers without breaking self-hosted services
- Cloudflare Always Online alternative: show a saved copy when your server is down
- Self-hosting for beginners: plan your first service
Sources
- Cloudflare: Zero Trust plans
- Cloudflare One docs: Get started
- Cloudflare One docs: One-time PIN login
- Cloudflare One docs: Access policies
- Cloudflare One docs: Publish a self-hosted application
- Cloudflare One docs: Authorization cookie
- Cloudflare One docs: Access login page
- Cloudflare One docs: Access authentication logs

Leave a comment
Your email address will not be published. Required fields are marked *