This is a guide for those who want to update their Docker containers on a Synology NAS.
We'll go over the many methods for updating Docker containers here, so this solution may be used on any platform where Docker can be installed. You may need to update your containers if you follow the instructions in this article. Continue reading to learn how to update your images/containers.
- Install Watchtower to have your Docker Images/Containers automatically updated without having to do anything manually.
- By means Portainer to manually update your Docker Images/Containers
- Trought Synology Docker User Interface
In this article We'll show you how to update images/containers using the Synology Docker user interface (Solution n° 3)
Step 1
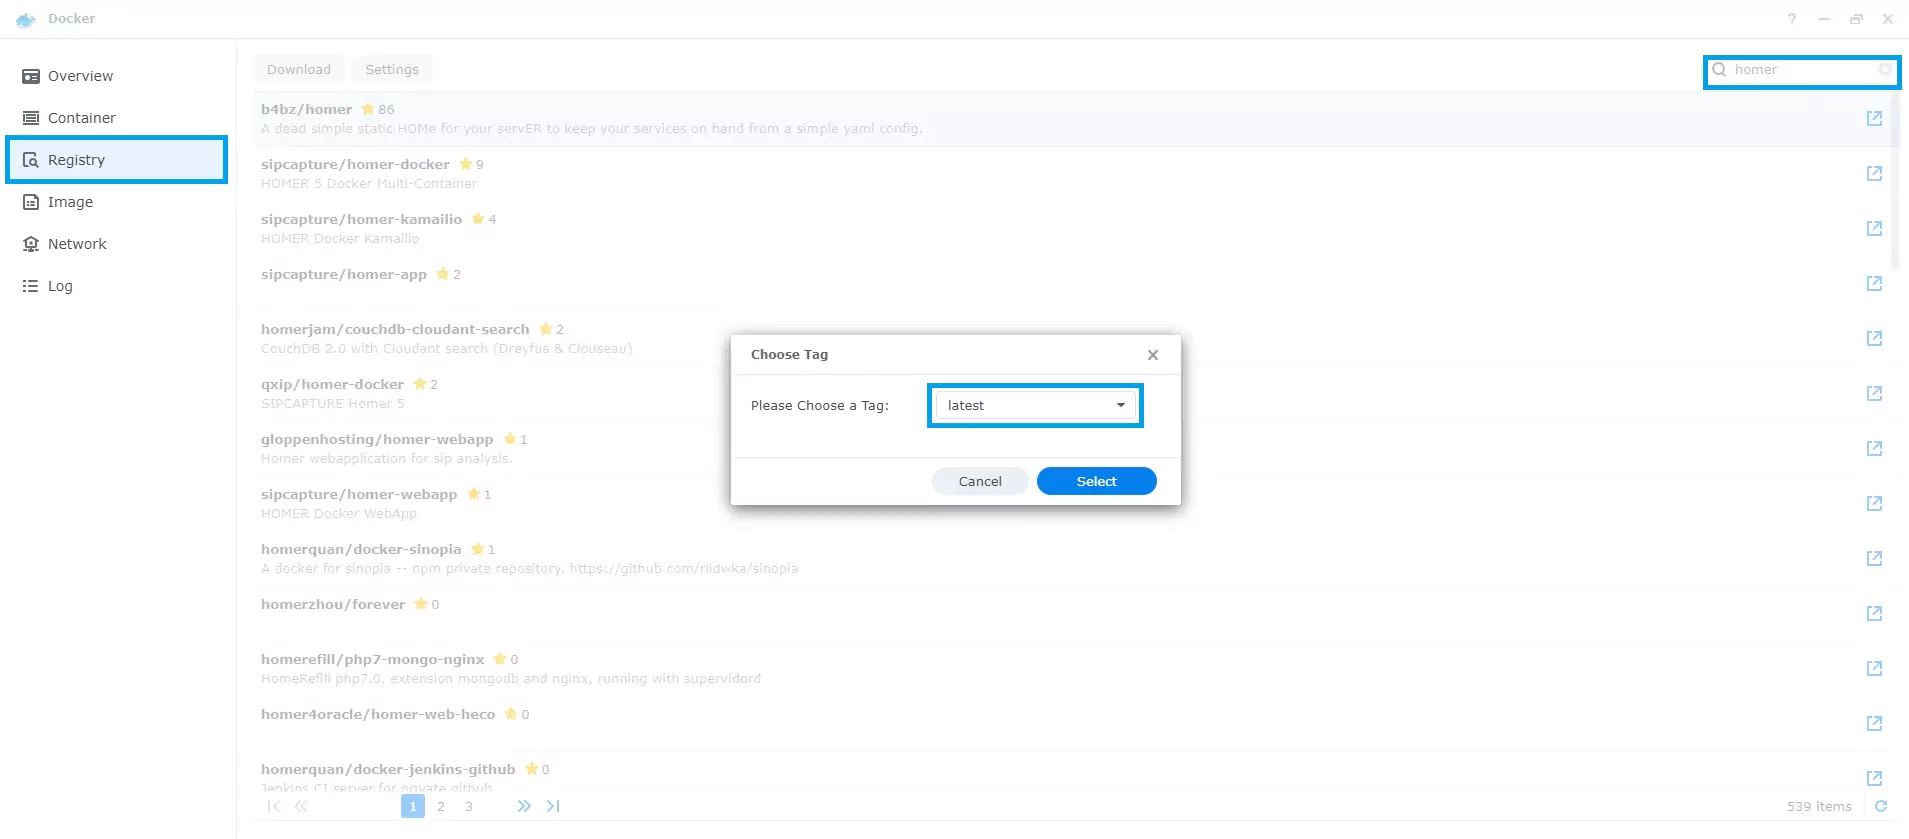
- Open the Docker package and go to the Registry page to get the most recent image, such as Portainer, Nginx, AdGuard, and so on.
Step 2
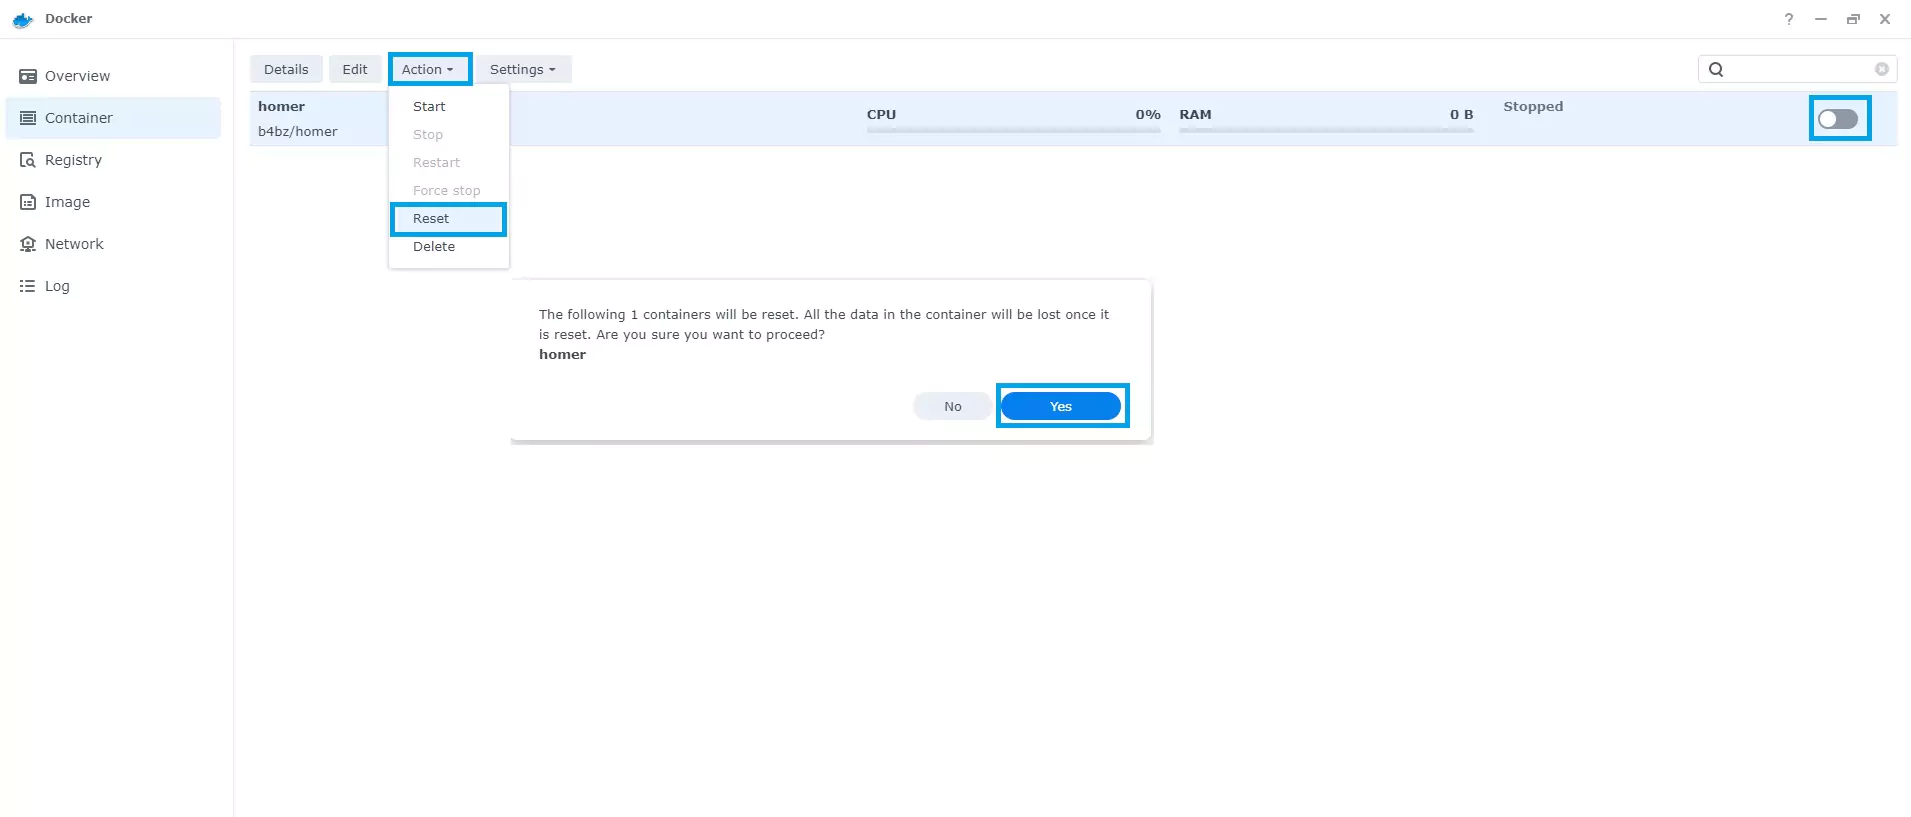
- When the download is finished, go to the Container tab and turn off the container you're working on. (Our example is Homer)
- Next, select the container and choose Reset from the Action drop-down menu. The container will be deleted from the list and rebuilt in STEP 1 using the image you downloaded.
Step 3
- Begin using the new container. It is ready to use after it has loaded.
A different approach
Step 1
- Open the Docker package and navigate to the Registry menu to obtain the most recent image, we used Homer as an example.
Step 2
- Go to the Container tab and switch off the container you're working on after the download is complete. (We'll use Homer as an example.)
- After that, pick the container and select Export from the Settings drop-down menu, then save the file to your local computer.
- Open the file you just downloaded in notepad and scroll down to the line where this variable is mentioned.
 "image" : "docker.io/b4bz/homer",
 Replace with
"image" : "docker.io/b4bz/homer:latest",- Save the file, then import it from the same menu where you exported it before, as shown in the image below:
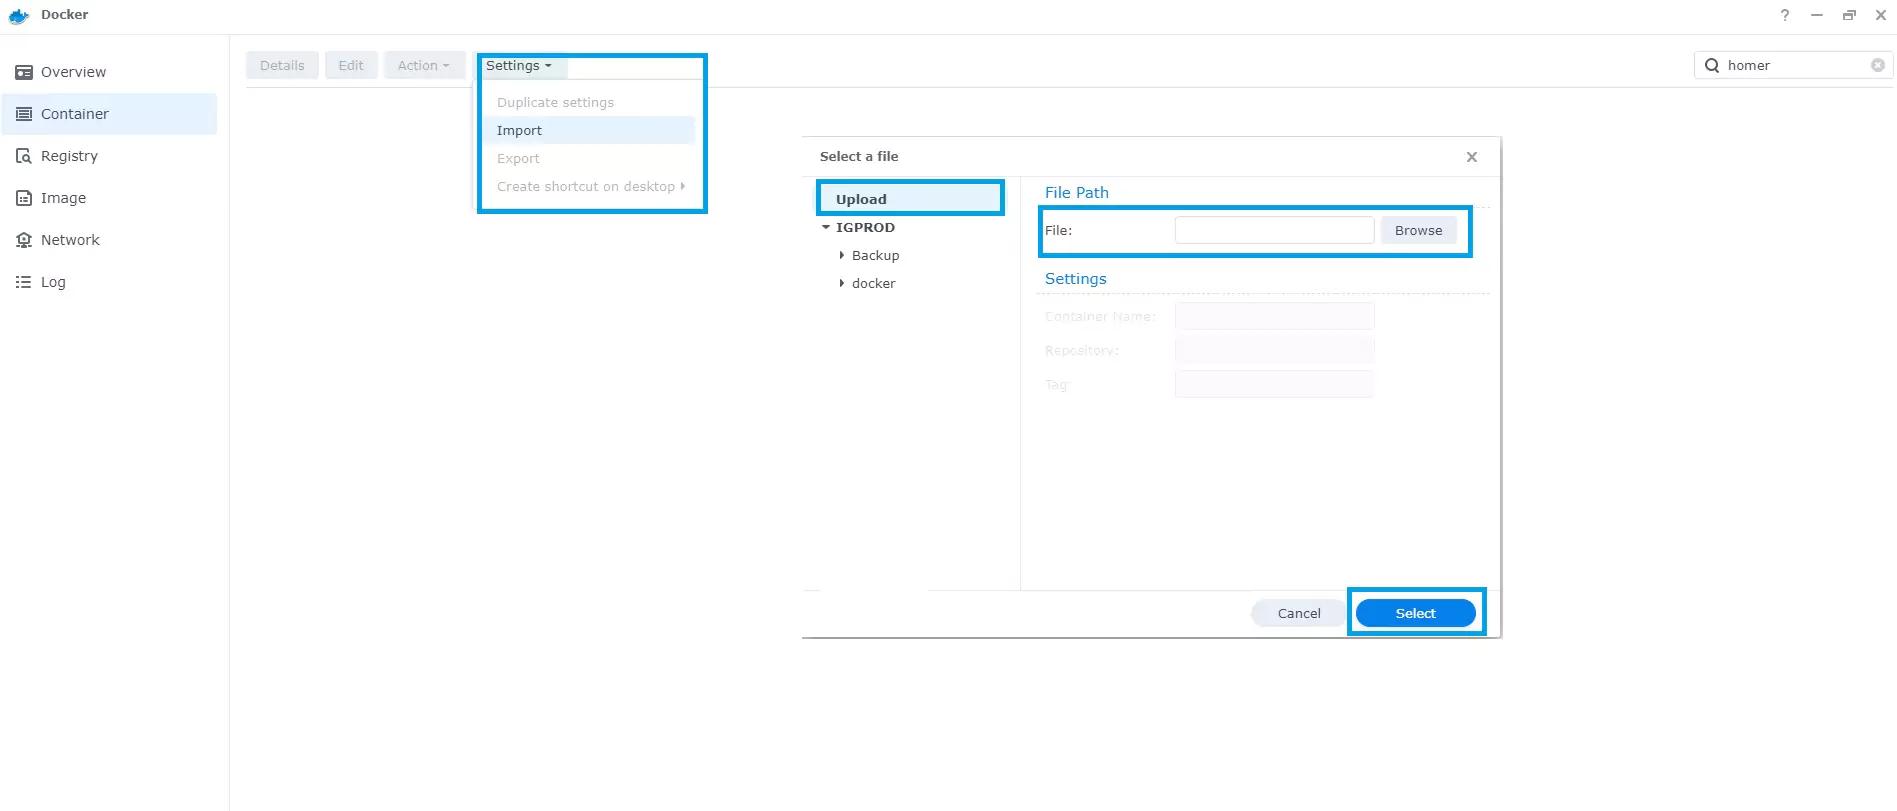
- The container will appear on the screen when you import the json file, all you have to do now is start it.
If you like this post, please consider donating so that we can continue to maintain our site.?

Leave a comment
Your email address will not be published. Required fields are marked *