
To install Docker Compose on Ubuntu, add Docker’s official APT repository and install docker-compose-plugin. On a fresh machine, install Docker Engine and its command-line tools too. Verify docker compose version, then start the small web service below to check that Compose can actually run a container.
- A supported 64-bit Ubuntu installation: Docker currently lists Ubuntu 22.04, 24.04, 26.04 and 26.10.
- An account with
sudoaccess and a terminal on that Ubuntu machine. - Internet access for packages and container images, plus an unused local port 8080 for the example.
These are Ubuntu Engine instructions; Docker does not officially support Ubuntu derivatives such as Linux Mint through this installation path. Check the official Ubuntu requirements before proceeding on another system.
Compose is a Docker command-line plugin that manages containers from a YAML configuration file. Docker Engine is the service that runs those containers. If these terms are new, start with Docker for beginners.
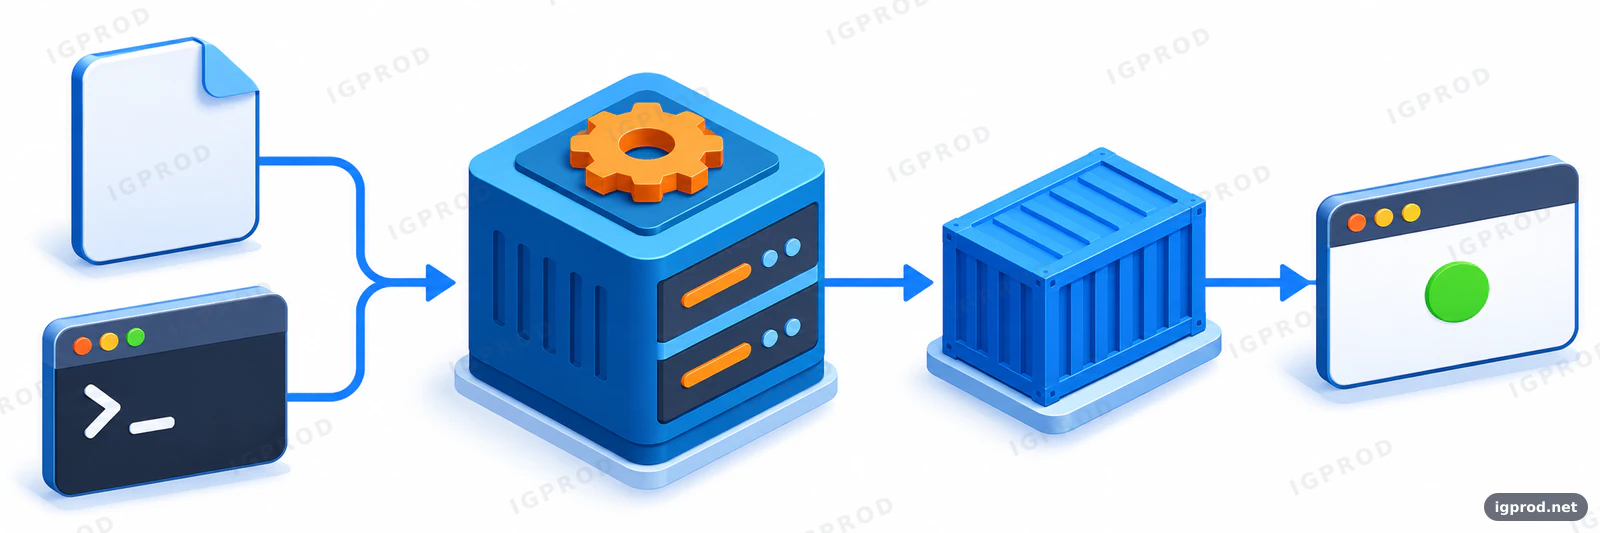
1. Check whether Docker and Compose are installed
Open a terminal on Ubuntu, or connect to it over SSH. Run these checks individually; a missing command is useful information at this stage:
cat /etc/os-release
dpkg --print-architecture
command -v docker
docker --version
docker compose version
apt-cache policy docker-ce docker.io docker-compose-plugin
The first two commands identify your Ubuntu release and CPU architecture. A working Compose check prints a line identifying Docker Compose and its version. If it succeeds, skip installation and continue at step 4. If Docker exists but Compose does not, check which repository supplies Docker before choosing the plugin-only path.
In the package policy output, download.docker.com identifies Docker’s repository. If command -v docker prints nothing, use the full installation path in step 3. If you already use Ubuntu’s docker.io, Podman, Snap or Docker Desktop, identify that installation first; mixing package families can create conflicts. Docker Desktop already includes Compose, as explained in Docker’s installation options.
2. Add Docker’s official Ubuntu repository
APT is Ubuntu’s package manager; a repository supplies its package lists and downloads. If Docker’s repository already works, keep it and skip the setup block. Adding another entry can produce duplicate-source or conflicting signature-key errors.
If you are replacing an existing package family
Skip package removal on a fresh machine. For an intentional migration, back up application data and Compose files first, and allow for interrupted services. Docker’s conflicting-package instructions give this removal command. Review APT’s proposed transaction before accepting it, especially if other software uses containerd or runc:
sudo apt remove $(dpkg --get-selections docker.io docker-compose docker-compose-v2 docker-doc docker-buildx podman-docker containerd runc | cut -f1)Removing these packages does not automatically erase Docker’s stored images or volumes. That does not replace a backup or guarantee that an existing application will survive a runtime change without work.
Configure the key and package source
Paste this complete block into the Ubuntu terminal. It downloads the repository’s signing key and writes a source file using your machine’s release and architecture. Keep END_SOURCE at the start of its line:
# Run on the Ubuntu host, not inside the offline sandbox.
# Based on https://docs.docker.com/engine/install/ubuntu/
sudo apt update
sudo apt install ca-certificates curl
sudo install -m 0755 -d /etc/apt/keyrings
sudo curl -fsSL https://download.docker.com/linux/ubuntu/gpg -o /etc/apt/keyrings/docker.asc
sudo chmod a+r /etc/apt/keyrings/docker.asc
sudo tee /etc/apt/sources.list.d/docker.sources <<END_SOURCE
Types: deb
URIs: https://download.docker.com/linux/ubuntu
Suites: $(. /etc/os-release && echo "${UBUNTU_CODENAME:-$VERSION_CODENAME}")
Components: stable
Architectures: $(dpkg --print-architecture)
Signed-By: /etc/apt/keyrings/docker.asc
END_SOURCE
sudo apt update
Wait for the final update to finish successfully. Stop if it reports signature, connection or missing Release-file errors. Check package availability with:
apt-cache policy docker-compose-pluginExpect a candidate version with an entry from download.docker.com. A candidate of (none) means the package metadata is still unavailable; resolve that before installing. These commands follow Docker’s Ubuntu repository procedure.
3. Install the Docker Compose plugin
Choose the branch matching step 1. Allow APT to finish before running the next check.
Docker Engine and CLI already come from Docker’s repository
sudo apt-get update
sudo apt-get install docker-compose-plugin
This is the official plugin-only installation. It adds Compose to an existing Engine installation; it is not the full setup for a machine without Docker.
Docker Engine is missing, or you are intentionally migrating
sudo apt install docker-ce docker-ce-cli containerd.io docker-buildx-plugin docker-compose-pluginThis installs Engine, the Docker CLI, the container runtime, Buildx and Compose. APT should complete without dependency errors. Continue to the version check rather than assuming a successful package download proves the installation works.
4. Verify Compose and Docker Engine separately
First check whether the CLI discovers the plugin:
docker compose versionExpect Docker Compose identification and a version number. A v5 result is valid: Docker documents both v2 and v5 as modern Compose CLI families using docker compose. The CLI version is separate from YAML file-format version numbers. See Docker’s Compose version history.
For the local, systemd-managed Engine installed above, check its service and your access to it:
sudo systemctl status docker
sudo docker info
The service should be active and running, and docker info should show server information without a connection error. If the status view opens in a pager, press q to leave it. If the local service is stopped, start it, then repeat the info check:
sudo systemctl start docker
sudo docker info
Finally, run Docker’s basic container check:
sudo docker run hello-worldIt downloads an image and should print Hello from Docker! before exiting. A version check proves plugin discovery; docker info checks Engine access; this last command proves Engine can run an image. The systemd commands here apply to the local Engine, so investigate the target first if you deliberately use a remote or rootless daemon.
5. Run a simple Docker Compose web service
Use a separate folder for this disposable test. It stores no application data. A Compose project groups services described in one configuration; our explanation of Docker Compose covers larger projects.
Create the folder, enter it, and write the complete compose.yaml file:
mkdir -p ~/compose-test
cd ~/compose-test
cat > compose.yaml <<'EOF'
# Disposable HTTP service; no persistent data.
services:
  web:
    image: nginx:1.30.6-alpine
    ports:
      # Ubuntu host loopback port 8080 forwards to HTTP port 80.
      - "127.0.0.1:8080:80"
EOF
The image tag selects the official Nginx image used for this test. The loopback address 127.0.0.1 keeps the example reachable locally. Avoid dropping that address just to make a remote browser work; see Docker’s port-publishing explanation.
Validate the file, start the service in the background, list running services, and request the page:
sudo docker compose config -q
sudo docker compose up -d
sudo docker compose ps --services --status running
curl -fsS http://127.0.0.1:8080/
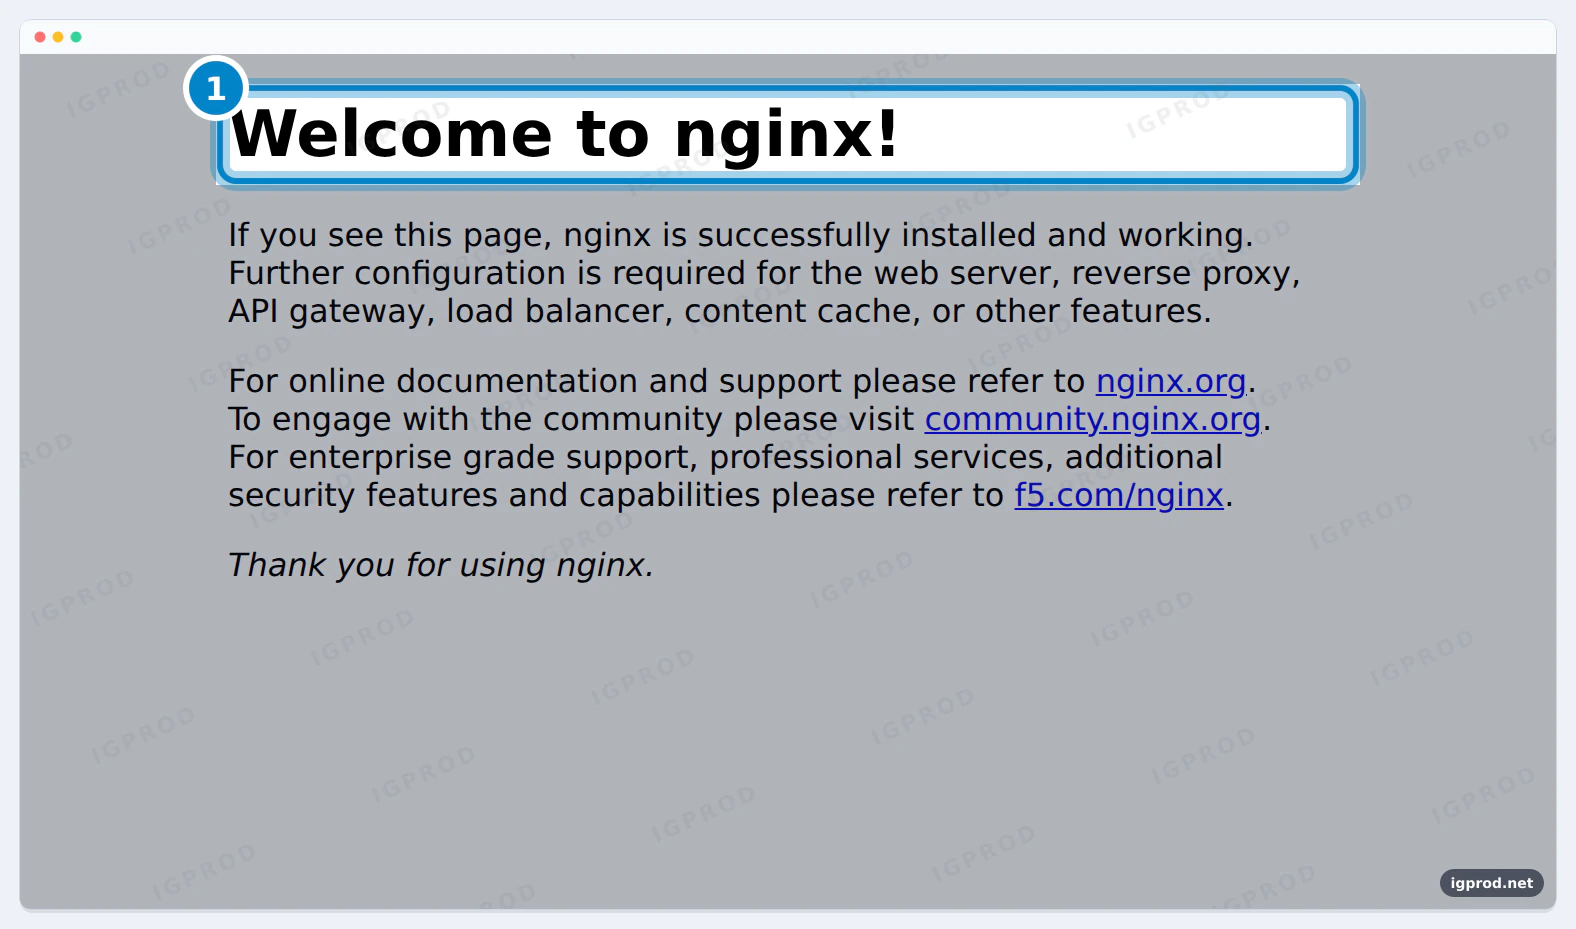
Successful validation is quiet. The running-service check should print web, and the HTTP response should contain Welcome to nginx!. The first start needs internet access to download the image if it is not already present. Validation alone does not start anything.
We tested the Compose service startup and HTTP page on 12 November 2026 with nginx:1.30.6-alpine in a Docker sandbox. The service ran and the welcome-page screenshot succeeded. This test did not run the Ubuntu APT installation steps.
On the same Ubuntu computer, open http://127.0.0.1:8080/ in a browser and check the highlighted heading shown below. If Ubuntu is a remote SSH server, leave the service running and open a second terminal on your own computer. Substitute your SSH account and server address in this example:
ssh -L 8080:127.0.0.1:8080 [email protected]Keep that SSH connection open, then visit http://127.0.0.1:8080/ in your local browser. The tunnel forwards the local port to the remote server’s loopback port. Your own computer’s port 8080 must also be free.
After checking the page, return to the Ubuntu terminal in ~/compose-test and clean up:
sudo docker compose downThe test service should stop and disappear from the running-service check. This removes the project’s containers and network. For real applications, keep their data-management instructions: adding -v can remove volumes, so it is omitted here.
Update, repair or remove the Compose plugin
To install an available repository update, refresh package lists and install the package again:
sudo apt-get update
sudo apt-get install docker-compose-plugin
docker compose version
APT selects the available candidate; an upstream GitHub release does not guarantee that exact version is already in your repository. If package files need repair, use:
sudo apt-get install --reinstall docker-compose-pluginTo remove the APT-installed plugin, use the documented uninstall command:
sudo apt-get remove docker-compose-pluginRemoving the plugin removes the Compose command, rather than cleaning up application data. Manually downloaded plugins need separate maintenance and do not auto-update; prefer the repository path unless you have a specific reason to follow the official manual installation instructions.
Fix common Docker Compose installation errors
APT cannot locate docker-compose-plugin
This usually points to missing or unsuccessful repository setup. Read errors from sudo apt-get update, then inspect the source and candidate:
cat /etc/apt/sources.list.d/docker.sources
apt-cache policy docker-compose-plugin
Check the installed Ubuntu release against step 2, especially after an operating-system upgrade. Do not substitute an arbitrary codename to force a candidate. If APT reports duplicate entries or conflicting Signed-By values, inspect both older docker.list entries and docker.sources; retain one correct Docker source without deleting unrelated repositories.
A reader report about a working hyphenated command and a missing plugin package illustrates the package-origin confusion. That report concerns Mint; it does not establish support for derivatives.
docker is missing, or compose is not a Docker command
command -v docker
docker --help
dpkg-query -W docker-compose-plugin
docker compose version
If Docker itself is absent, return to the full-package branch. If Docker exists but the plugin package is absent, install it through the configured repository. If an old script says docker-compose: command not found, try the supported space-separated docker compose form before installing another binary.
If the package is installed but Compose still fails, inspect manual plugin locations such as ~/.docker/cli-plugins/docker-compose and /usr/local/lib/docker/cli-plugins/docker-compose. A wrong-architecture or non-executable manual download can interfere with discovery. Compare docker compose version and sudo docker compose version: user-local plugins can differ under sudo. Do not delete binaries blindly; follow the manual installation checks.
A working Engine connection can also show the selected Compose plugin path:
sudo docker info --format '{{range .ClientInfo.Plugins}}{{if eq .Name "compose"}}{{.Path}}{{end}}{{end}}'Plugin discovery happens before a project starts. A primarily macOS GitHub discussion about Compose command errors includes an Ubuntu report resolved by installing the plugin; its platform-specific workarounds should not be copied into Ubuntu.
Permission denied while connecting to the Docker socket
docker info
sudo docker info
If only the sudo command works, retain sudo as this guide does. Optionally, trusted local users can join the Docker group, which grants root-level privileges. Check that the group exists first:
getent group dockerIf absent, create it with sudo groupadd docker. Then add your current user:
sudo usermod -aG docker "$USER"Log out completely and log back in, then repeat docker info. Follow Docker’s Linux post-installation guidance; making the socket world-writable is not an appropriate fix.
Cannot connect to the Docker daemon
If the Compose version command works, investigate the Engine connection instead of reinstalling the plugin:
docker context show
printenv DOCKER_HOST
sudo systemctl status docker
A Docker context chooses the target Engine; DOCKER_HOST can also change the connection endpoint. No output from printenv simply means that variable is unset. Preserve intentional remote settings. For a stopped local systemd service, use the start command in step 4. See Docker daemon troubleshooting.
Port 8080 is allocated, or the browser cannot reach the page
For a busy server port, change the example mapping to 127.0.0.1:8081:80, run sudo docker compose up -d again, and use port 8081 in curl and any matching SSH forwarding command. Leave the container’s HTTP port at 80. A remote computer cannot reach the server’s loopback address directly; use the tunnel in step 5.
If the service exits, inspect it from the project folder with sudo docker compose ps --all and sudo docker compose logs --tail 50. Our guide to following and limiting Docker logs explains how to keep diagnostic output manageable.
Compose warns that version is obsolete
Remove the top-level version: line from that Compose file. The obsolete version property does not select or update your installed Compose CLI. The complete example above deliberately omits it.
FAQ
How do I install Docker Compose on Ubuntu 24.04 or 22.04?
Use Docker’s Ubuntu repository and install docker-compose-plugin. The source block above detects your release, so neither version needs a hardcoded codename. Fresh installations also need the Engine and CLI packages from step 3.
Why can APT not find docker-compose-plugin?
APT needs package metadata from Docker’s repository. Fix failed update messages, check the source file and supported Ubuntu release, then inspect apt-cache policy docker-compose-plugin for a candidate before retrying installation.
Is docker compose the same as docker-compose?
The supported plugin command uses a space: docker compose. Legacy Python Compose v1 used docker-compose. A hyphenated binary’s filename alone does not reliably identify its version, so check version output before migrating scripts.
Is Compose v5 the wrong version when a guide says v2?
No. Docker’s supported modern CLI families include v2 and v5, both invoked with docker compose. Neither number requires a matching version: field in your YAML file.
Do I need Docker Desktop on Ubuntu Server?
No. Docker Engine, the Docker CLI and the Compose plugin provide the server installation used here. Docker Desktop is another installation option that bundles Compose.
Can I use Compose without sudo?
Yes, through a suitable Engine access configuration. Joining the Docker group is optional and grants root-level privileges; log out and back in after changing membership. This guide keeps sudo for Engine operations, and rootless Docker is a separate setup.
What can I run next?
Once your test works, try installing Uptime Kuma with Docker. Use a separate project folder and follow that application’s persistence and backup requirements rather than treating its data like this disposable Nginx example.
Sources
- Docker: Install Engine on Ubuntu
- Docker: Install the Compose plugin
- Docker: Compose installation options
- Docker: Compose history and CLI versions
- Docker: Linux post-installation
- Docker: Daemon troubleshooting
- Docker: Port publishing
- NGINX: Official container image
- Docker: compose config
- Docker: compose up
- Docker: compose ps
- Docker: compose down
- Docker: Obsolete version property
- Docker: Uninstall Compose
- Reddit: Working standalone command, missing plugin
- GitHub: Compose command error discussion

Leave a comment
Your email address will not be published. Required fields are marked *