
Jellyfin is a free, open-source media server. It puts your movies, shows and music in one library, with posters and summaries, and streams them to a browser, a phone or a TV. You host it yourself: no account with a company, no subscription.
This guide installs Jellyfin with Docker Compose on a Linux machine, runs the setup wizard and plays a first movie. It also explains the Jellyfin ports, updates, backups and the errors that you are most likely to meet.
We tested every step on 13 November 2026 in a disposable lab: Jellyfin 12.4.0 (the jellyfin/jellyfin:latest image of 26 October 2026), Docker Engine 29.9.3 and Docker Compose v5.7.1. Our test movie is Big Buck Bunny, the free open movie of the Blender Foundation.
Which ports does Jellyfin use?
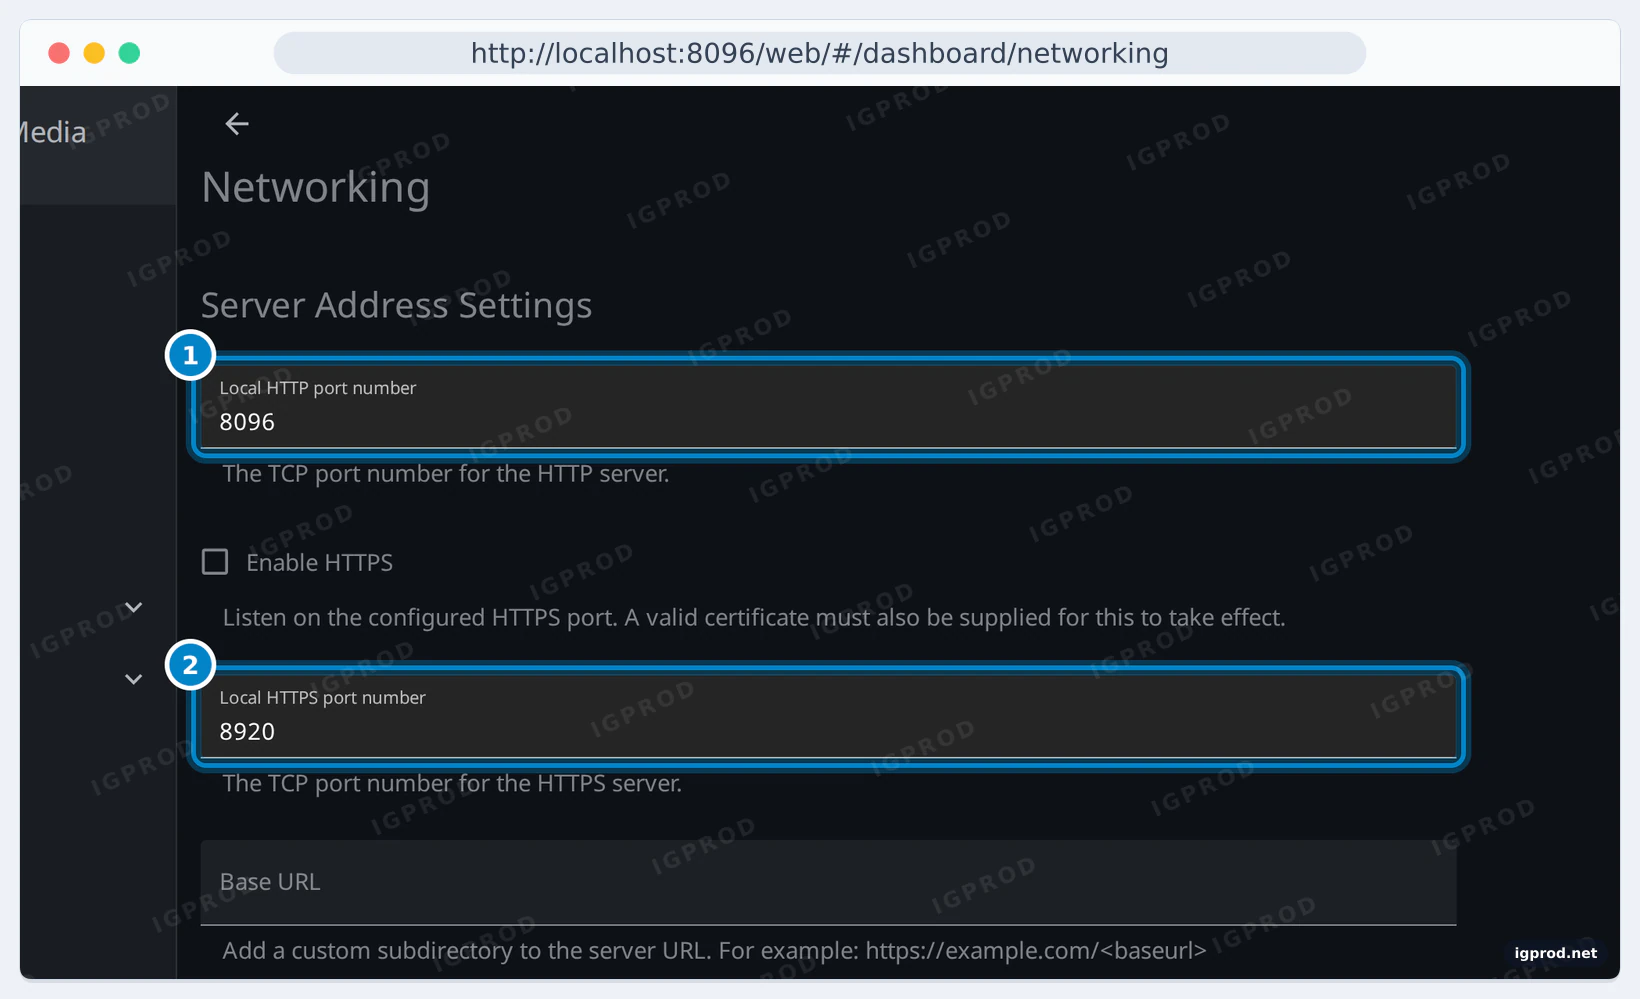
Jellyfin uses port 8096 for its web interface and streaming. The other two ports are optional:
| Port | Protocol | Used for | Do you need it? |
|---|---|---|---|
| 8096 | TCP | Web interface, apps and streaming over HTTP (the default) | Yes |
| 8920 | TCP | HTTPS, only after you enable it in Jellyfin and give it a certificate | Only for Jellyfin's own HTTPS |
| 7359 | UDP | Lets the Jellyfin apps find the server on your local network | Optional, local network only |
The Jellyfin documentation adds that DLNA needs host networking (network_mode: host). This guide uses the default bridge network, which is enough for the browser and the apps.
To use another port, change only the left side of the mapping in the Compose file, for example "8097:8096/tcp", then open http://your-server-ip:8097. Inside the container, Jellyfin stays on 8096. The same numbers are in the Dashboard, under Networking:
What you need
- A Linux machine with Docker Engine and the Compose plugin. No Docker yet? Follow our guide to install Docker and Docker Compose on Ubuntu. New to containers? Read Docker for beginners first.
- Your movies or shows on a disk of that machine.
- Port 8096 free on that machine.
- At least 2 GiB free for the Jellyfin config folder. Jellyfin checks this at every start.
On Windows and macOS, the Jellyfin project tells you to install Jellyfin natively. In a container on these systems, features such as hardware-accelerated transcoding do not work, and the project gives no support.
If your user is not in the docker group, put sudo in front of every docker command below.
Step 1: Create the folders
Jellyfin uses three places:
config: the settings, the users, the library database and the downloaded posters. This is the folder to back up.cache: temporary files, such as resized images and transcoded video. Jellyfin can rebuild it.- Your media folder. In this guide:
/srv/media, with the movies in/srv/media/movies.
mkdir -p ~/jellyfin/config ~/jellyfin/cache
sudo mkdir -p /srv/media/movies
sudo chown -R $(id -u):$(id -g) /srv/media
Now check your user ID (uid) and group ID (gid). Jellyfin will run with them, so that it can write to its folders:
iduid=1000(igprod) gid=1000(igprod) groups=1000(igprod),2375(docker)ls -ld ~/jellyfin/config ~/jellyfin/cache /srv/media/moviesdrwxr-sr-x 2 igprod igprod 4096 Nov 13 13:25 /home/igprod/jellyfin/cache
drwxr-sr-x 2 igprod igprod 4096 Nov 13 13:25 /home/igprod/jellyfin/config
drwxr-xr-x 2 igprod igprod 4096 Nov 13 13:25 /srv/media/moviesOur user has the IDs 1000 and 1000, which is usual for the first user of a Linux machine. If yours are different, use your numbers in step 2.
Put each movie in its own folder, named with the title and the year. Jellyfin uses these names to find the right poster and summary:
/srv/media/movies/Big Buck Bunny (2008)/Big Buck Bunny (2008).mp4Step 2: Write the compose.yaml file
Go to the Jellyfin folder and create the file:
cd ~/jellyfin
nano compose.yaml
Paste this content. It is the official example of the Jellyfin documentation, with the paths of step 1:
services:
  jellyfin:
    image: jellyfin/jellyfin:latest
    container_name: jellyfin
    user: "1000:1000"
    ports:
      - "8096:8096/tcp"
      - "7359:7359/udp"
    volumes:
      - ./config:/config
      - ./cache:/cache
      - type: bind
        source: /srv/media
        target: /media
        read_only: true
    restart: unless-stopped
image: jellyfin/jellyfin:latest: the official image.latestfollows the newest stable release. To stay on one version line, use a tag such asjellyfin/jellyfin:12.4.user: "1000:1000": Jellyfin runs as your user, not as root. Keep the quotes.8096:8096/tcp: the web interface.7359:7359/udp: discovery by the apps on your local network. You can remove that line if you do not need it../configand./cache: the two folders of step 1, next to the Compose file.- The bind mount shows your media folder inside the container as
/media. Withread_only: true, Jellyfin can read your files but cannot change or delete them. restart: unless-stopped: Docker starts Jellyfin again after a reboot, unless you stopped it yourself.
Step 3: Start Jellyfin
docker compose up -d Network jellyfin_default Creating
Network jellyfin_default Created
Container jellyfin Creating
Container jellyfin Created
Container jellyfin Starting
Container jellyfin Starteddocker compose psNAME IMAGE COMMAND SERVICE CREATED STATUS PORTS
jellyfin jellyfin/jellyfin:latest "/jellyfin/jellyfin" jellyfin 21 seconds ago Up 20 seconds (healthy) 0.0.0.0:7359->7359/udp, [::]:7359->7359/udp, 0.0.0.0:8096->8096/tcp, [::]:8096->8096/tcpWait until the status says (healthy). In our lab, Jellyfin started in less than 10 seconds. The log confirms it, and shows the FFmpeg build that comes with the image:
docker logs jellyfin 2>&1 | grep -E "FFmpeg:|Startup complete"[13:40:22.075] [INF] [10] MediaBrowser.MediaEncoding.Encoder.MediaEncoder: FFmpeg: /usr/lib/jellyfin-ffmpeg/ffmpeg
[13:40:22.076] [INF] [10] Main: Startup complete 0:00:05.1192869You can also ask the server directly:
curl -s http://localhost:8096/health
curl -s http://localhost:8096/System/Info/Public | grep -o '"Version":"[^"]*"'Healthy
"Version":"12.4.0"Step 4: Run the setup wizard
Open http://your-server-ip:8096 in a browser. On the server itself, http://localhost:8096 also works. The wizard starts by itself.
Name the server and choose the language
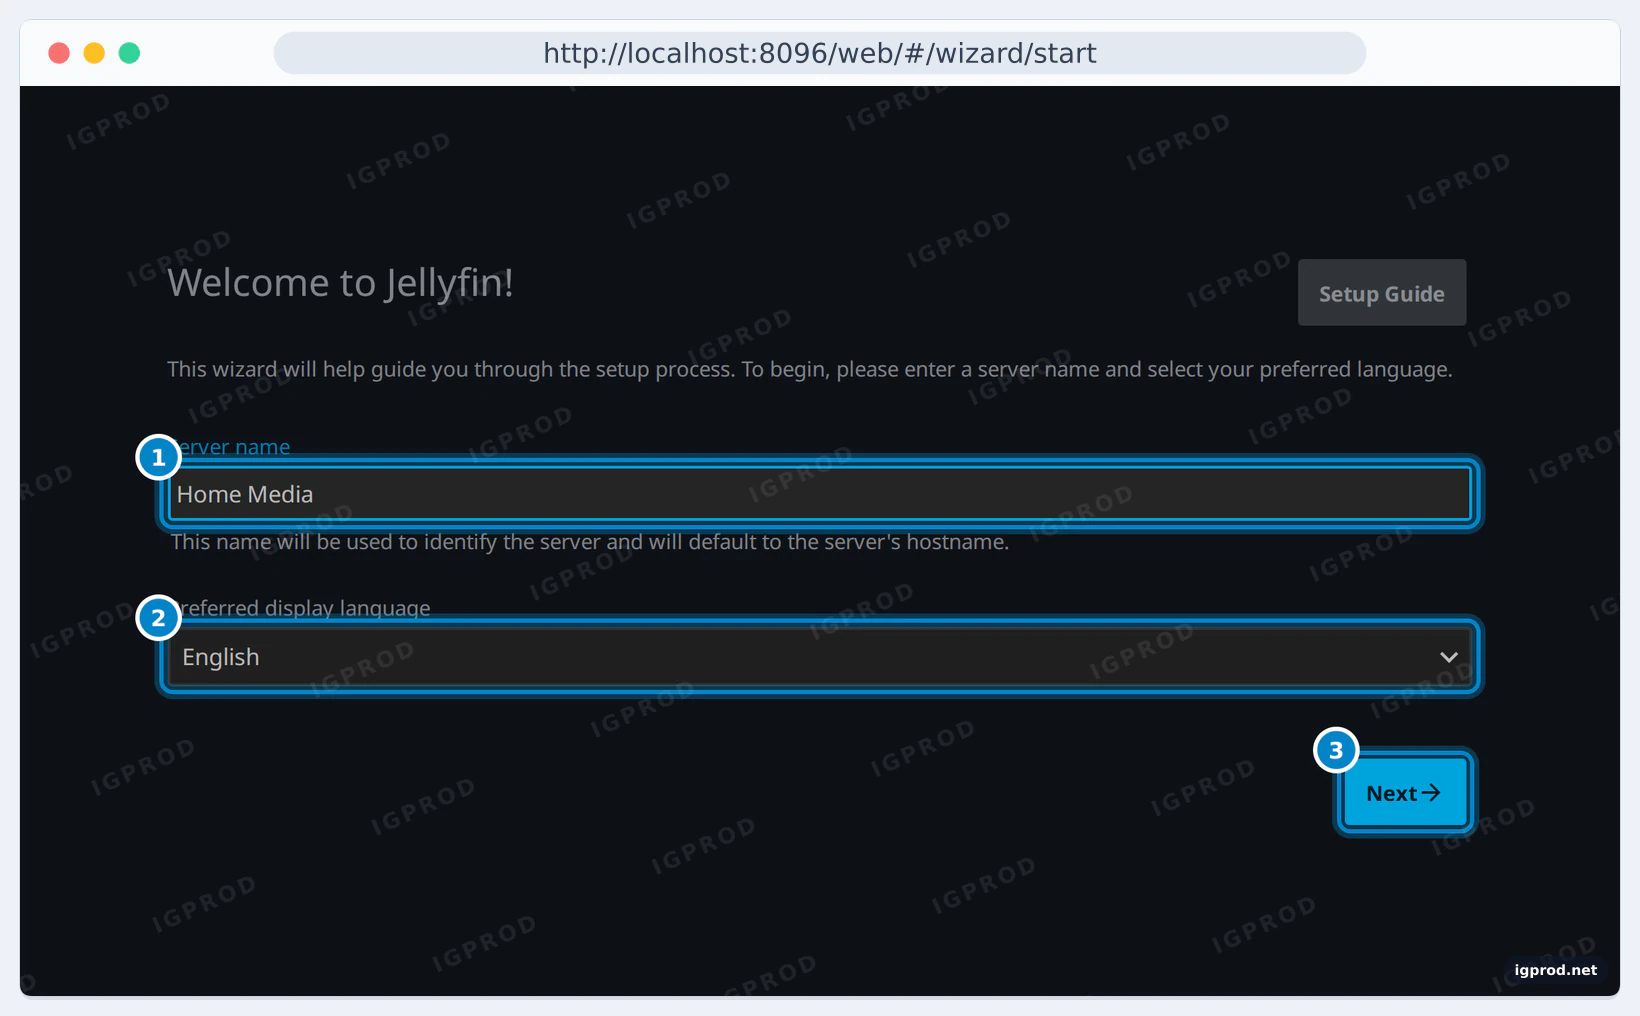
By default, the server name is the host name of the container, a random ID. Give it a name that you will recognize in the apps. We used Home Media.
Create the admin user
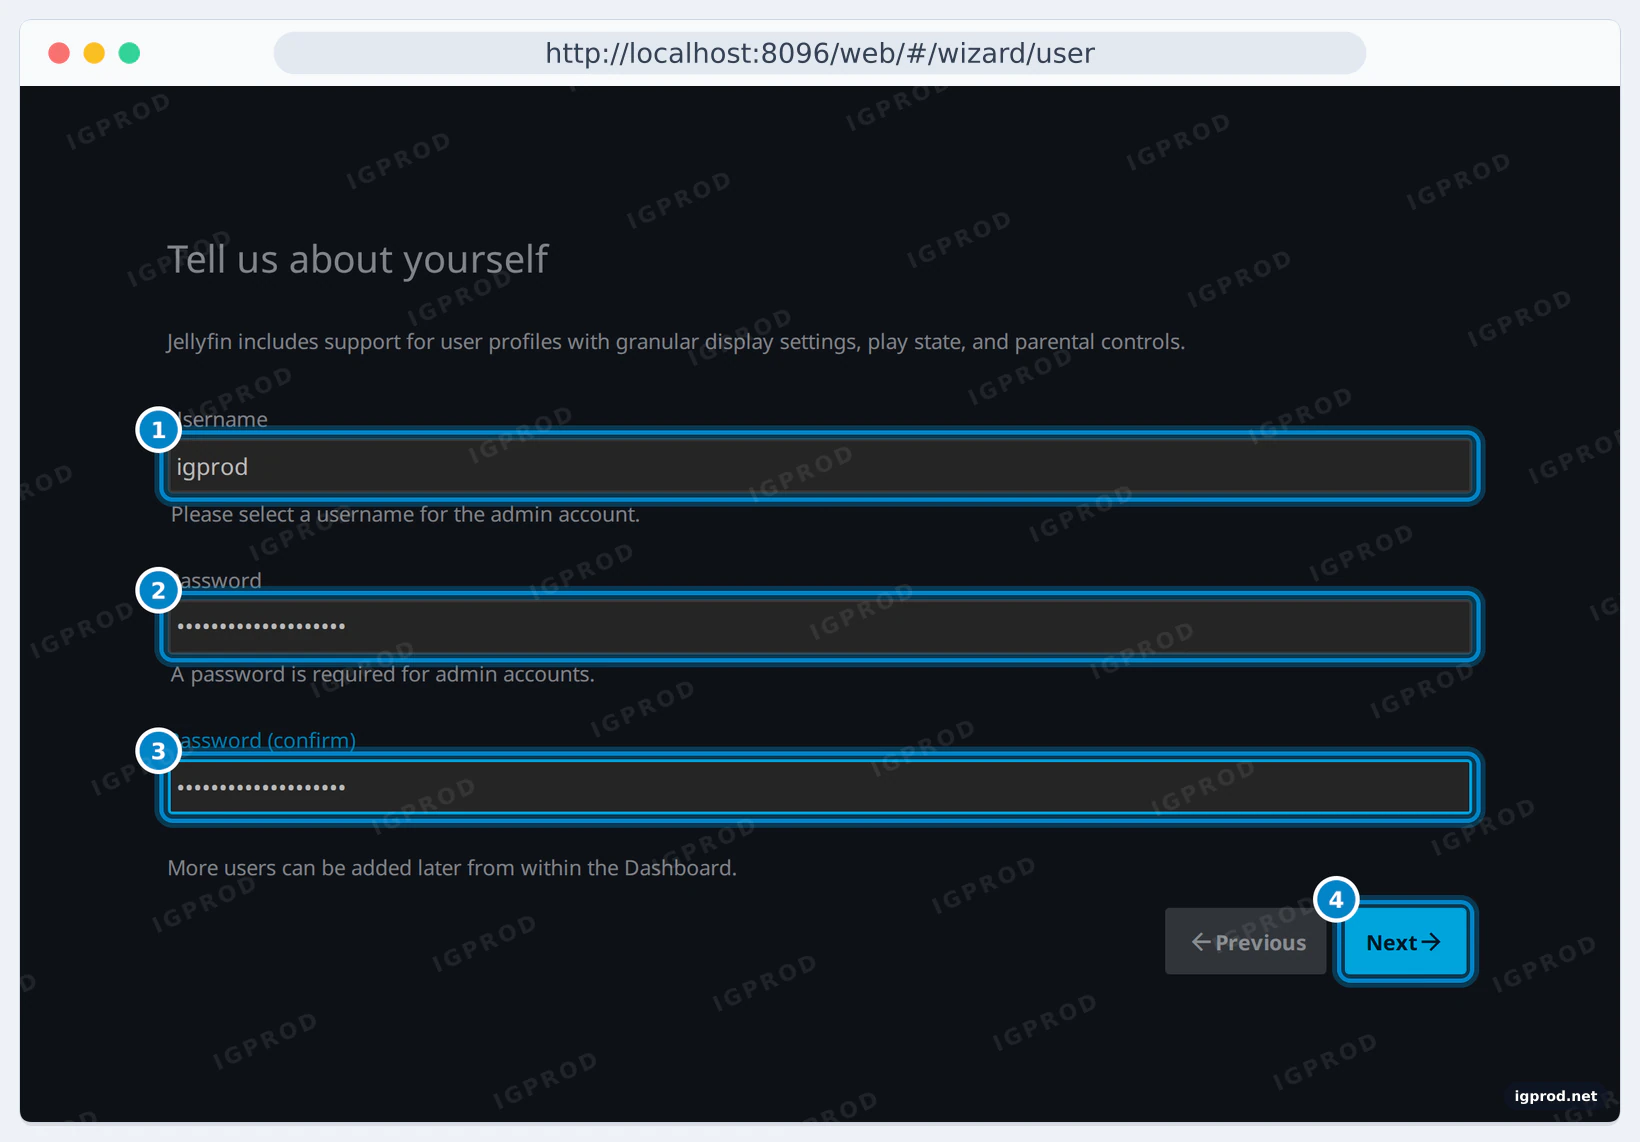
Jellyfin proposes the name MyJellyfinUser: replace it with your own. A password is required for the admin account. You can add the other users of your home later, in the Dashboard.
Add your movie library
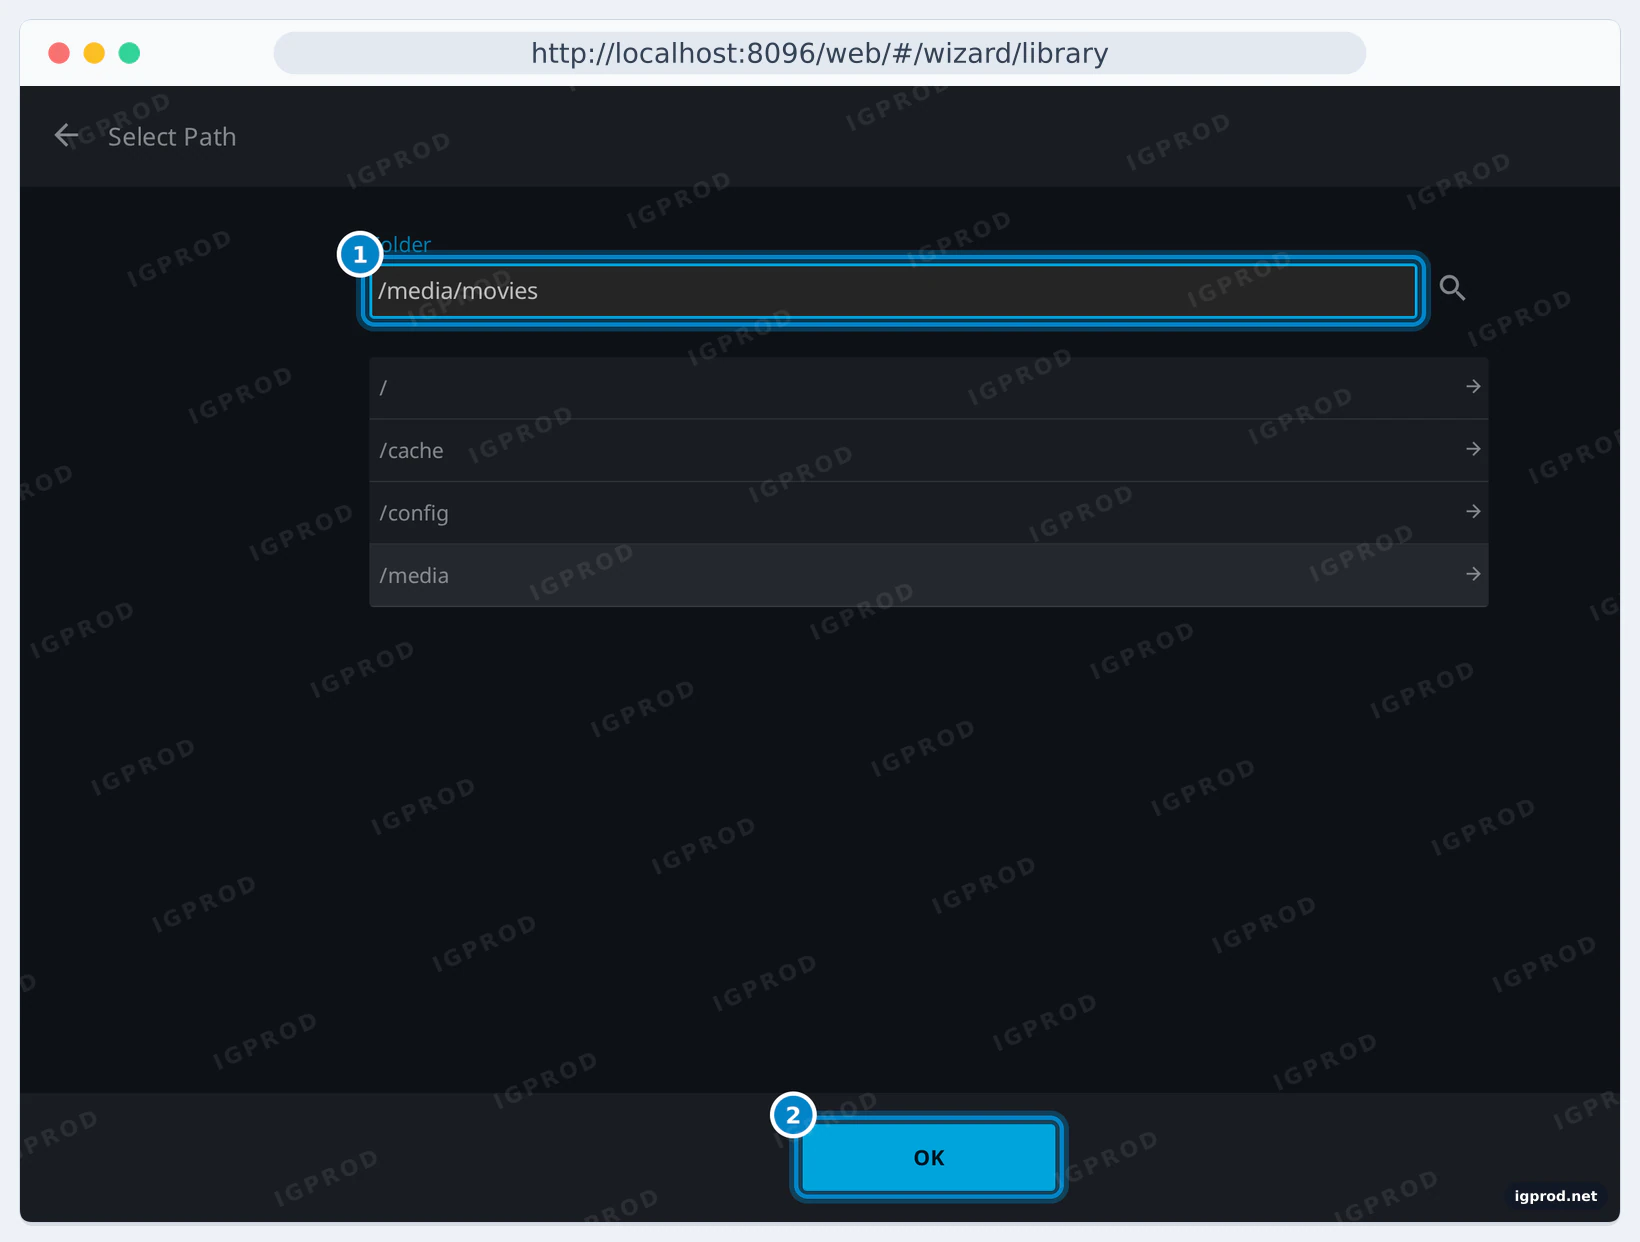
Click Add Media Library. Choose Movies as content type and type a display name. Then click + next to Folders. The Select Path window shows the folders of the container, not the folders of your server. Type /media/movies, the path of step 2, and click OK:
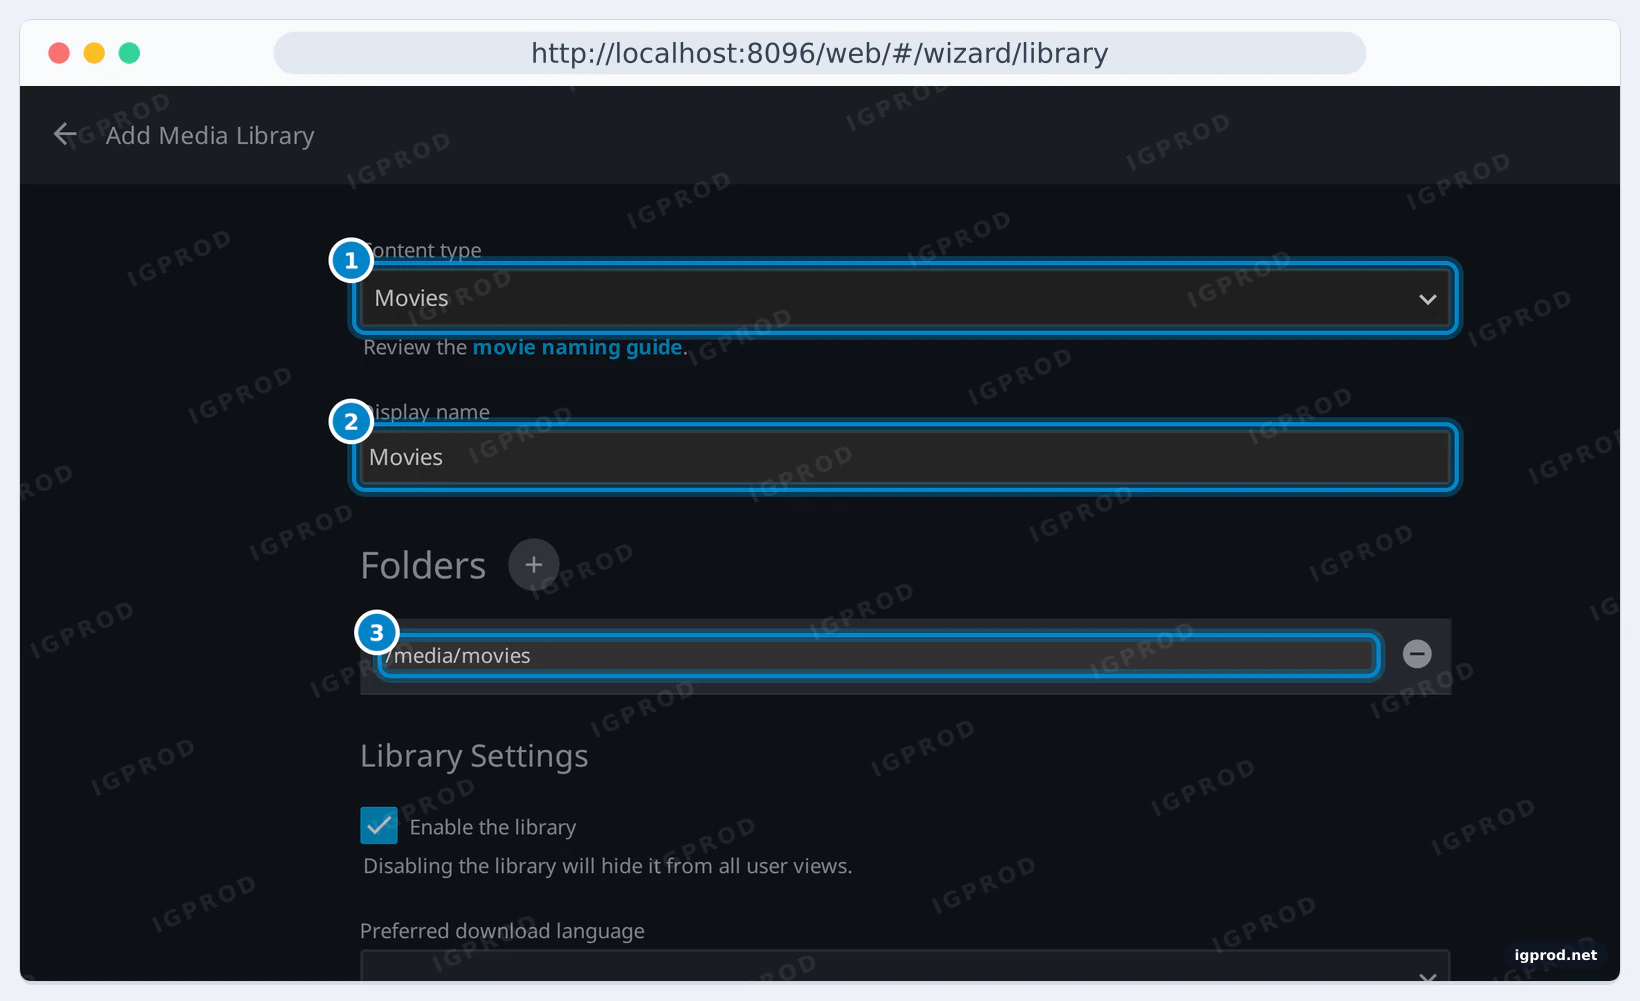
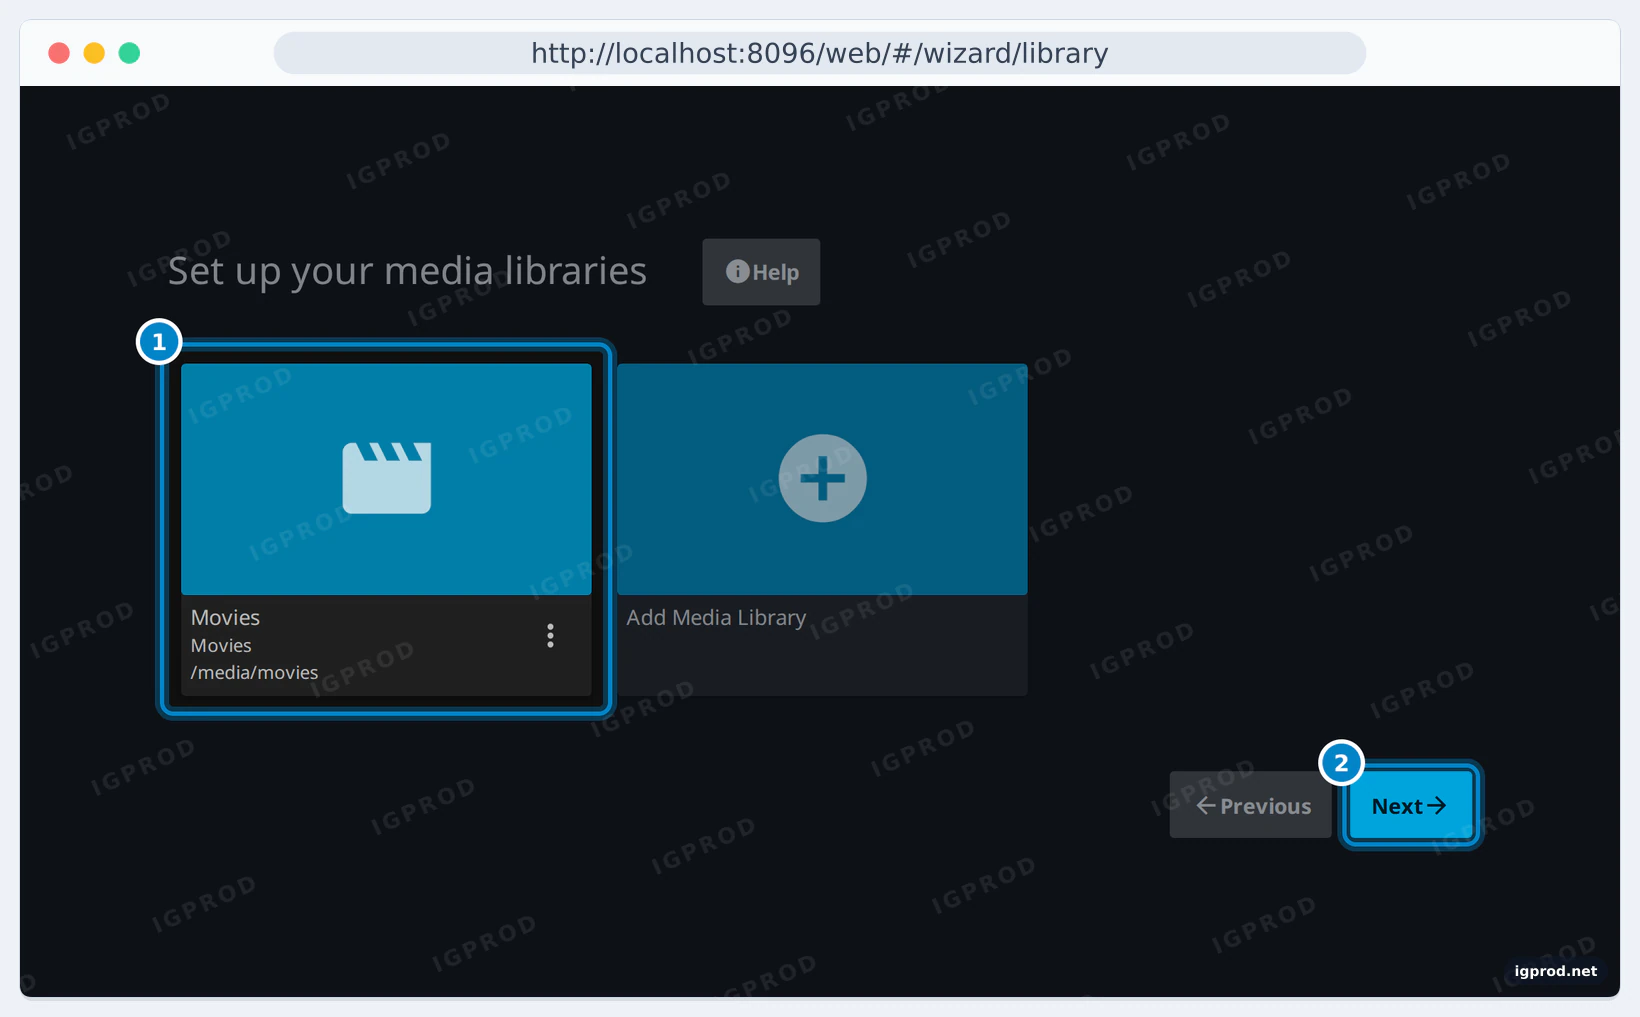
Before you click OK, scroll down and clear Save subtitles into media folders. It is on by default, but our media folder is read-only, so Jellyfin could not save subtitles there. It then keeps them in its own folders. Click OK: the library appears on the page.
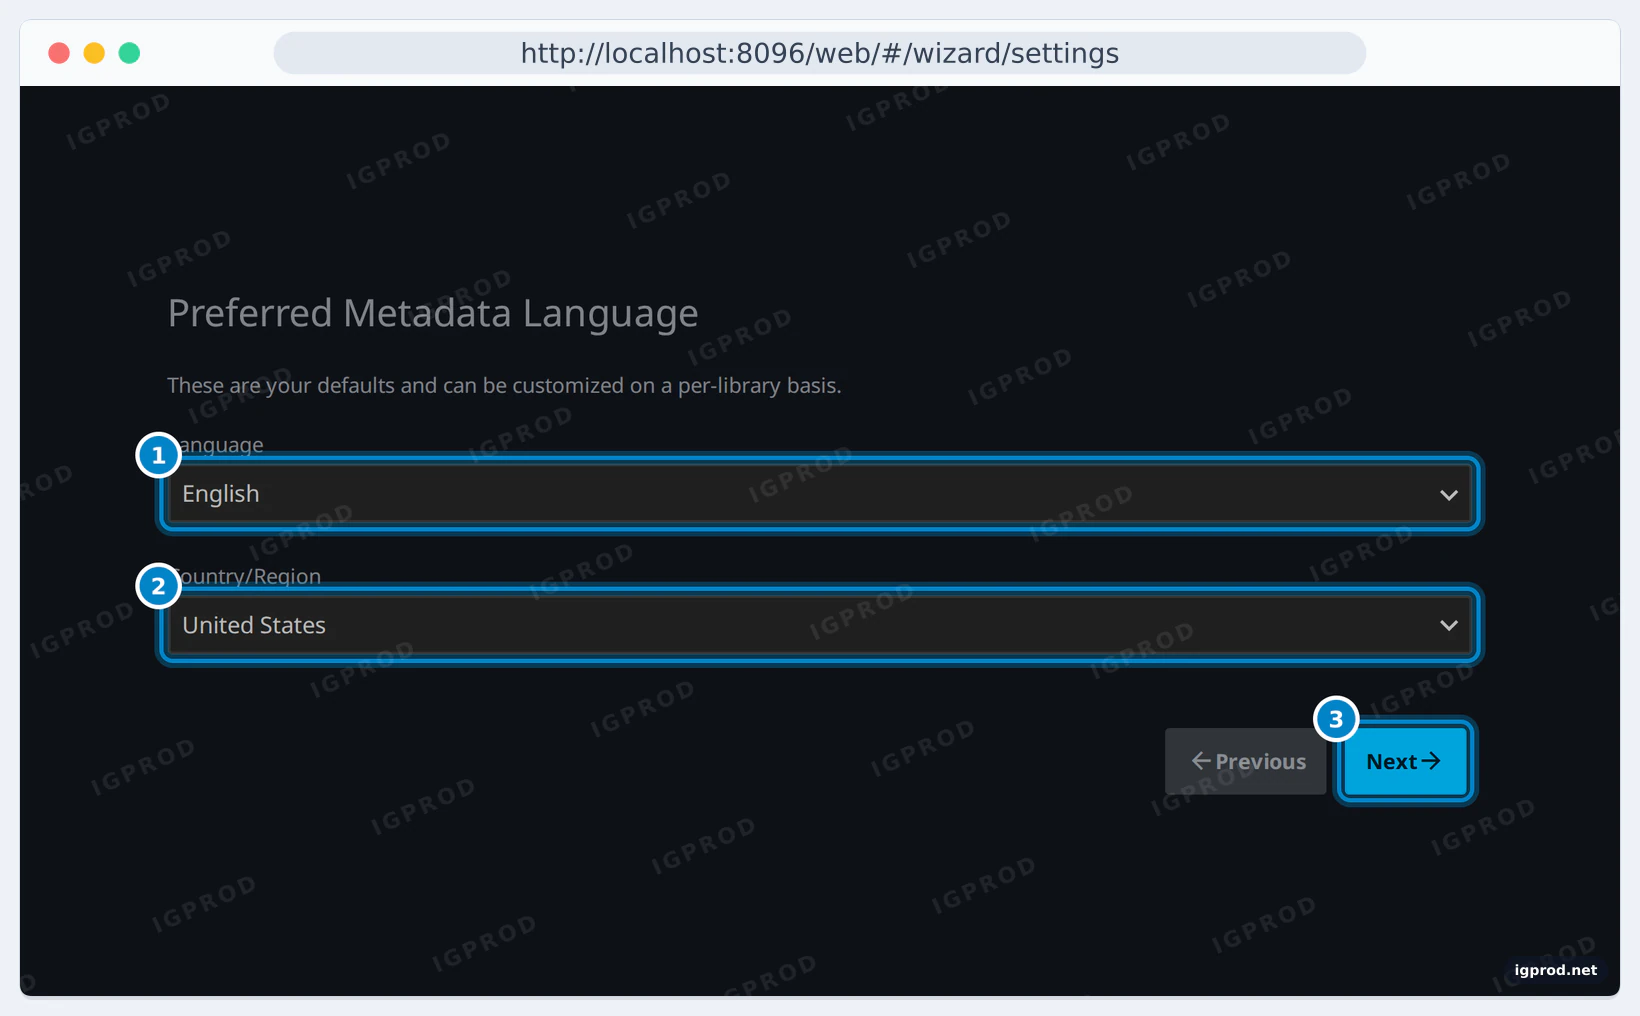
Choose the metadata language
Remote access
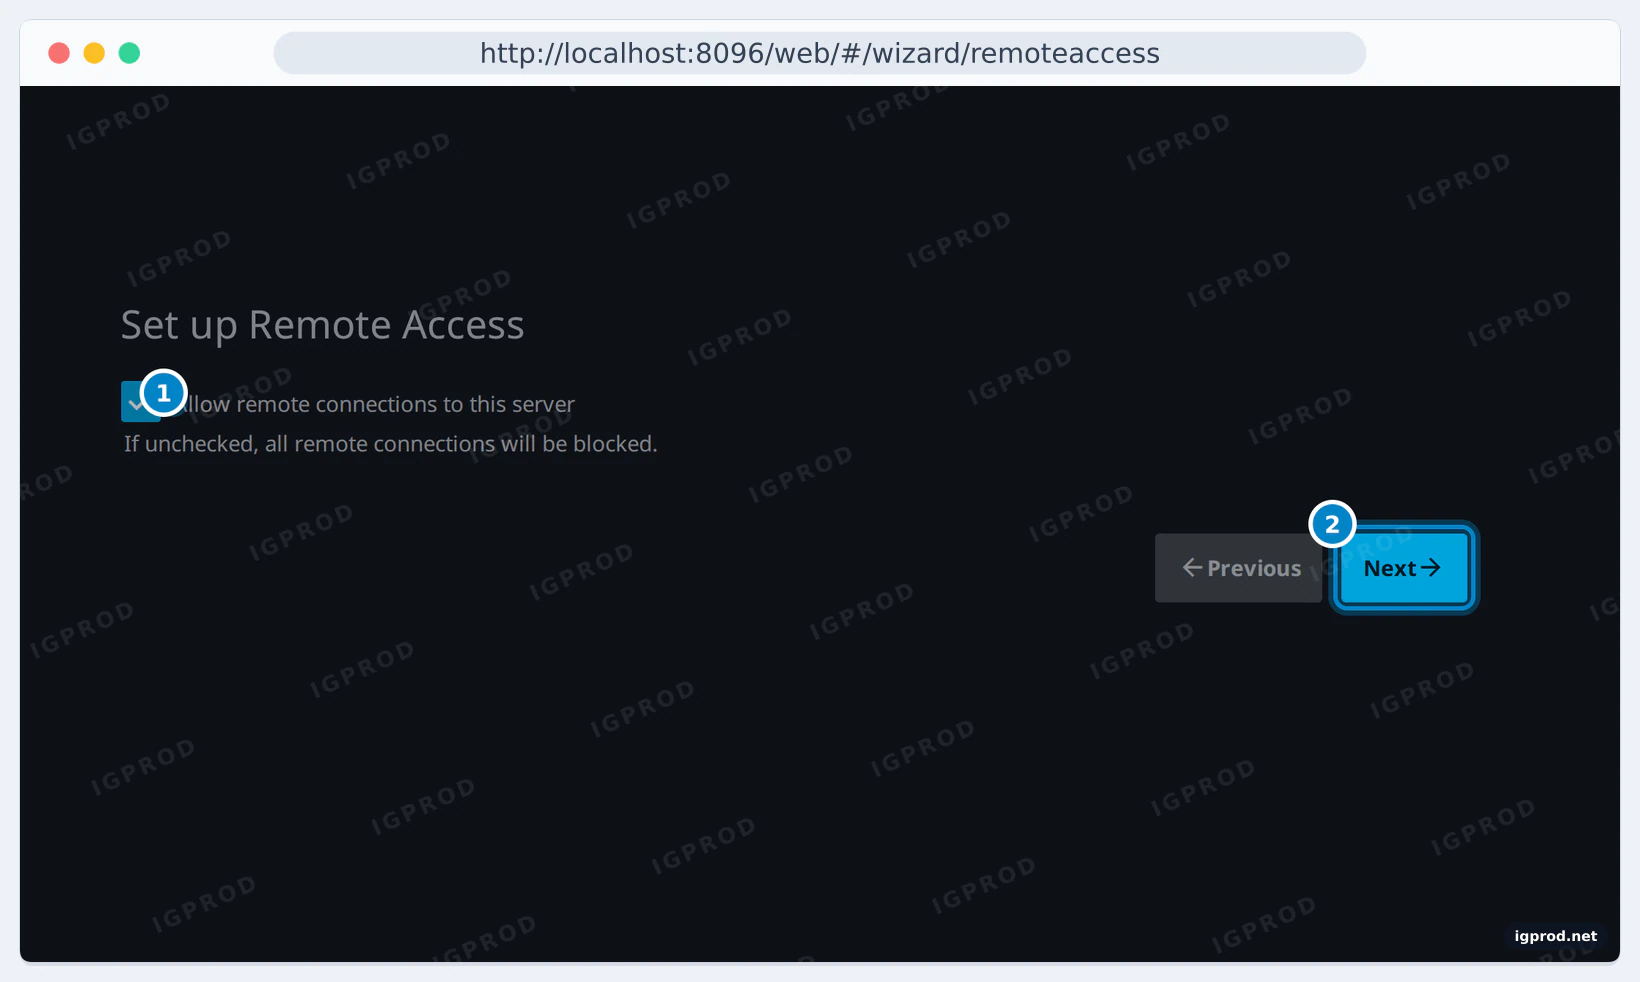
The wizard explains: "If unchecked, all remote connections will be blocked." Leave it on if you want to watch from outside your home later, through a VPN or a reverse proxy (see below). The option does not open anything on your router.
Finish
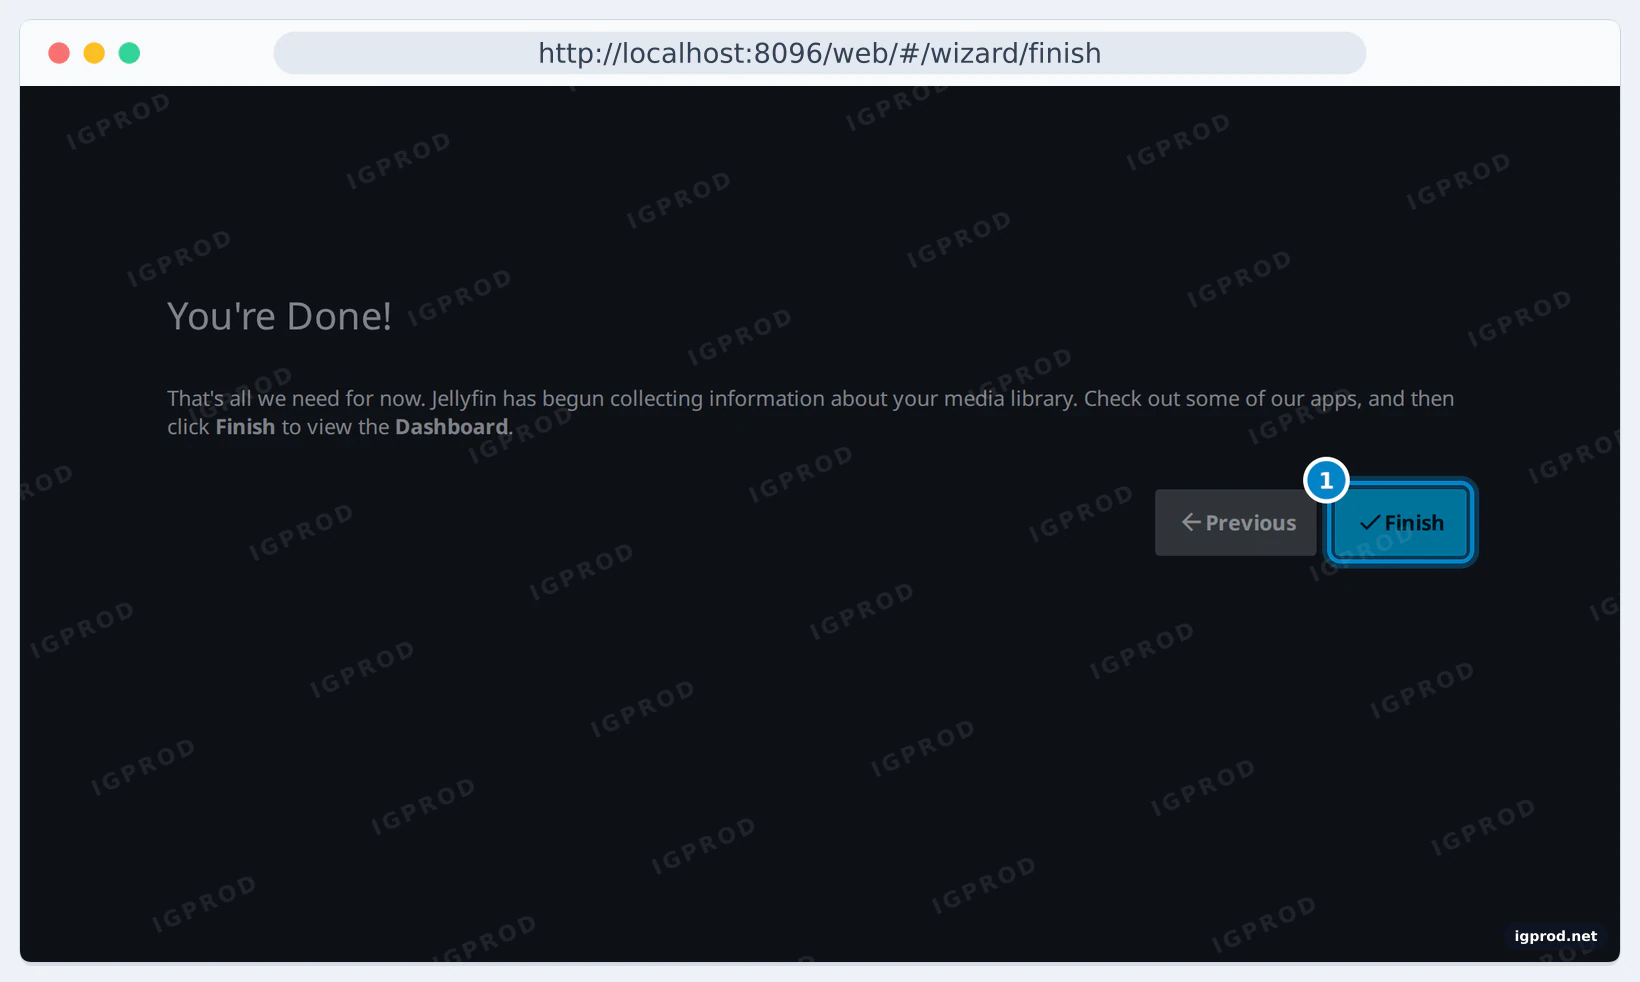
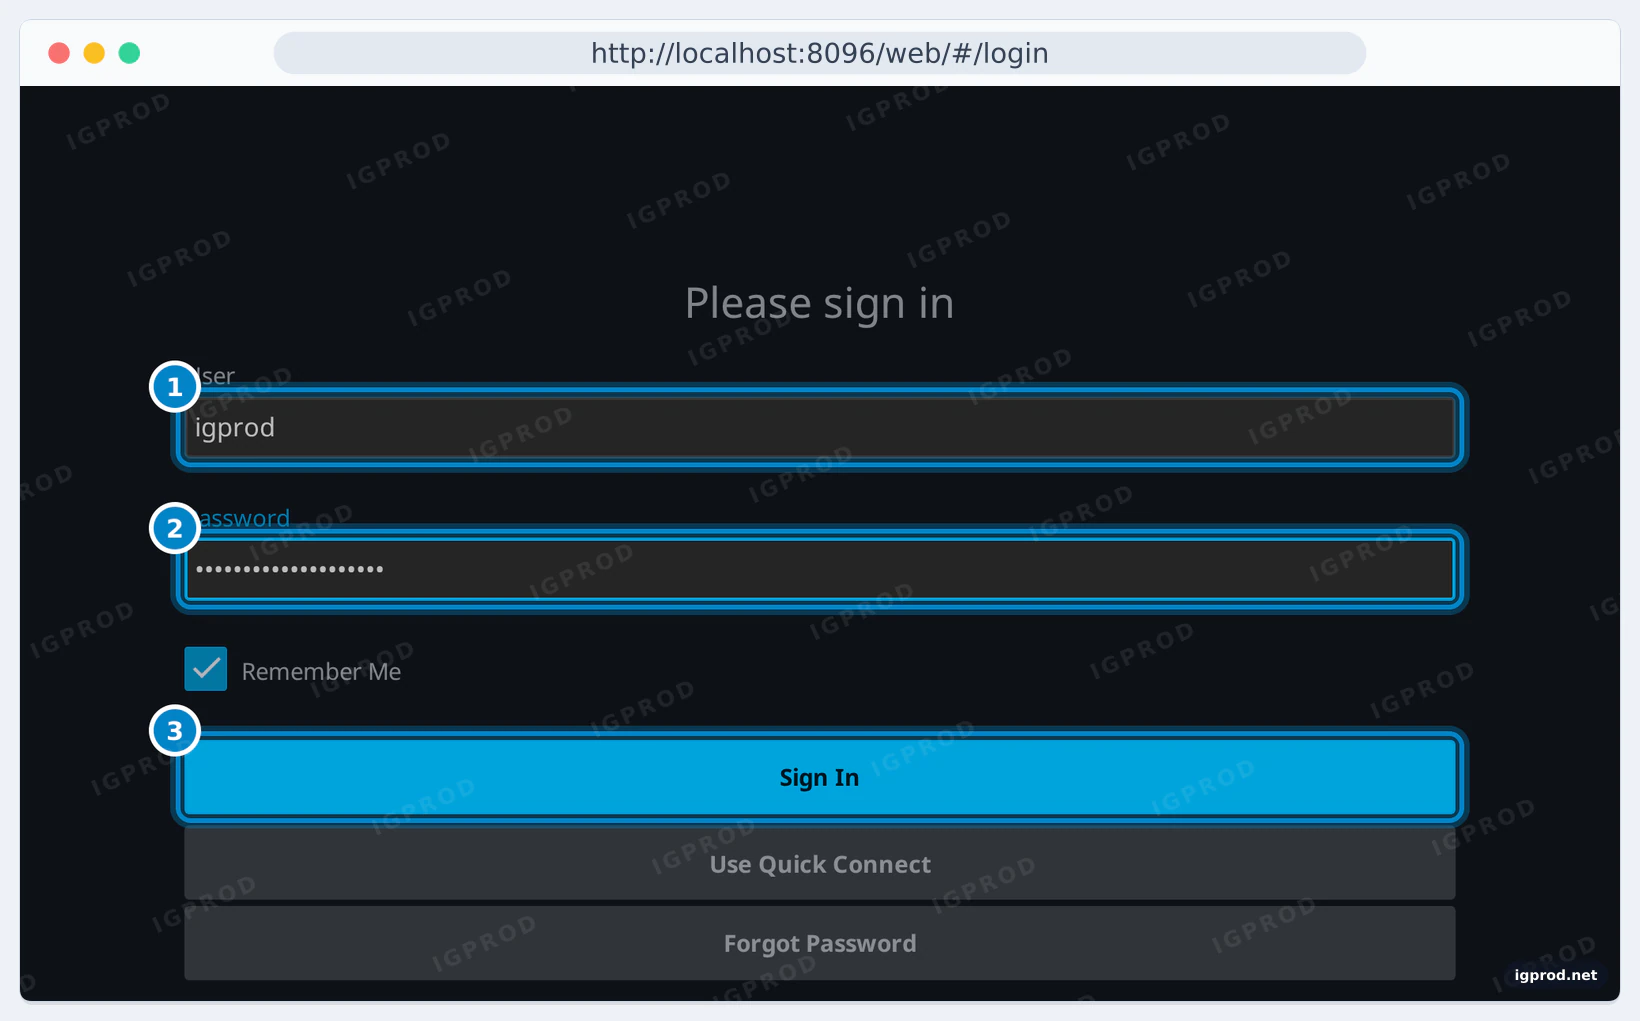
Step 5: Sign in and play your first movie
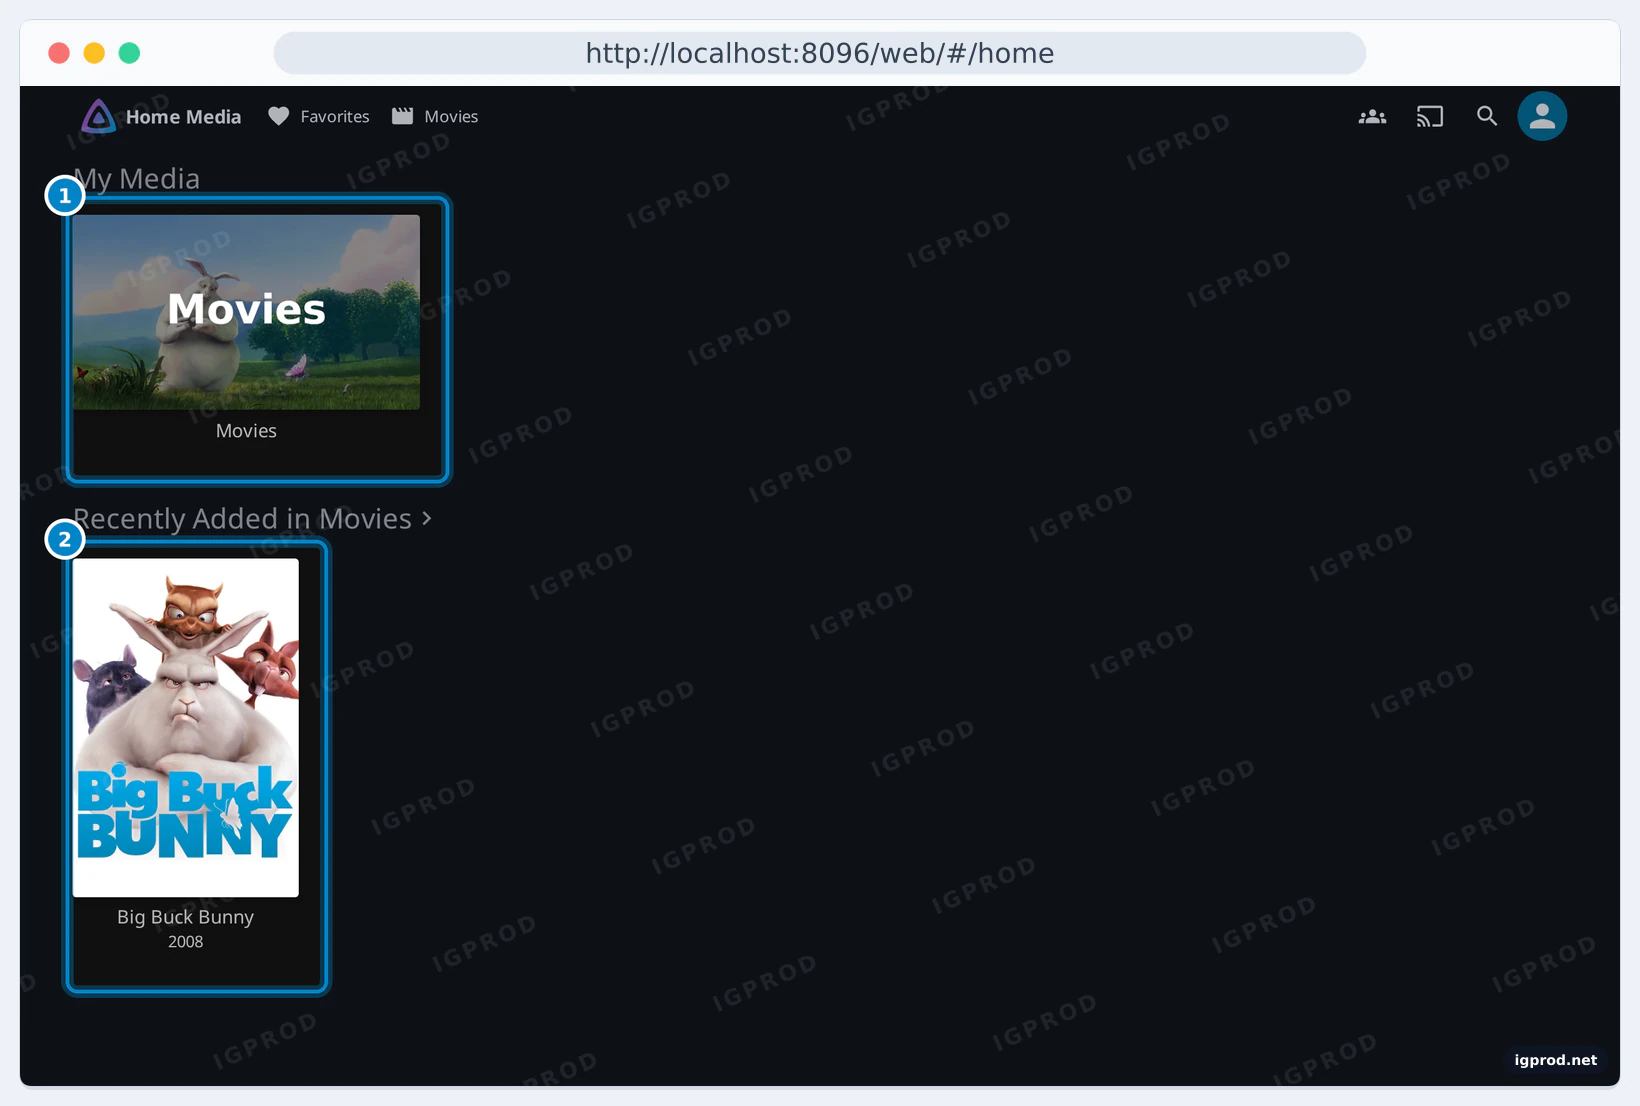
The home page shows your libraries and the latest movies. Jellyfin found the poster and the details of our test movie from its folder name alone:
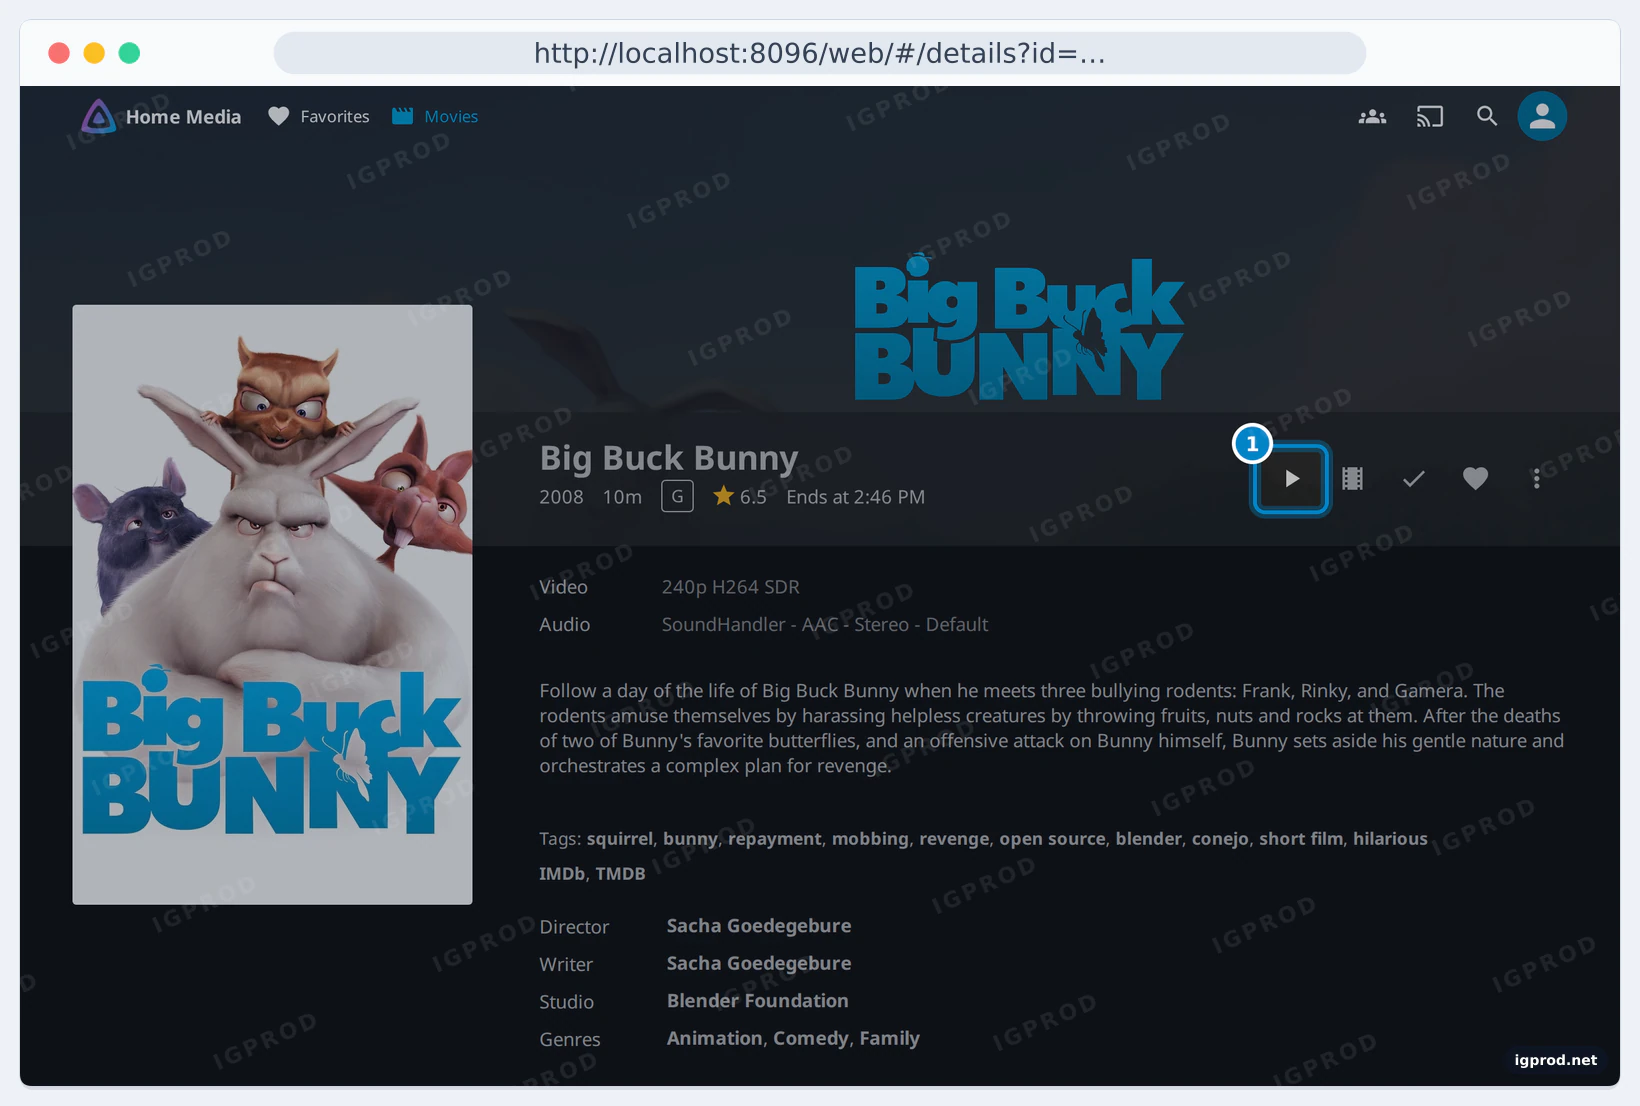
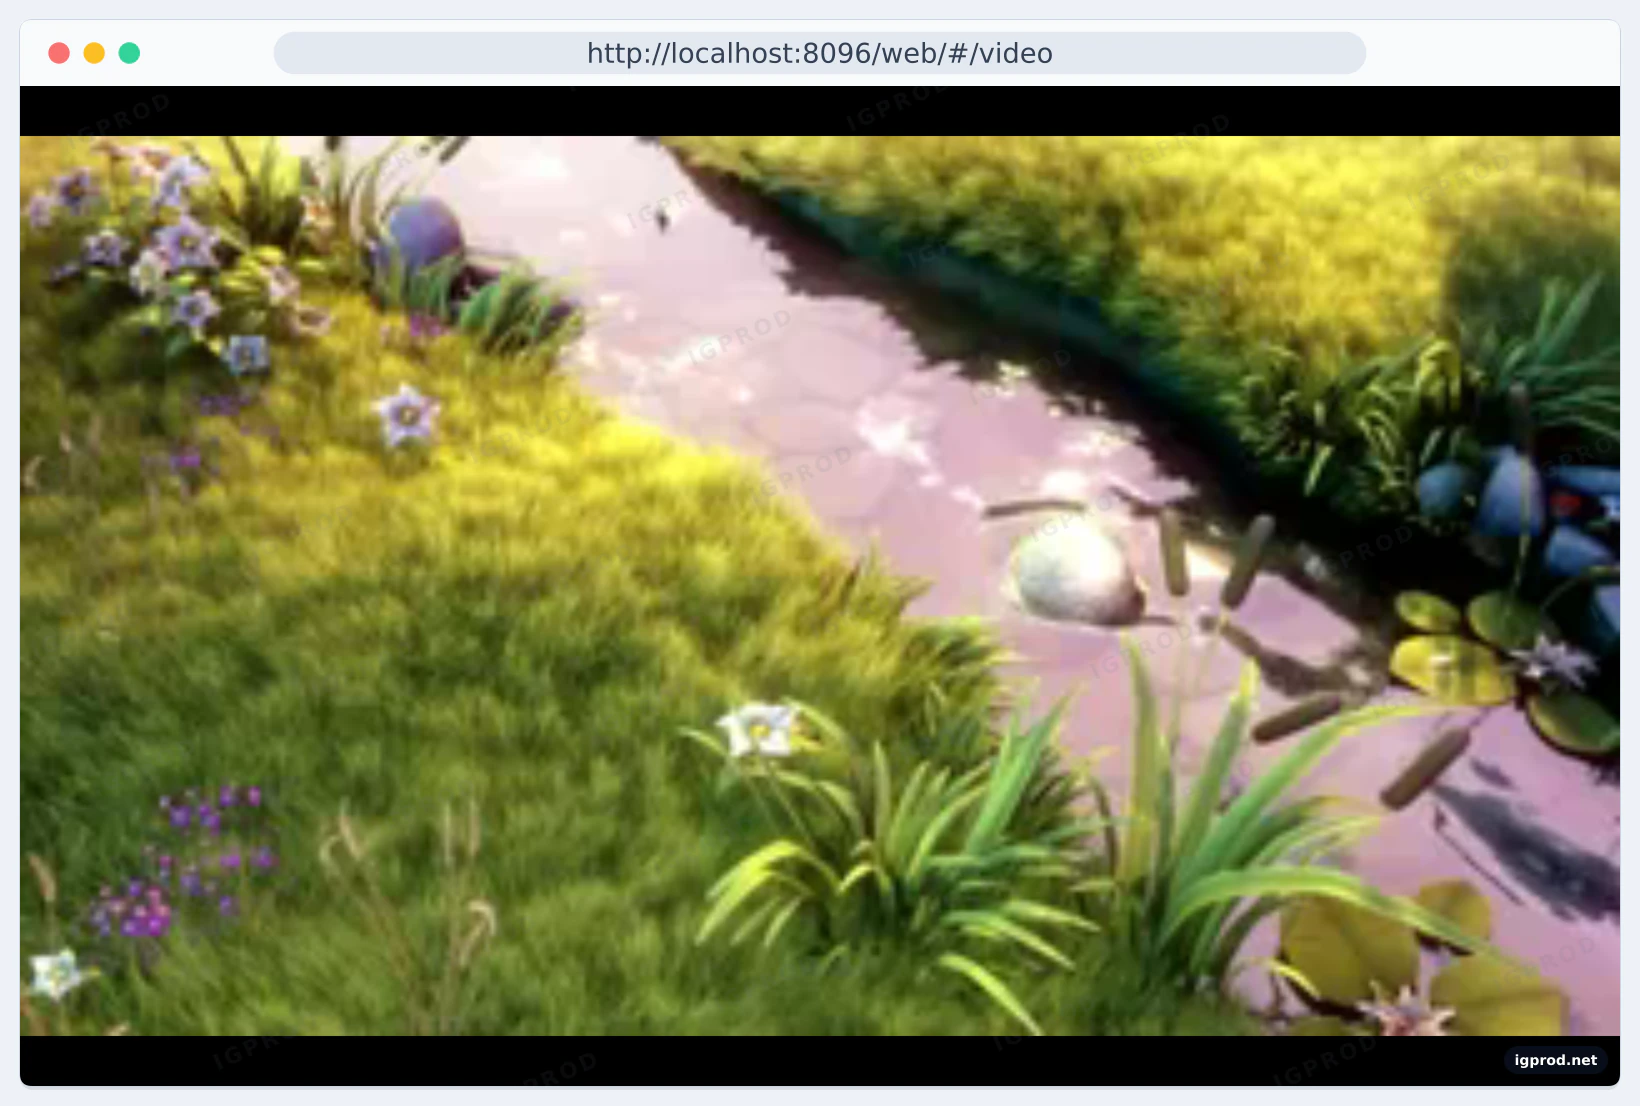
The browser played the file directly, without transcoding: its H.264 video and AAC audio are formats that the browser reads. When a device cannot read a format, Jellyfin converts the video while it plays. That is transcoding, and it needs much more processor power.
Run Jellyfin with docker run instead
If you do not use Compose, this one command creates the same container. We tested it with the same folders:
docker run -d --name jellyfin --user 1000:1000 \
  -p 8096:8096/tcp -p 7359:7359/udp \
  -v ~/jellyfin/config:/config -v ~/jellyfin/cache:/cache \
  --mount type=bind,source=/srv/media,target=/media,readonly \
--restart=unless-stopped jellyfin/jellyfin:latestdocker ps --format "{{.Names}} {{.Status}} {{.Ports}}"jellyfin Up 24 seconds (healthy) 0.0.0.0:7359->7359/udp, [::]:7359->7359/udp, 0.0.0.0:8096->8096/tcp, [::]:8096->8096/tcpDo not run both versions at the same time: they use the same container name and the same port. The Compose file is easier to keep, update and share, which is why we use it in this guide. To learn more, read what Docker Compose is and why it helps.
Update Jellyfin
cd ~/jellyfin
docker compose pull && docker compose up -d Image jellyfin/jellyfin:latest Pulling
Image jellyfin/jellyfin:latest Pulled
Container jellyfin RunningWhen the registry has a newer image, Compose downloads it and creates the container again. Your config folder stays, so your users and libraries stay too. On our test day, the image was already the newest, so the container kept running.
Before an update to a new version line, back up the config folder (next section) and read the release notes.
Back up and restore Jellyfin
Stop Jellyfin, save the config folder in an archive, and start Jellyfin again. The cache folder can be rebuilt, and your media files have their own backups:
cd ~/jellyfin
docker compose stop && tar czf ~/jellyfin-config-backup.tgz -C ~/jellyfin config && docker compose start
ls -lh ~/jellyfin-config-backup.tgz Container jellyfin Stopping
Container jellyfin Stopped
Container jellyfin Starting
Container jellyfin Started
3.1M /home/igprod/jellyfin-config-backup.tgzOur archive was 3.1 MB with one movie. With a big library and its posters, expect much more. Copy the archive to another disk or machine.
To restore, stop and remove the container, keep the current folder aside, extract the archive, and start again:
cd ~/jellyfin
docker compose down
mv config config.before-restore
tar xzf ~/jellyfin-config-backup.tgz -C ~/jellyfin
docker compose up -d Container jellyfin Stopping
Container jellyfin Stopped
Container jellyfin Removing
Container jellyfin Removed
Container jellyfin Creating
Container jellyfin Created
Container jellyfin Starting
Container jellyfin StartedWe checked the result: the wizard did not start again, our user could sign in, and the API listed the same library and movie:
"Name":"Movies"
"Locations":["/media/movies"]
"Name":"Big Buck Bunny"
Jellyfin 12.4 also has a Backups page in the Dashboard. We tested the folder backup above because it works with any version and needs nothing more than tar.
Hardware acceleration
Transcoding with the processor alone is slow, above all for 4K video. Jellyfin can use a graphics chip instead: Intel Quick Sync, AMD or NVIDIA. The image comes with its own FFmpeg build that supports these methods. At start, our log listed cuda, vaapi, qsv, drm, opencl, vulkan and amf.
To use them, the container needs access to the graphics device (for Intel and AMD, /dev/dri), and you choose the method in the transcoding settings of the Dashboard. We did not test this part: our lab has no graphics chip. Follow the hardware acceleration page of the Jellyfin documentation for your hardware.
Watch from outside your home, safely
Do not forward port 8096 on your router. The Jellyfin documentation itself says that opening a port directly to the internet is insecure and not recommended. Two safer ways:
- A VPN such as WireGuard or Tailscale. Your phone joins your home network, and you open Jellyfin as at home. Nothing is public.
- A reverse proxy with HTTPS, such as Nginx Proxy Manager, in front of Jellyfin. Then add the address of the proxy in Known proxies on the Networking page, so that Jellyfin sees the real address of each visitor. Our guide to fix the real IP behind Nginx Proxy Manager explains why this matters.
Troubleshooting
"Bind for 0.0.0.0:8096 failed: port is already allocated"
Another container already uses port 8096. We got this error when we started a second container on the same port:
docker: Error response from daemon: failed to set up container networking: driver failed programming external connectivity on endpoint port-test (…): Bind for 0.0.0.0:8096 failed: port is already allocatedFind the other container with docker ps. Emby, for example, also uses 8096. Stop it, or publish Jellyfin on another host port, for example "8097:8096/tcp". Our Emby vs Jellyfin trial runs both servers side by side this way.
"Access to the path '/config/log' is denied"
Jellyfin cannot write to its config folder. We reproduced it with a folder created by root while Jellyfin runs as the user 1000. The container stops at once with:
Unhandled exception. System.UnauthorizedAccessException: Access to the path '/config/log' is denied.
 ---> System.IO.IOException: Permission denied
Give the folders to the user of your Compose file, then start again:
sudo chown -R 1000:1000 ~/jellyfin/config ~/jellyfin/cache
docker compose up -d
The library stays empty
Look at the folder from inside the container, with the path that Jellyfin sees:
docker exec jellyfin ls -l /media/movies "/media/movies/Big Buck Bunny (2008)"/media/movies:
total 4
drwxr-xr-x 2 1000 1000 4096 Nov 13 13:28 Big Buck Bunny (2008)
/media/movies/Big Buck Bunny (2008):
total 63144
-rw-r--r-- 1 1000 1000 64657027 Nov 13 13:28 Big Buck Bunny (2008).mp4If the list is empty, the bind mount points to the wrong folder of your server: check source in the Compose file. If you get Permission denied, the files are not readable by the user 1000. When the files are visible, start a new scan of the library from the Dashboard.
Frequently asked questions
What port does Jellyfin use?
Port 8096 (TCP) for the web interface and streaming. Port 8920 (TCP) is for HTTPS, only when you enable it in Jellyfin. Port 7359 (UDP) lets the apps find the server on your local network.
Is Jellyfin free?
Yes. Jellyfin is free and open source, with no paid plan and no premium features. You only pay for the machine that runs it.
Should I use jellyfin/jellyfin or linuxserver/jellyfin?
jellyfin/jellyfin is the official image, built by the Jellyfin project from its source code (also on ghcr.io/jellyfin/jellyfin). The LinuxServer.io and hotio images are made by third parties, from the official Ubuntu packages. All of them work. This guide uses the official one.
Can I run Jellyfin in Docker on Windows or macOS?
It can start, but the Jellyfin project does not support it, and features such as hardware-accelerated transcoding do not work. On these systems, install Jellyfin natively.
Where does Jellyfin keep its data?
In the config folder: settings, users, watch history, the library database and the posters. The cache folder holds temporary files. Your media files stay where they are, untouched.
Can Jellyfin and Plex run on the same machine?
Yes. Plex uses port 32400 and Jellyfin 8096, so they do not collide, and both can read the same media folder. Not sure which one to keep? Read our Jellyfin vs Plex comparison.
Related guides
- Emby vs Jellyfin: costs, apps and a safe Docker trial
- Jellyfin vs Plex
- How to install Portainer with Docker, to manage your containers in a browser
- How to install Uptime Kuma with Docker, to get an alert when Jellyfin stops
- Self-hosting for beginners: plan your first service
Sources

Leave a comment
Your email address will not be published. Required fields are marked *