
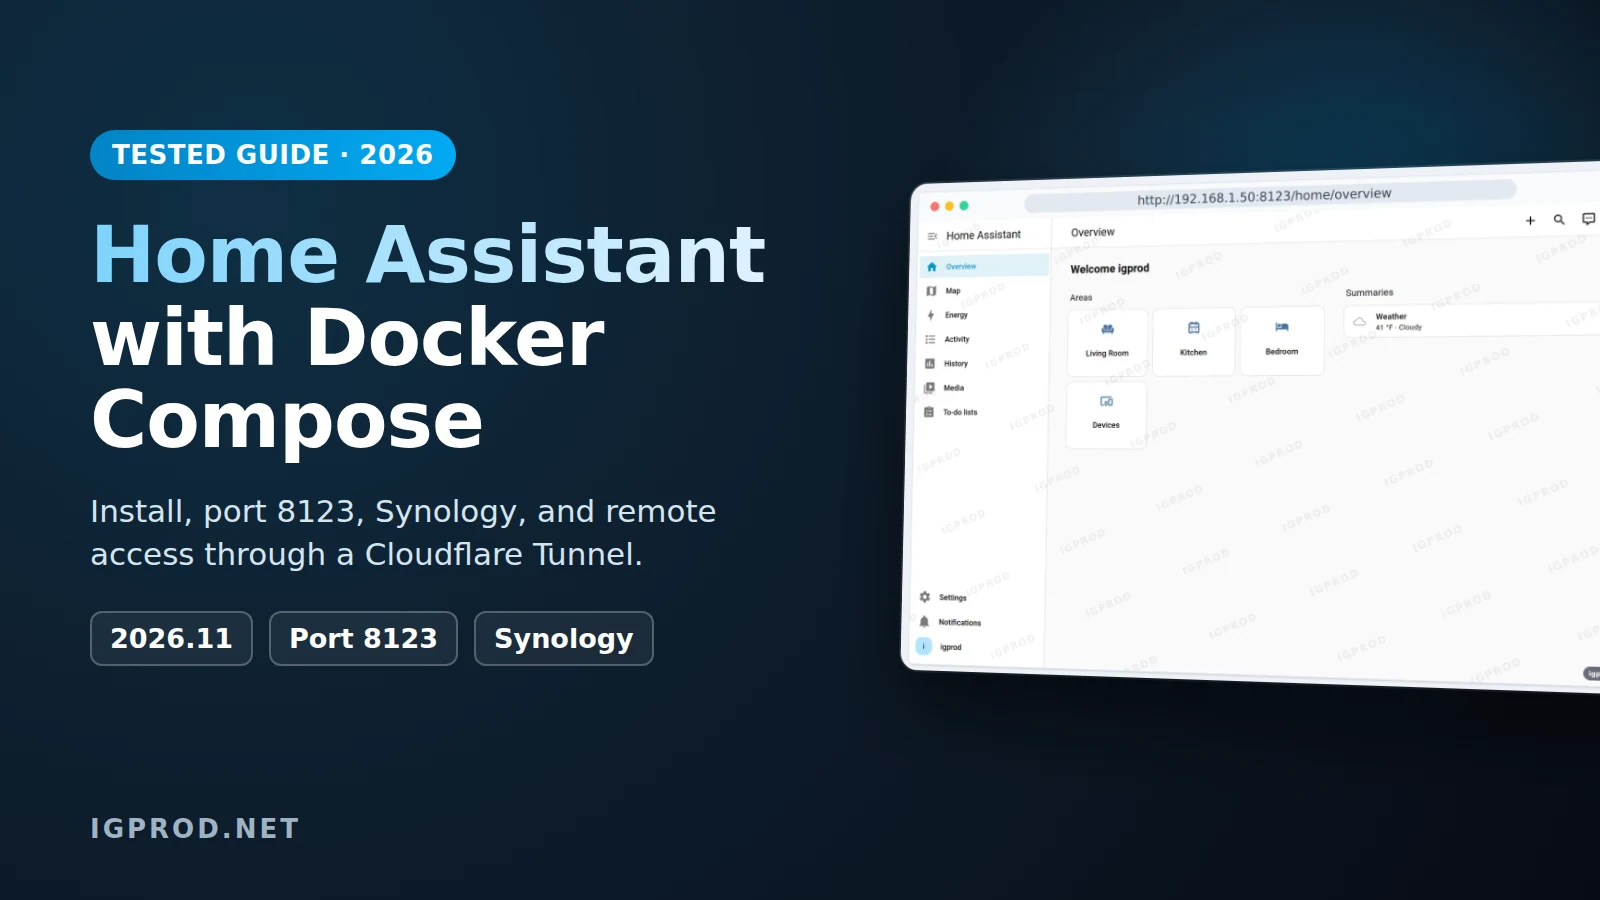
Home Assistant runs your smart home on your own hardware: lights, sensors, cameras and automations, without a cloud account. The easiest way to run it next to other services on a Linux server or a NAS is Home Assistant Container with Docker Compose.
This guide installs it with the compose file of the official documentation and answers what people search most about it: port 8123, a Synology NAS, and remote access through a Cloudflare Tunnel without the 400: Bad Request error.
We tested every step on 13 November 2026 with Home Assistant 2026.11.1, released on 9 November. The screenshots come from a Linux lab with Docker Compose 2.29. We also ran the same compose file on a Synology NAS with DSM 7.4.1 (Docker 24.0.2, Compose 2.20), and opened the lab through a Cloudflare Quick Tunnel with cloudflared 2026.11.0.
New since 2026.8: the port and the reverse-proxy settings are in the web interface, under Settings > System > Network. Many older guides still tell you to add an http: block to configuration.yaml.
Home Assistant Container or Home Assistant OS?
Home Assistant OS is a complete system for a Raspberry Pi, a mini PC or a virtual machine. Home Assistant Container is only the Home Assistant application, in a Docker container on a system that you already run. The documentation compares them like this:
| Feature | Home Assistant OS | Container |
|---|---|---|
| Automations, dashboards, integrations, blueprints | Yes | Yes |
| Backups | Yes | Yes |
| Apps (formerly called add-ons) | Yes | No |
| One-click updates | Yes | No |
Apps are extra programs that Home Assistant OS installs for you. With Container, you run that software yourself, often in its own container next to Home Assistant. If your server or NAS already runs Docker, Container is the simple choice.
What you need
- A Linux machine or a NAS with Docker and the Compose plugin. Check with
docker compose version. - Free port 8123 on that machine.
- About 2.5 GB of disk space: the image used 2.41 GB in our lab. Our idle lab instance used about 620 MB of RAM.
The Home Assistant documentation describes this method for Linux. We tested it on Linux hosts only.
Step 1: Create the folder and compose.yaml
Create a folder for Home Assistant, with a config folder inside. On a Synology NAS, use /volume1/docker/homeassistant.
mkdir -p homeassistant/config
cd homeassistant
nano compose.yaml
Paste the compose file of the documentation. We changed only the configuration path and the time zone:
services:
  homeassistant:
    container_name: homeassistant
    image: "ghcr.io/home-assistant/home-assistant:stable"
    volumes:
      - ./config:/config
      - /etc/localtime:/etc/localtime:ro
      - /run/dbus:/run/dbus:ro
    restart: unless-stopped
    stop_grace_period: 60s
    privileged: true
    network_mode: host
    environment:
TZ: America/New_Yorkimage: thestabletag always points to the latest release. To stay on one version, use a version tag such as2026.11.1../config:/config: all your settings, your history database and the logs. This folder is your Home Assistant: back it up./etc/localtimeandTZ: the clock of the logs. Write your own tz database name./run/dbus: only needed for the Bluetooth integration, as the documentation notes.stop_grace_period: 60s: gives Home Assistant time to save its data when the container stops.privileged: true: lets Home Assistant use devices of the host, such as USB sticks and Bluetooth.network_mode: host: Home Assistant uses the network of the host directly, so it can find devices on your network. There is noports:line: it listens on port 8123 of the host.
For a Zigbee or Z-Wave USB stick, add the device to the service, as the documentation shows:
services:
  homeassistant:
    ...
    devices:
      - /dev/ttyUSB0:/dev/ttyUSB0
Step 2: Start Home Assistant
docker compose up -d Container homeassistant Creating
Container homeassistant Created
Container homeassistant Starting
Container homeassistant StartedThe first start takes a moment. Our lab answered after about 12 seconds, the NAS after about a minute. Check that the container is up:
docker compose psNAME IMAGE COMMAND SERVICE CREATED STATUS PORTS
homeassistant ghcr.io/home-assistant/home-assistant:stable "/init" homeassistant About a minute ago Up 58 secondsThe PORTS column is empty: with host networking, Docker publishes no port. Home Assistant listens on the host itself, for IPv4 and IPv6:
tcp        0      0 0.0.0.0:8123            0.0.0.0:*               LISTEN
tcp6       0      0 :::8123                 :::*                    LISTEN
Home Assistant also created its files in config: configuration.yaml, automations.yaml, scripts.yaml, scenes.yaml, secrets.yaml, the database home-assistant_v2.db and the log home-assistant.log. To follow the start, run docker compose logs -f homeassistant.
Step 3: Create your account (onboarding)
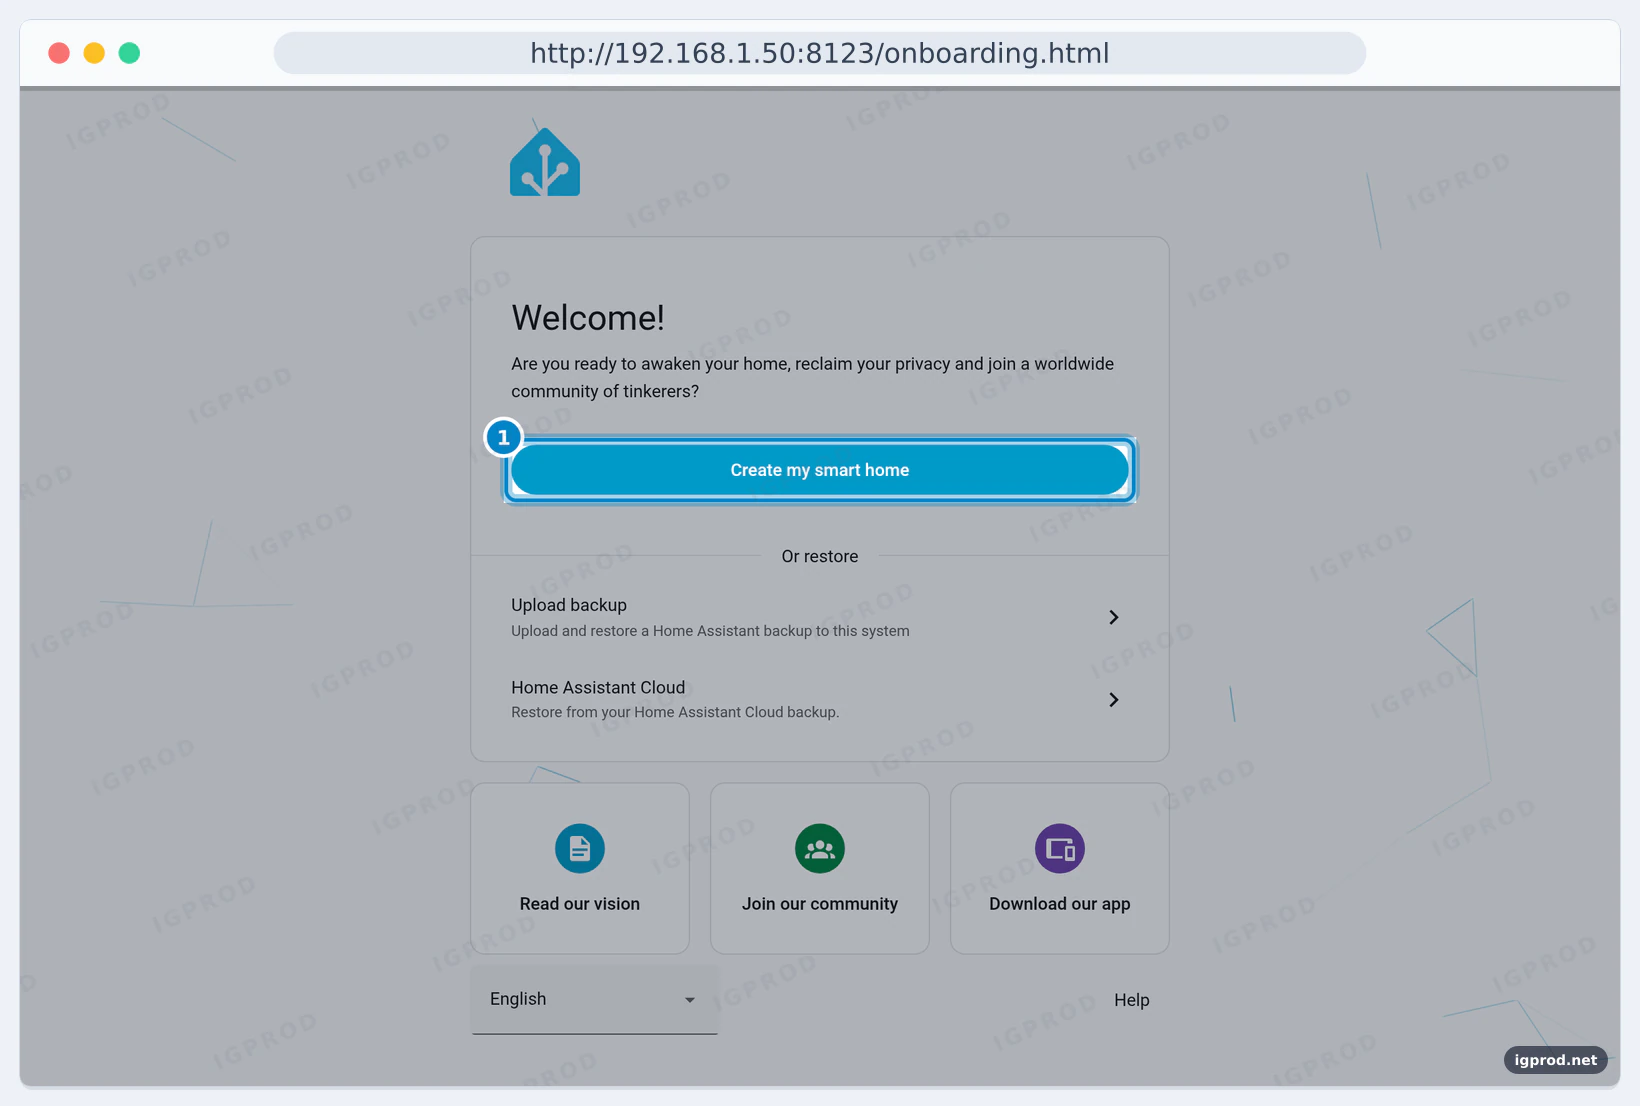
Open http://192.168.1.50:8123, with the IP address of your server. Home Assistant shows its welcome page:
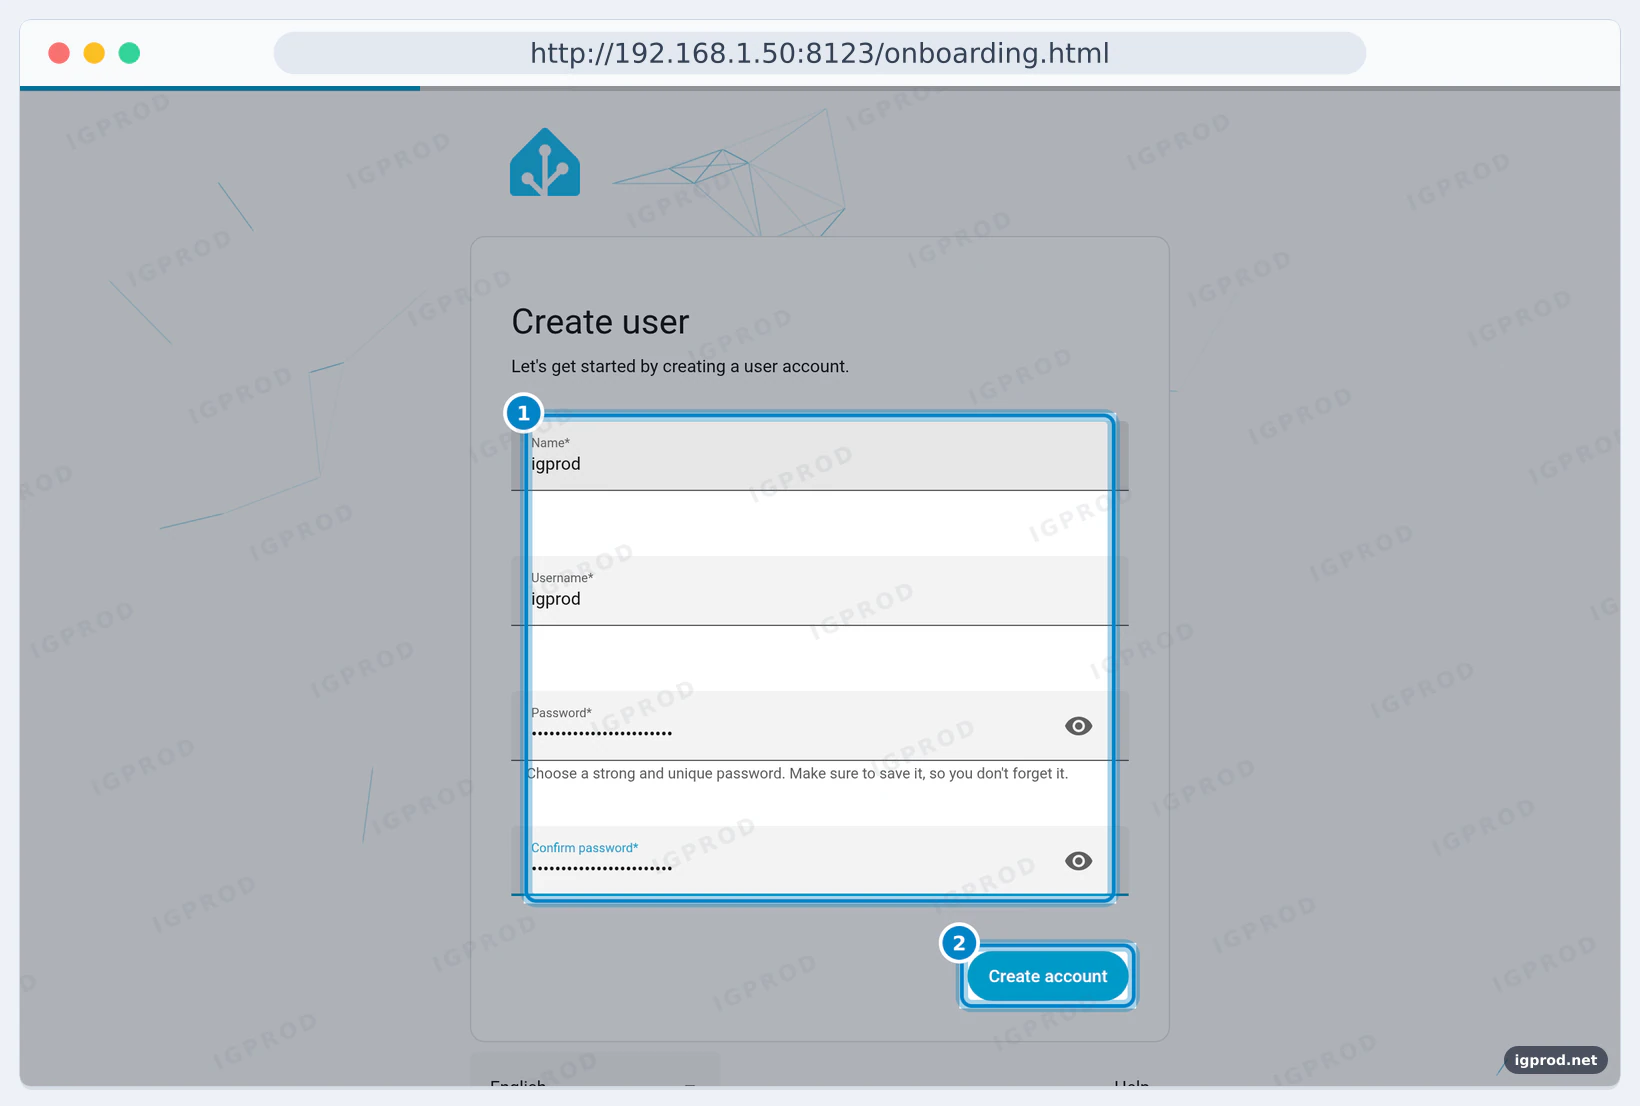
Create the owner account. Write down the password: it is the administrator of your smart home.
Next, set the Home location: search your address, or move the pin. Home Assistant uses it for the sun, the weather and presence. We chose a public place in New York: Home Assistant then set the country (United States), the time zone (America/New_York) and the currency (USD) from it.
On the analytics page, every option was off. Turn on what you want to share, click Next, then Finish. Home Assistant opens the overview:
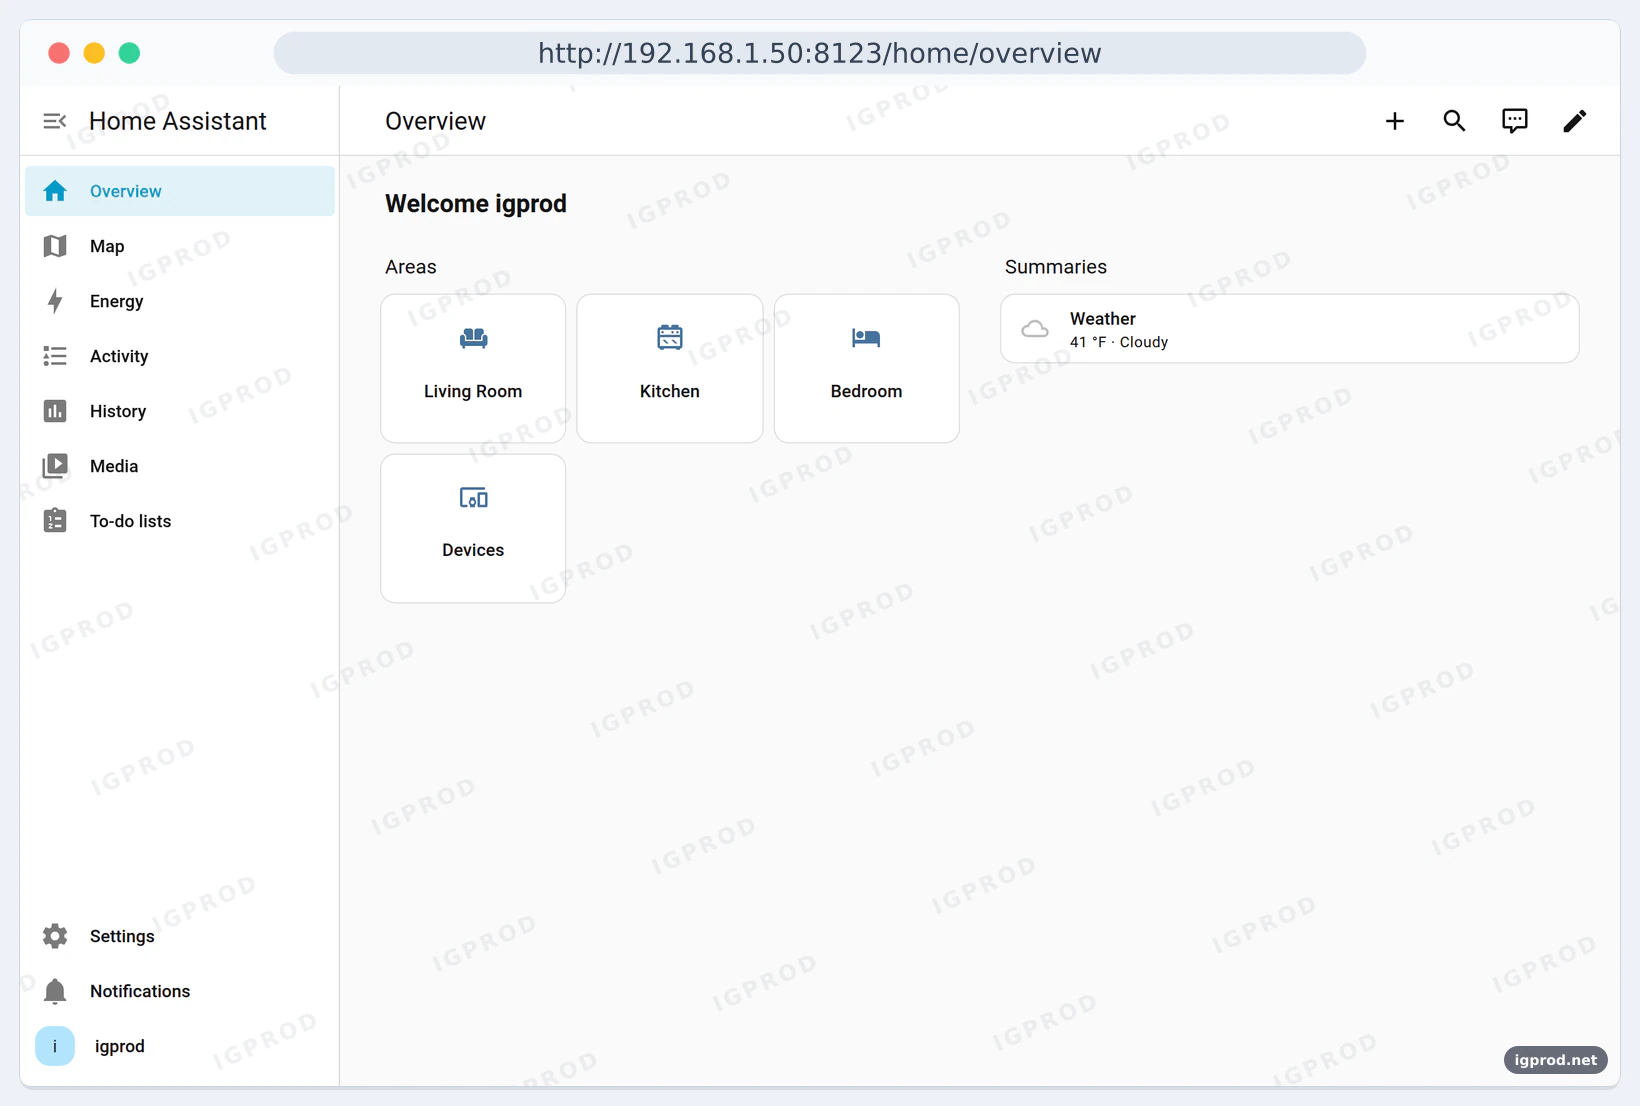
Home Assistant port 8123: check it and change it
Home Assistant Container listens on port 8123. Home Assistant OS uses port 80 since version 2026.8, and 8123 when port 80 is already in use. You see the port in Settings > System > Network, in the HTTP server section:
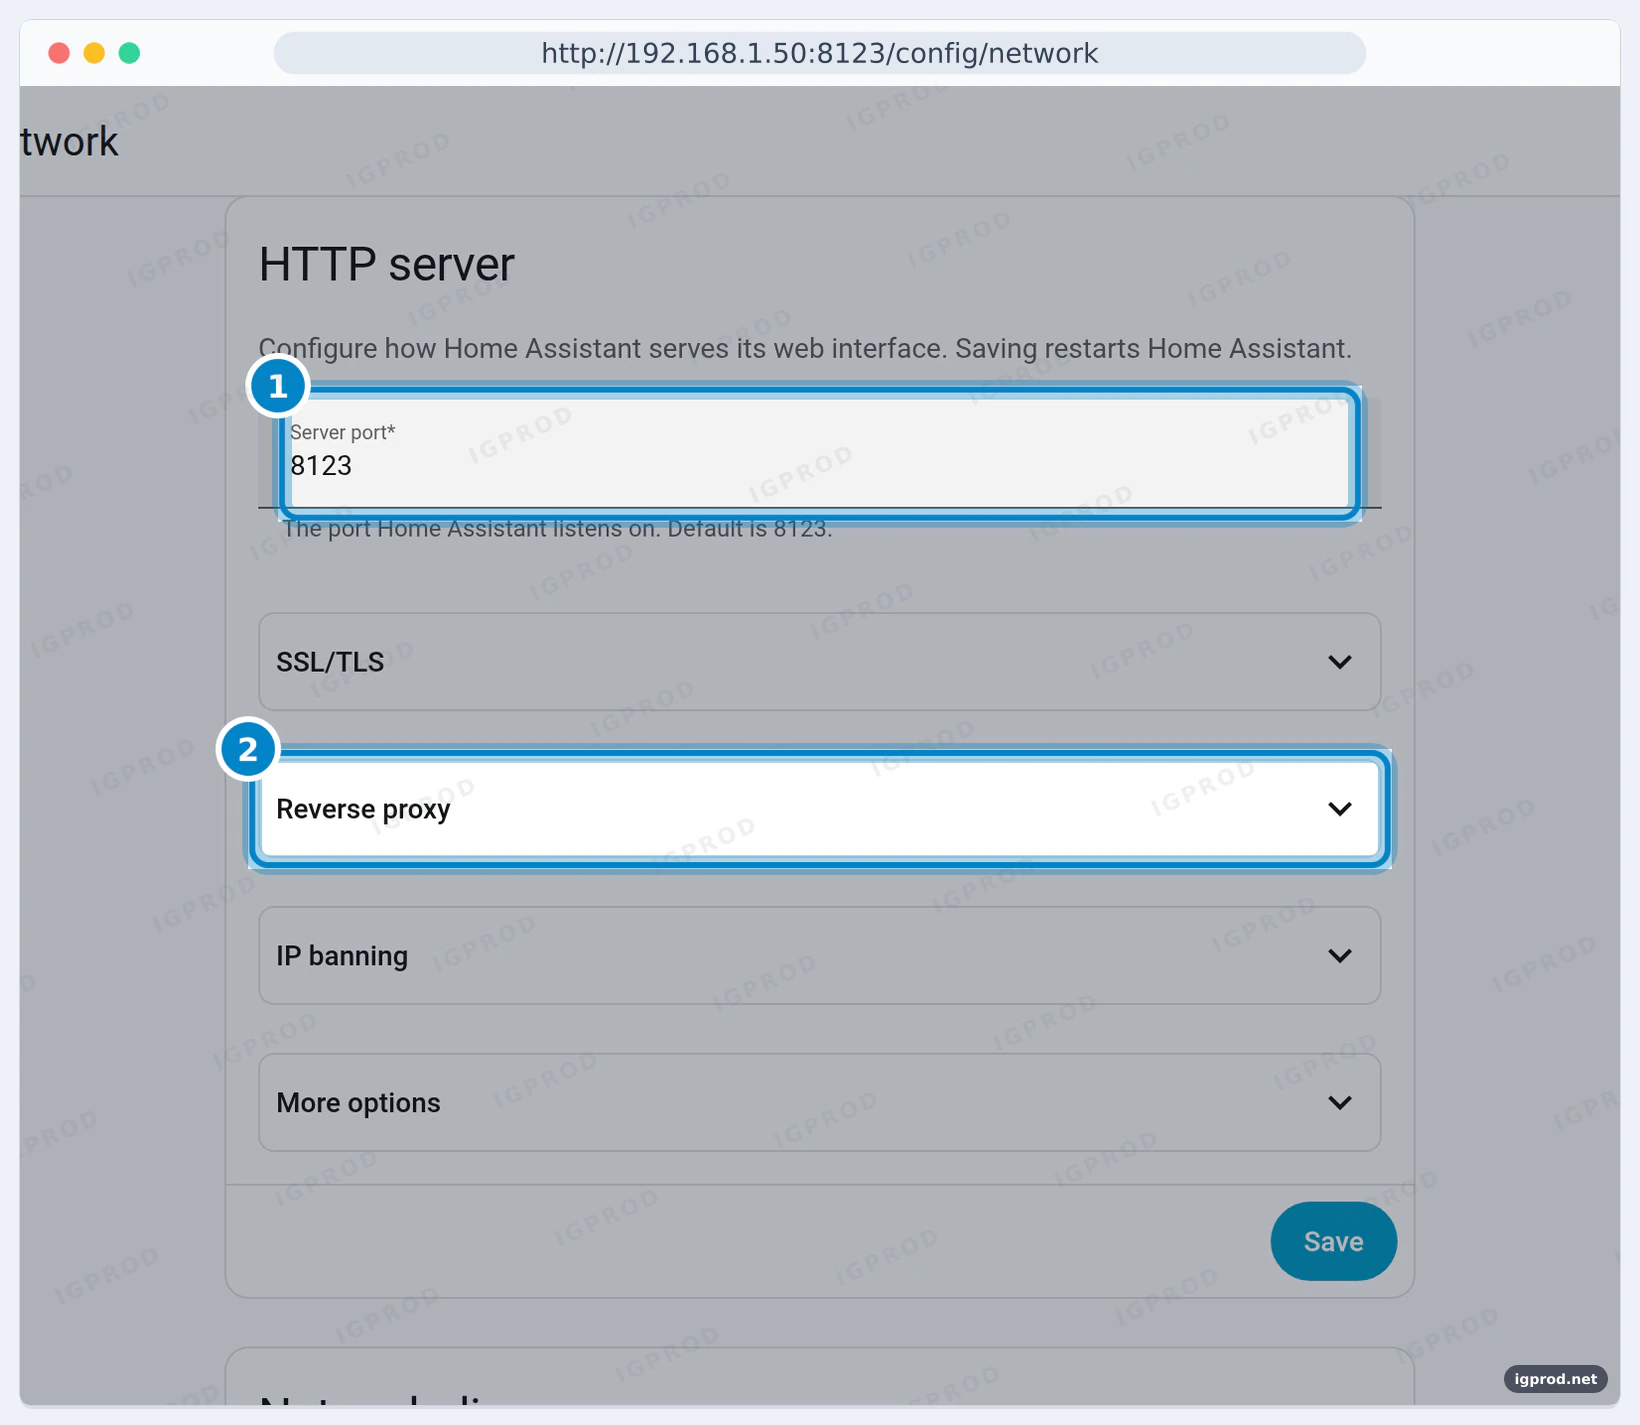
To change it, type the new port and click Save. Home Assistant warns that saving restarts it: click Save and restart, then open the new port. We changed 8123 to 8124: a few seconds later, Home Assistant answered on 8124 and no longer on 8123. Then it asked us to confirm:
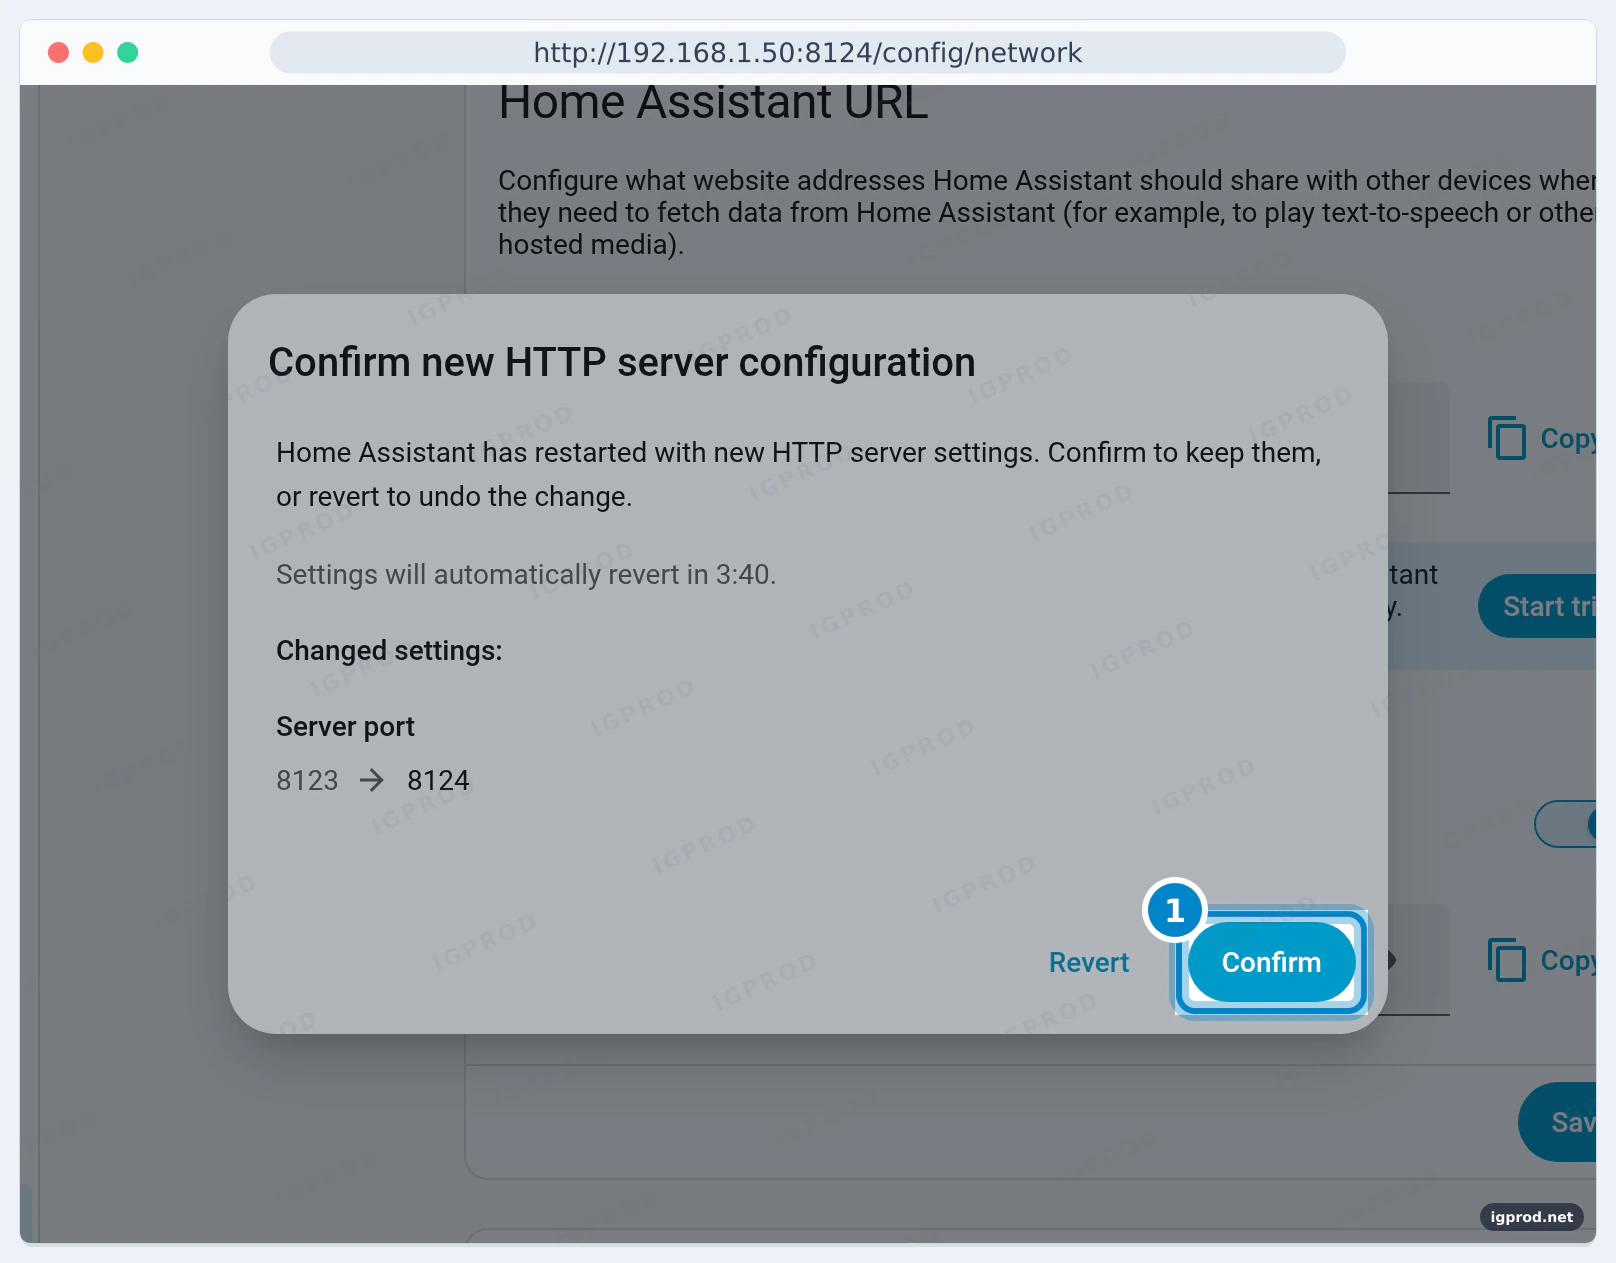
Click Confirm within 5 minutes. This safety net saves you when a new setting locks you out. In our lab, a change that we did not confirm was undone after 5 minutes, with this line in the log:
2026-11-13 17:33:24.326-05:00 WARNING (MainThread) [homeassistant.components.http.config] Pending HTTP config was not confirmed within 0:05:00; reverting to the stable config and restarting- With
network_mode: host, the compose file does not change. Without host networking, change theports:line of your compose file too. - The documentation adds that the
SETUP_PORTenvironment variable overrides the default port at startup. - Update the address in the Home Assistant Companion app after a port change.
- Do not forward port 8123 on your router. For remote access, use a tunnel or a VPN (below).
Install Home Assistant on a Synology NAS
We ran the same compose.yaml on a Synology NAS with DSM 7.4.1, in /volume1/docker/homeassistant, over SSH. It worked without any change:
- DSM has the
/run/dbusfolder, so the Bluetooth line causes no bind-mount error. - Docker 24.0.2 and Compose 2.20 of Container Manager accept
privileged,network_mode: hostandstop_grace_period. - Home Assistant 2026.11.1 answered on port 8123 after about a minute, with a redirect to the onboarding page:
cd /volume1/docker/homeassistant
sudo docker compose up -d
curl -s -o /dev/null -w 'HTTP %{http_code} %{redirect_url}\n' http://127.0.0.1:8123/HTTP 302 http://127.0.0.1:8123/onboarding.htmlSee how to SSH into a Synology NAS for the SSH part. Without SSH, Container Manager can also run a compose file as a project: Project > Create, then choose the folder that holds compose.yaml. We used SSH for this test.
If the DSM firewall is on, allow port 8123 for your local network. Home Assistant also has a Synology DSM integration that shows the status of the NAS. It logs in with a DSM account. We did not test it in this guide.
Remote access with a Cloudflare Tunnel (and the 400: Bad Request fix)
A Cloudflare Tunnel opens Home Assistant on the internet without an open port on your router: the cloudflared program connects out to Cloudflare. We tested it with a Quick Tunnel, which needs no Cloudflare account. cloudflared ran on the Home Assistant machine, with host networking:
docker run --rm --network host cloudflare/cloudflared:latest tunnel --no-autoupdate --url http://localhost:81232026-11-13T22:17:01Z INF Requesting new quick Tunnel on trycloudflare.com...
2026-11-13T22:17:06Z INF | Your quick Tunnel has been created! Visit it at (it may take some time to be reachable): |
2026-11-13T22:17:06Z INF | https://demonstrated-todd-substitute-trio.trycloudflare.com |Cloudflare says that Quick Tunnels are for tests: the address changes each time, and there is no uptime guarantee. Our second test got a new address, so the screenshots below show two. For a fixed name on your own domain, create a named tunnel, as in our guide to create a Cloudflare Tunnel with Synology, and point its public hostname to http://localhost:8123.
The error: 400: Bad Request
The tunnel worked, but Home Assistant refused the request:
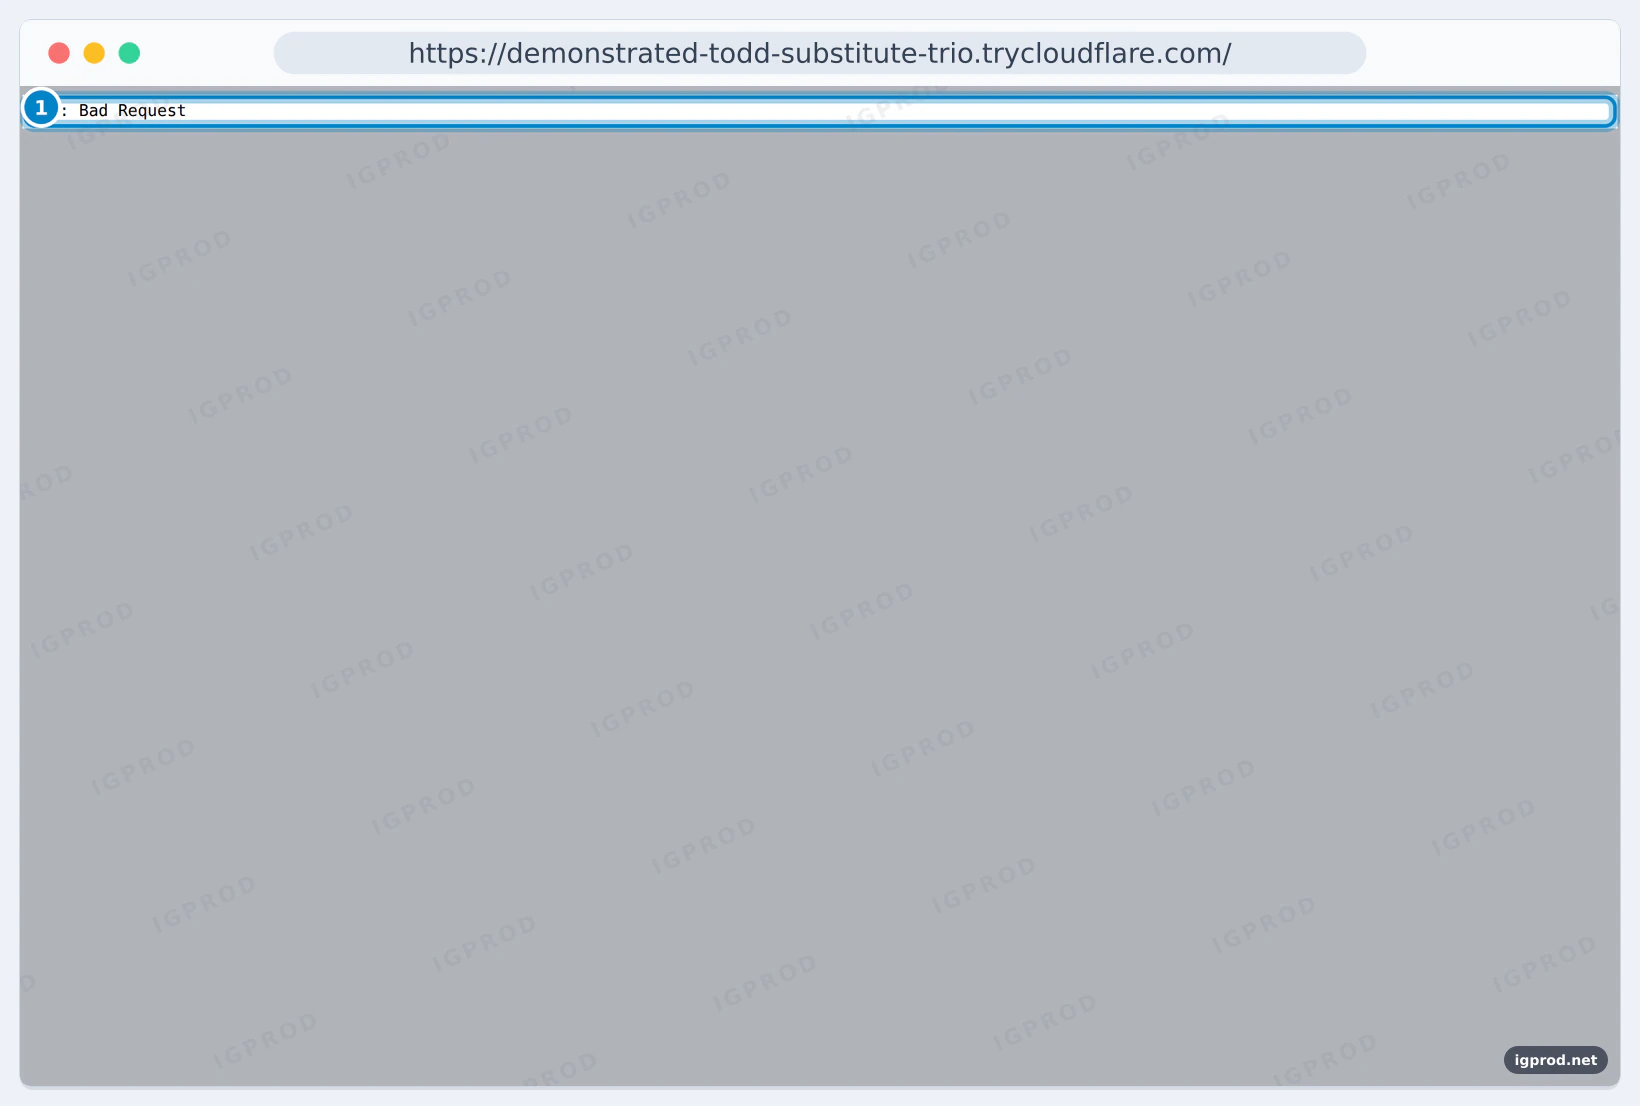
The log says why:
docker compose logs homeassistant | grep "reverse proxy"2026-11-13 17:17:17.485-05:00 ERROR (MainThread) [homeassistant.components.http.forwarded] A request from a reverse proxy was received from 127.0.0.1, but your HTTP integration is not set-up for reverse proxiescloudflared works as a reverse proxy: it adds an X-Forwarded-For header with the address of the visitor. Home Assistant blocks requests from reverse proxies that are not on its trusted list. The log line also names the address of the proxy: 127.0.0.1, because cloudflared runs on the same machine.
The fix: trust the proxy
Open Settings > System > Network, then Reverse proxy in the HTTP server section:
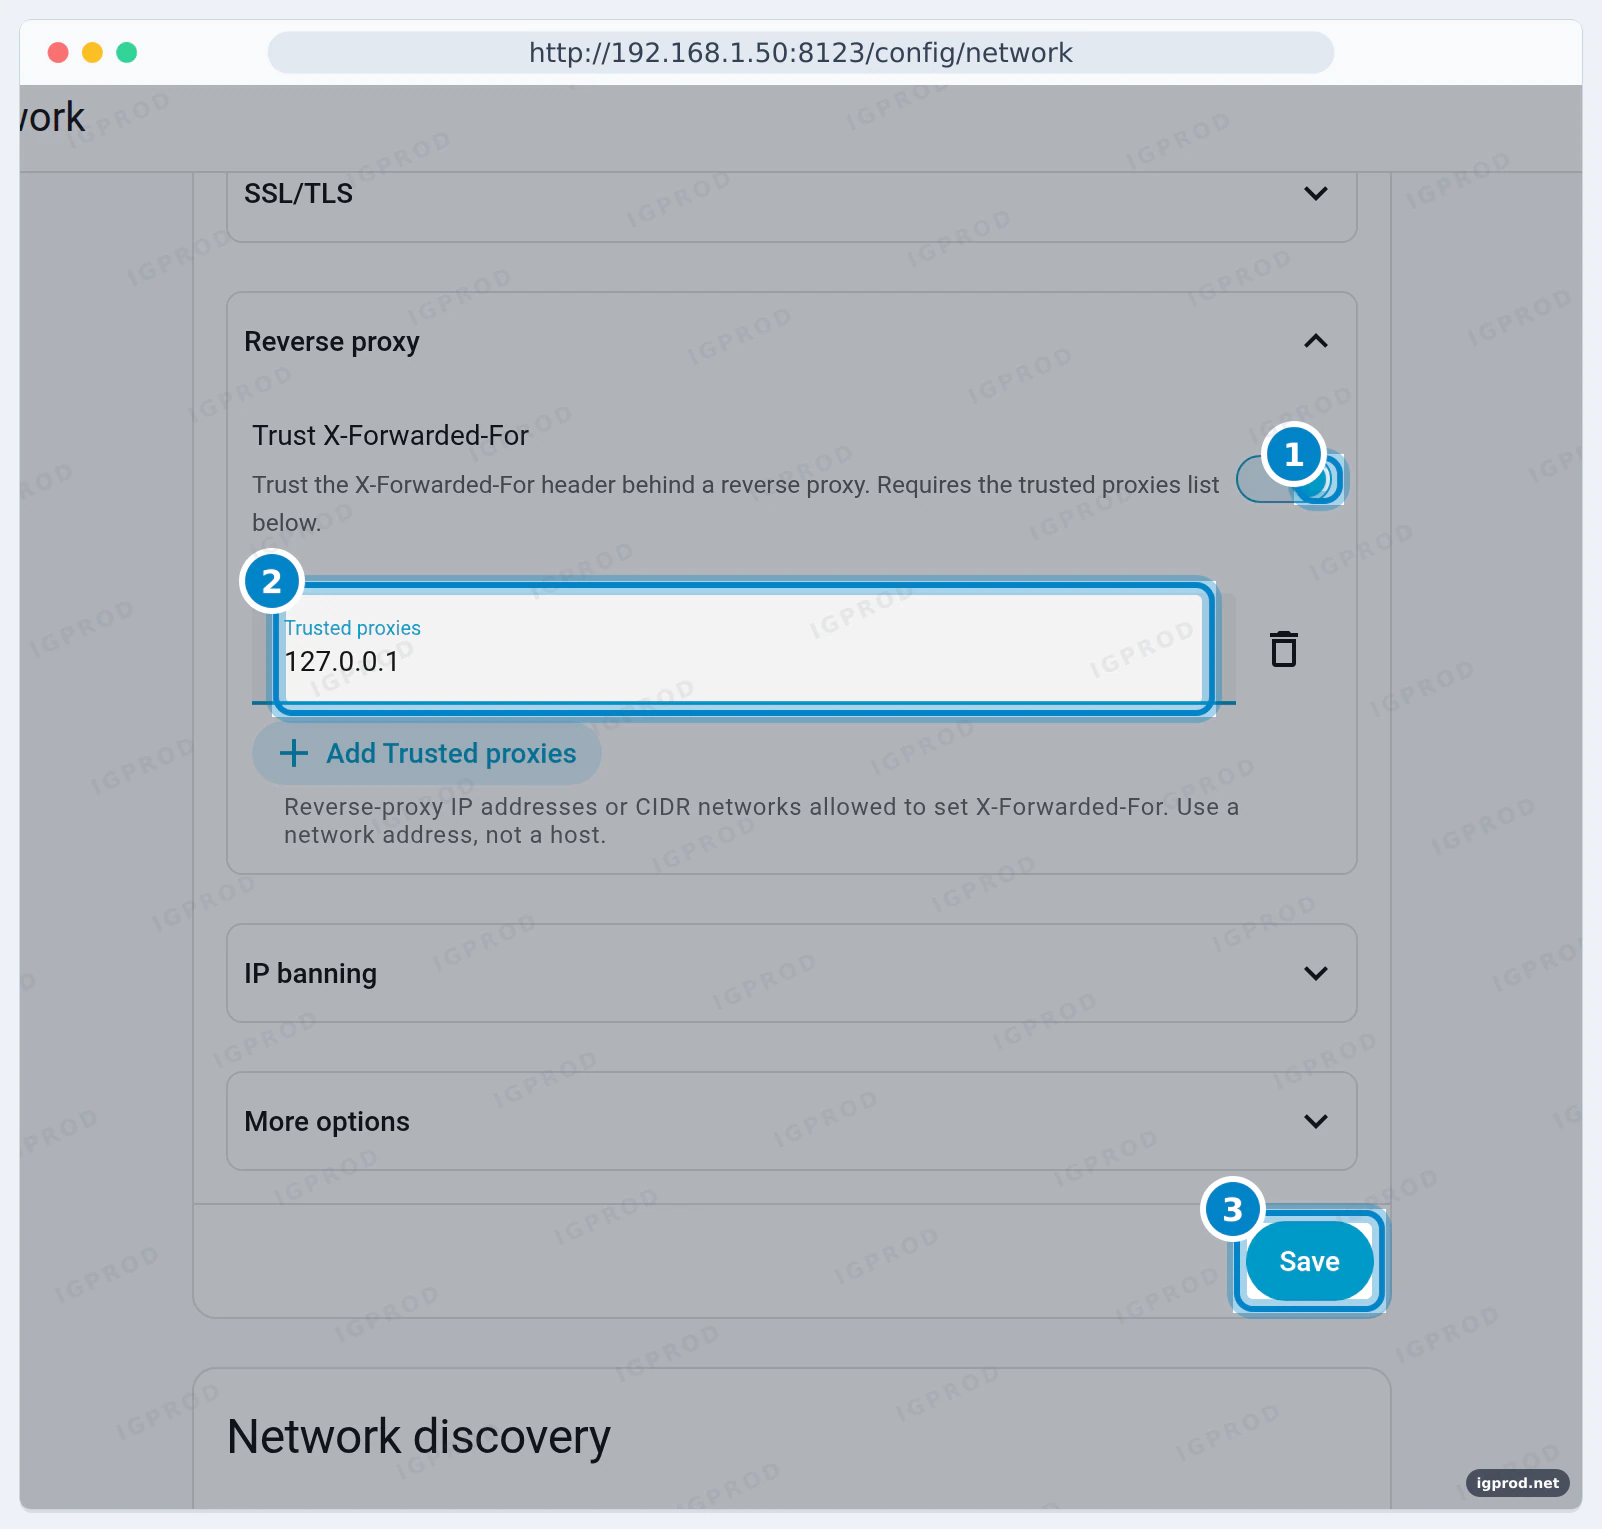
If cloudflared or your proxy runs in a container without host networking, the log shows its Docker address instead. Add that address, or its Docker network, such as 172.18.0.0/16. Use a network address, as the help text says: 192.168.1.0/24, not 192.168.1.50/24.
After the restart, Home Assistant lists the changes. Click Confirm:
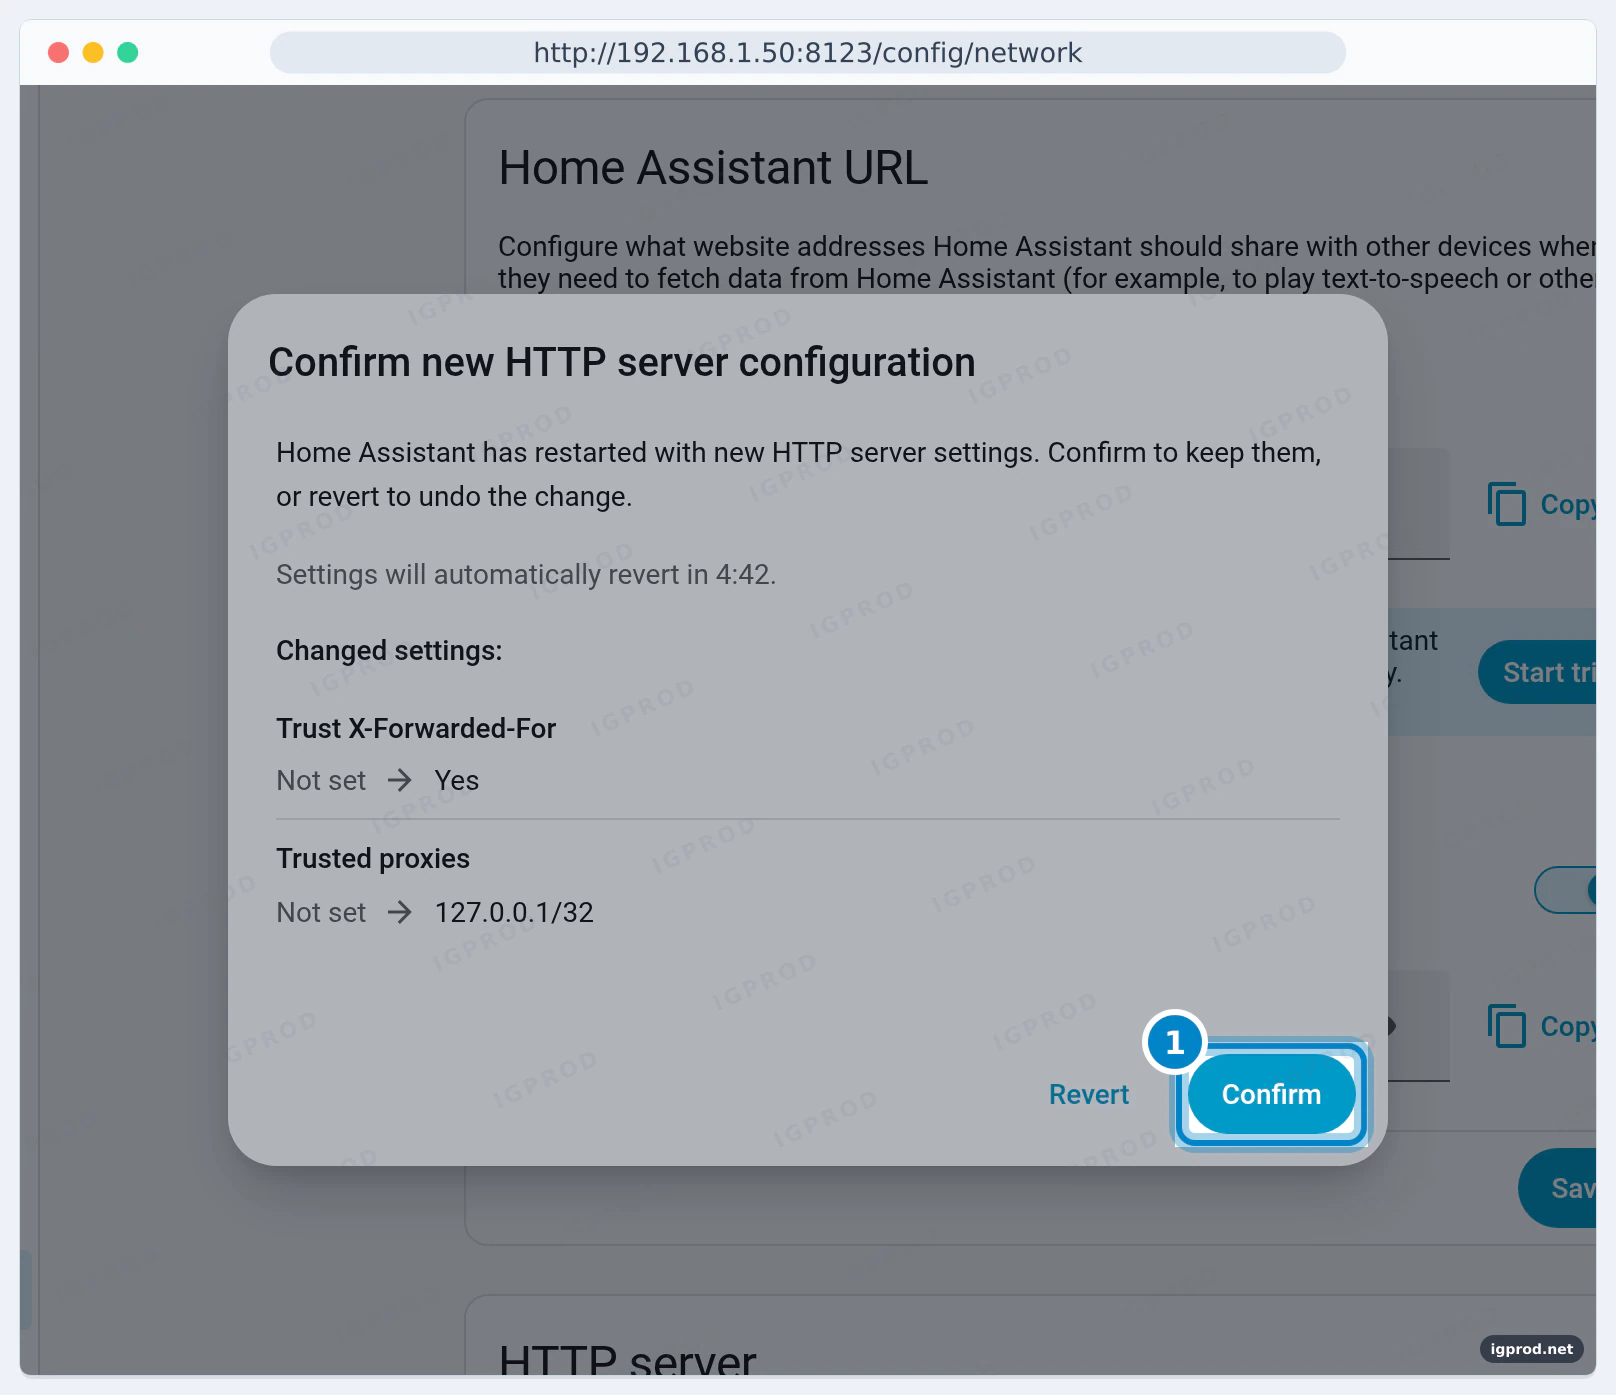
The tunnel then opened the Home Assistant login page, and the log showed no new error:
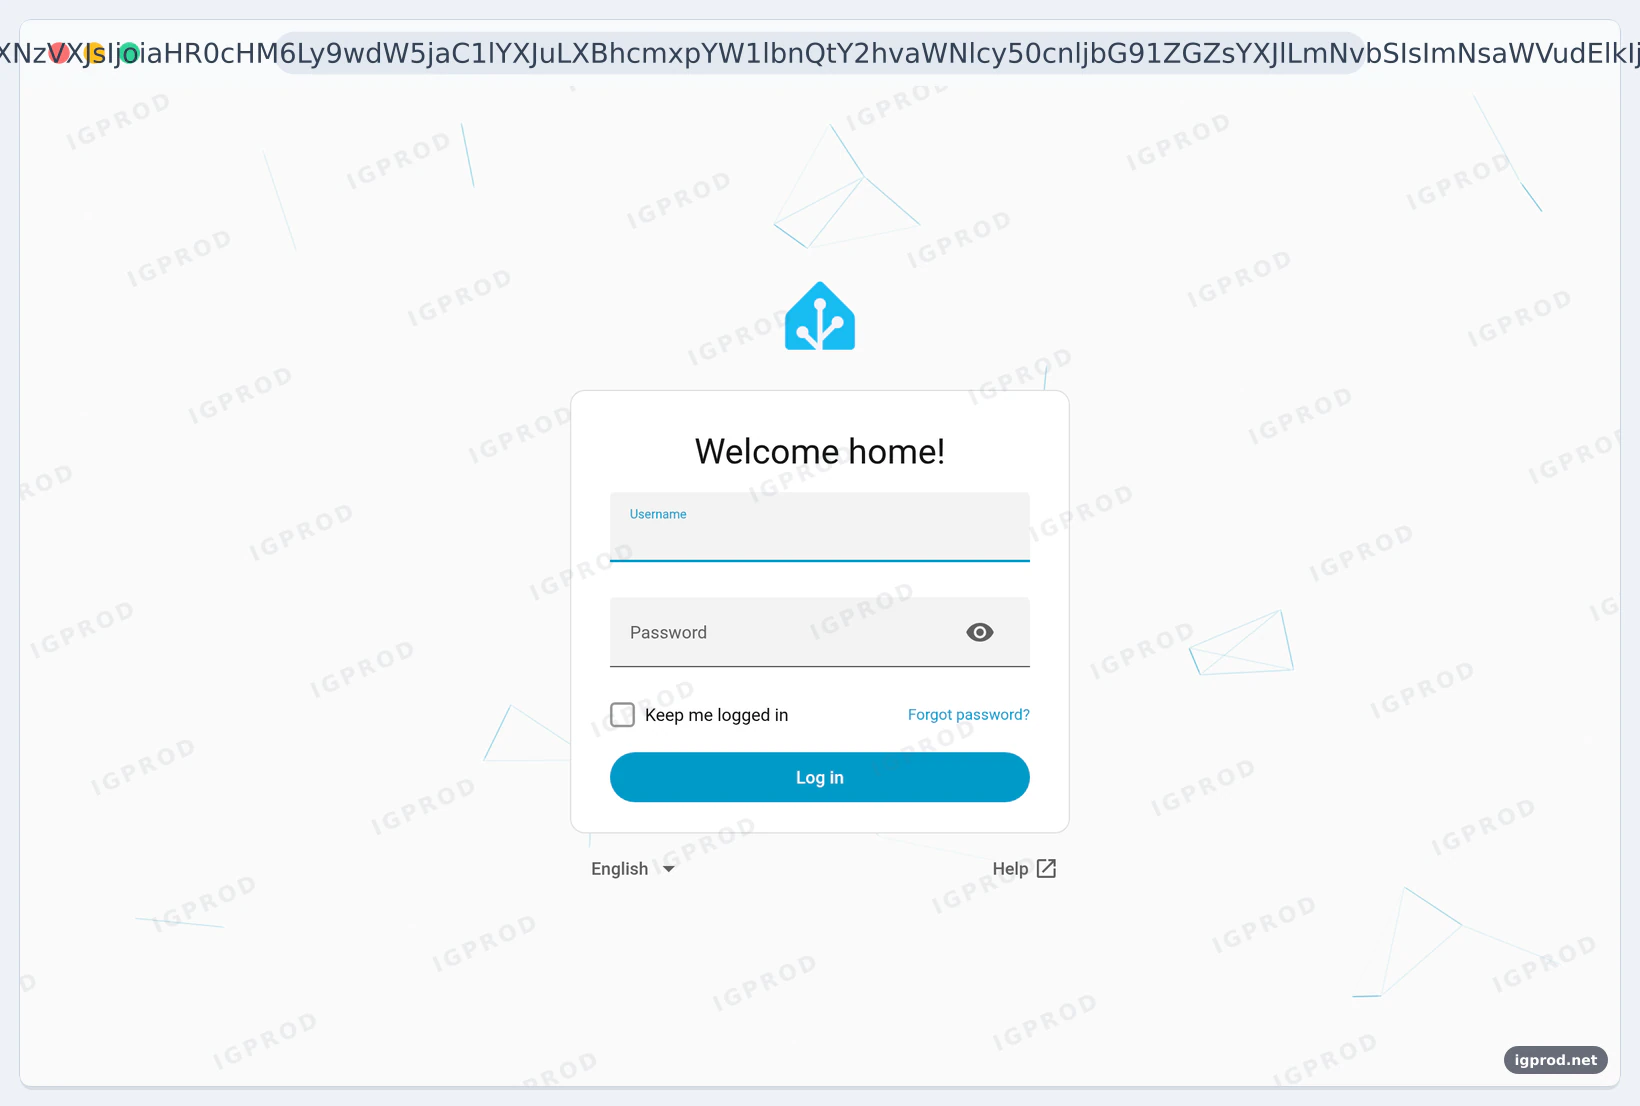
Older guides set this with use_x_forwarded_for and trusted_proxies in configuration.yaml. Since 2026.8, Home Assistant imports such an http: block into these settings once and raises a repair to remove it. If you use Home Assistant Cloud instead, you need none of this.
Update Home Assistant
In the folder of compose.yaml:
docker compose pull homeassistant
docker compose up -d
Before a big update, read the release notes, and make a backup in Settings > System > Backups. That page also exists in Home Assistant Container, with Set up backups and Backup now. After the update, the documentation tells you to check Settings > System > Repairs and Logs.
If an update breaks an integration, go back to the version before: replace stable with a version tag, for example ghcr.io/home-assistant/home-assistant:2026.11.1, and run docker compose up -d again. For more on container updates on a NAS, see how to update a Docker container on Synology.
Troubleshooting
400: Bad Request through a tunnel or a reverse proxy
Trust the proxy, as shown above. The log line gives the address to add.
The page on port 8123 does not open
- Check that the container is
Upwithdocker compose ps, and readdocker compose logs homeassistant. - Wait a minute after the first start: our NAS needed about 60 seconds.
- Check the firewall of the host or of DSM for port 8123, and that no other program uses that port.
Home Assistant went back to the old port or proxy settings
You did not click Confirm within 5 minutes after the restart. The log shows the Pending HTTP config was not confirmed warning. Save the settings again and confirm them.
Home Assistant does not work after an update
Read the log and the repairs, then pin the previous version tag until a fix comes. After you edit YAML files, test them before a restart:
docker exec homeassistant python -m homeassistant --script check_config --config /configTesting configuration at /configIn our lab, the check printed only this line: no errors.
Frequently asked questions
What port does Home Assistant use?
Home Assistant Container uses port 8123. Home Assistant OS uses port 80 since version 2026.8, or 8123 when port 80 is in use.
How do I change the Home Assistant port?
In Settings > System > Network > HTTP server, change Server port, save and restart, then confirm on the new port within 5 minutes.
Does Home Assistant Container support add-ons?
No. Add-ons, now called apps, need Home Assistant OS. With Container, run that software in its own container.
Can I run Home Assistant on a Synology NAS?
Yes. The compose file of this guide ran unchanged on DSM 7.4.1 with Container Manager's Docker 24.0.2.
Why does Home Assistant show 400: Bad Request behind Cloudflare?
cloudflared is a reverse proxy that Home Assistant does not trust yet. Turn on Trust X-Forwarded-For and add the address of cloudflared to the trusted proxies.
Do I need network_mode: host?
The compose file of the documentation uses it, so that Home Assistant can find devices on your network. Without it, publish port 8123 with a ports: line, and expect automatic discovery of many devices to stop.
Related guides
- Docker Compose: what it is and what are its benefits
- Create a Cloudflare Tunnel and expose your services with Synology
- Fix Nginx Proxy Manager real IP behind Docker and Cloudflare
- How to SSH into a Synology NAS: enable SSH, root and SSH keys
- Self-hosting for beginners: plan your first service
Sources
- Home Assistant: Linux installation (Home Assistant Container)
- Home Assistant: installation methods compared
- Home Assistant: HTTP integration (port, reverse proxies)
- Home Assistant: common tasks for Home Assistant Container
- Home Assistant 2026.11.1 release
- Cloudflare: Quick Tunnels
- cloudflared 2026.11.0 release

Leave a comment
Your email address will not be published. Required fields are marked *