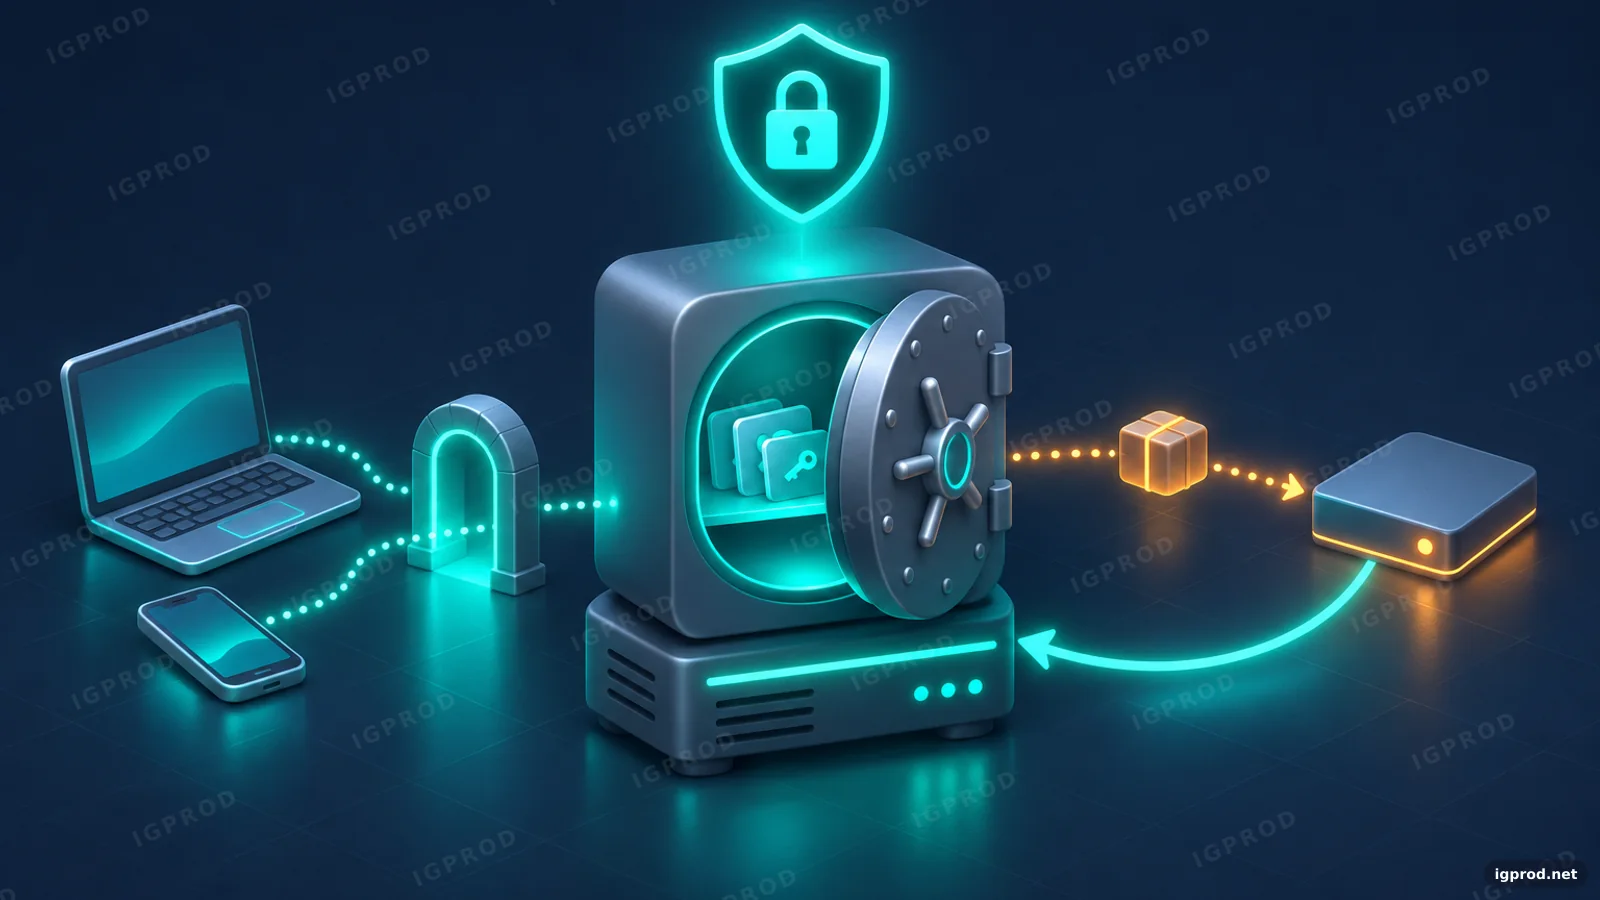
Vaultwarden is a small server that speaks the Bitwarden protocol, so the official Bitwarden apps, browser extensions and CLI can keep your passwords on your own machine. It is written in Rust and runs in a single container with a SQLite database.
This guide sets up Vaultwarden with Docker Compose behind Caddy, which gives it HTTPS on your home network without a public domain. It covers the admin token, the first account, closing sign-ups, the admin panel, a Bitwarden client, and a backup that we restored to prove it works.
We tested everything on 14 November 2026 with Vaultwarden 1.37.5 (web vault 2026.10.1), Caddy 2.11.9 and the Bitwarden CLI 2026.10.1, on a Linux machine with Docker. Every output and screenshot below comes from that test.
Quick answer: Vaultwarden in six steps
In plain words: Vaultwarden is your own Bitwarden server. The official Bitwarden apps and browser extensions keep your passwords on your machine instead of a company's cloud. Browsers open it only over HTTPS, so this guide puts Caddy in front of it: Caddy gives it HTTPS on your home network, without a public domain.
- Save the
compose.yaml(Vaultwarden and Caddy) and theCaddyfilefrom this guide in one folder. - Make a hashed admin password with
docker run --rm -it vaultwarden/server:1.37.5 /vaultwarden hash, and put theADMIN_TOKEN='...'line it prints in a.envfile next to them (chmod 600 .env). - Start everything with
docker compose up -d. - Trust Caddy's local certificate on your devices, open
https://vault.home.arpaand create your account. - Set
SIGNUPS_ALLOWEDto"false"incompose.yamland rundocker compose up -dagain, so nobody else can sign up. - In the Bitwarden apps, choose the self-hosted option and enter your server's address. Then set up the backup: the restore we tested is below.
Each step has a full, tested section below, with the outputs you should see.
What you need
- Docker with the Compose plugin. Our guide to installing Docker Compose on Ubuntu covers it.
- A machine that stays on. Vaultwarden is light: in our test it ran inside a 256 MB memory limit.
- A name for the server. We use
vault.home.arpa:home.arpais reserved for home networks (RFC 8375). Point it to the server's LAN address in your router's DNS, or in the hosts file of each device. - HTTPS. Without it, the web vault does not load on your other devices. Caddy takes care of it here.
If Vaultwarden is your first self-hosted app, our self-hosting guide for beginners helps you decide where it runs, who can reach it and how you will back it up.
Why Vaultwarden needs HTTPS
The web vault encrypts and decrypts your data in the browser with the Web Crypto API, and browsers allow it only on HTTPS pages or on localhost. We opened the vault over plain HTTP with a name other than localhost, and it stopped with this alert:
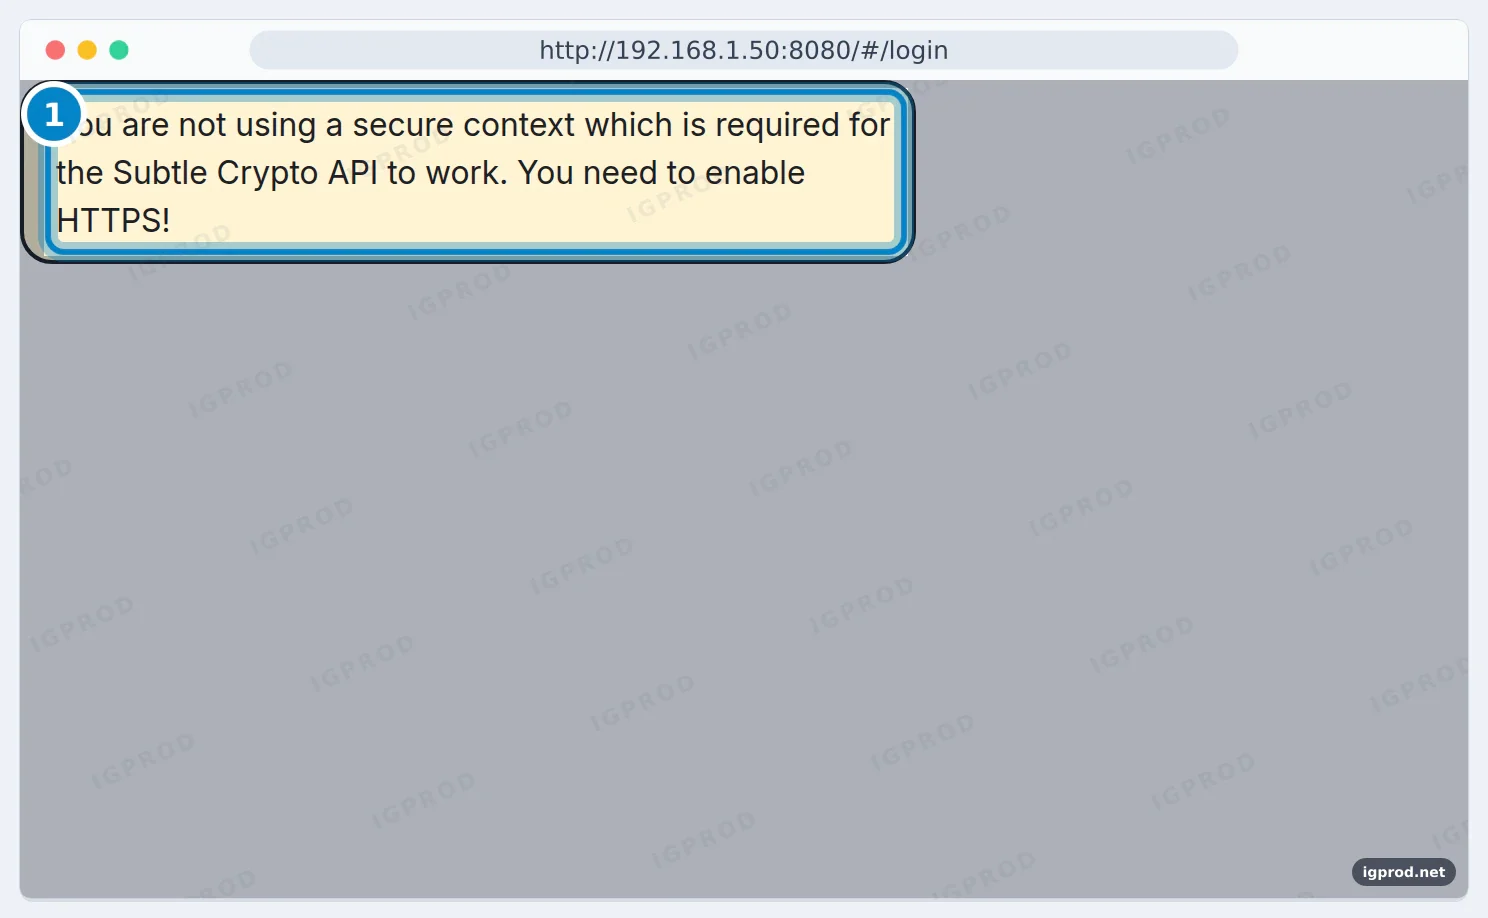
On the server itself, http://localhost:8080 loaded the login page without the alert, because browsers treat localhost as secure. Every other device needs HTTPS. The Bitwarden clients are stricter: the CLI refused a plain HTTP server address with this error:
Error: Insecure URL not allowed. All URLs must use HTTPS.The Docker Compose file for Vaultwarden and Caddy
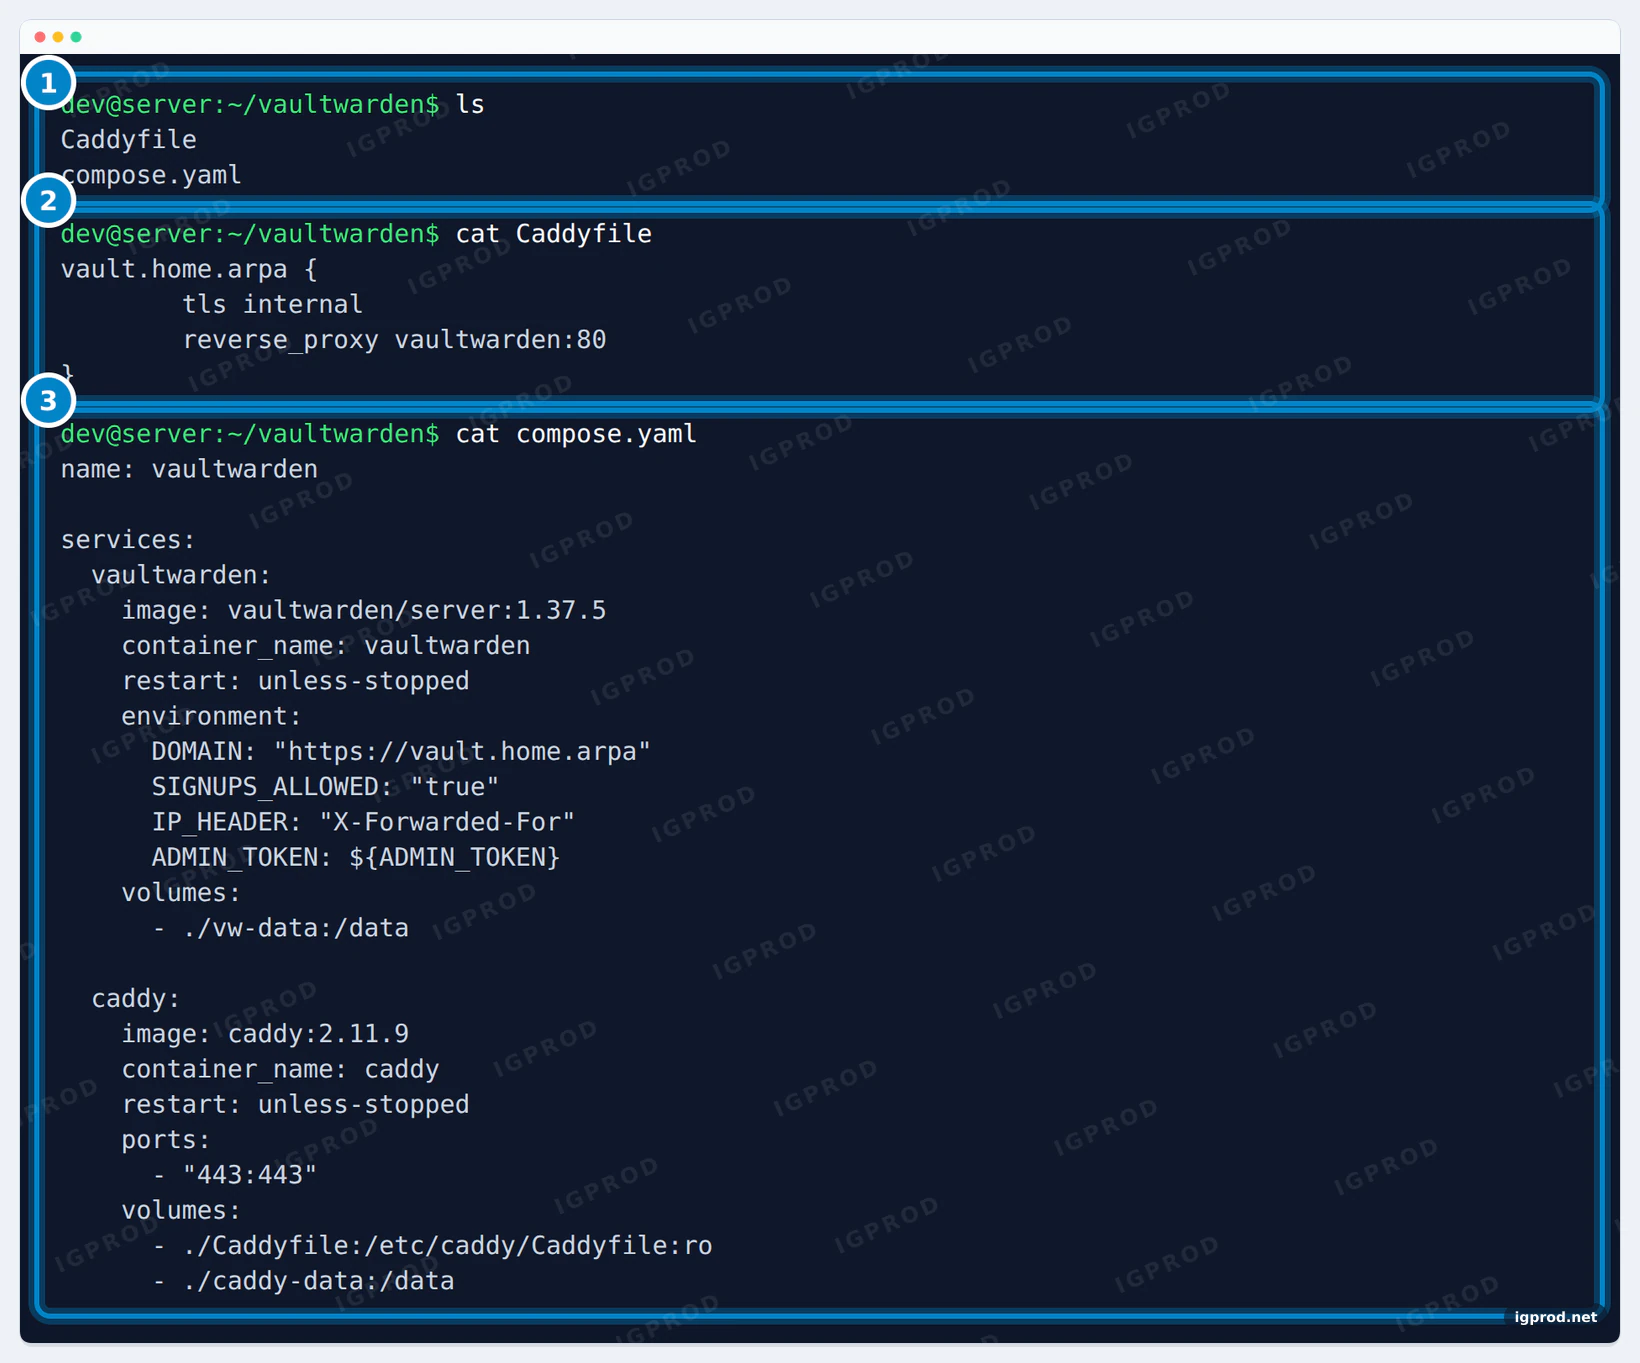
Create a folder, for example vaultwarden, and save this file in it as compose.yaml:
name: vaultwarden

services:
  vaultwarden:
    image: vaultwarden/server:1.37.5
    container_name: vaultwarden
    restart: unless-stopped
    environment:
      DOMAIN: "https://vault.home.arpa"
      SIGNUPS_ALLOWED: "true"
      IP_HEADER: "X-Forwarded-For"
      ADMIN_TOKEN: ${ADMIN_TOKEN}
    volumes:
      - ./vw-data:/data

  caddy:
    image: caddy:2.11.9
    container_name: caddy
    restart: unless-stopped
    ports:
      - "443:443"
    volumes:
      - ./Caddyfile:/etc/caddy/Caddyfile:ro
- ./caddy-data:/datavaultwarden/serveris the official Vaultwarden image on Docker Hub. The version tag (1.37.5) is pinned, so an update happens only when you change it.- Vaultwarden listens on port 80 inside the container. Only Caddy publishes a port, 443, so the vault answers over HTTPS only.
DOMAINis the address you type in the browser, withhttps://. The admin Diagnostics page checks that the two match.SIGNUPS_ALLOWEDstays"true"only until your own account exists.IP_HEADERmakes Vaultwarden read the visitor's address from theX-Forwarded-Forheader that Caddy sends. The Diagnostics section below shows why../vw-dataholds the database and the keys. Without a volume, Vaultwarden refuses to start.
Save this Caddyfile in the same folder:
vault.home.arpa {
	tls internal
	reverse_proxy vaultwarden:80
}
tls internal makes Caddy create its own certificate authority and sign a certificate for vault.home.arpa. reverse_proxy vaultwarden:80 sends the requests to the Vaultwarden container by its service name. With a public domain that reaches your server on ports 80 and 443, remove the tls internal line and Caddy gets a Let's Encrypt certificate instead.
Create a hashed admin token
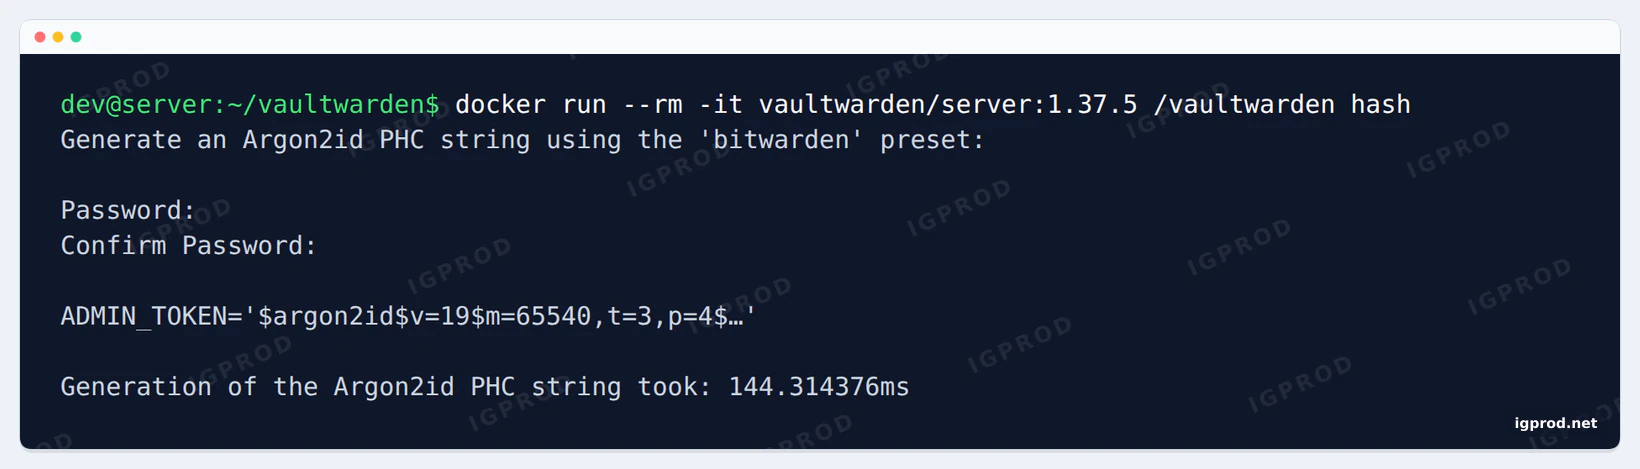
The admin panel at /admin is locked by ADMIN_TOKEN. Store a hash there, not the password itself. Vaultwarden has a hash command for this; run it with -it so it can ask for the password twice:
$ docker run --rm -it vaultwarden/server:1.37.5 /vaultwarden hash
Generate an Argon2id PHC string using the 'bitwarden' preset:

Password:
Confirm Password:

ADMIN_TOKEN='$argon2id$v=19$m=65540,t=3,p=4$…'

Generation of the Argon2id PHC string took: 144.314376ms
m=65540,t=3,p=4 are the settings of the default bitwarden preset; hash --preset owasp gives lighter ones.
Without -t, for example with the password piped in, the command stops at once with exit code 101:
Generate an Argon2id PHC string using the 'bitwarden' preset:

thread 'main' (1) panicked at src/main.rs:160:69:
called `Result::unwrap()` on an `Err` value: Os { code: 6, kind: Uncategorized, message: "No such device or address" }
note: run with `RUST_BACKTRACE=1` environment variable to display a backtrace
Put the token in a .env file
Copy the whole ADMIN_TOKEN='...' line from the output into a file named .env next to compose.yaml, and keep it private:
nano .env        # paste the ADMIN_TOKEN='$argon2id$...' line
chmod 600 .env
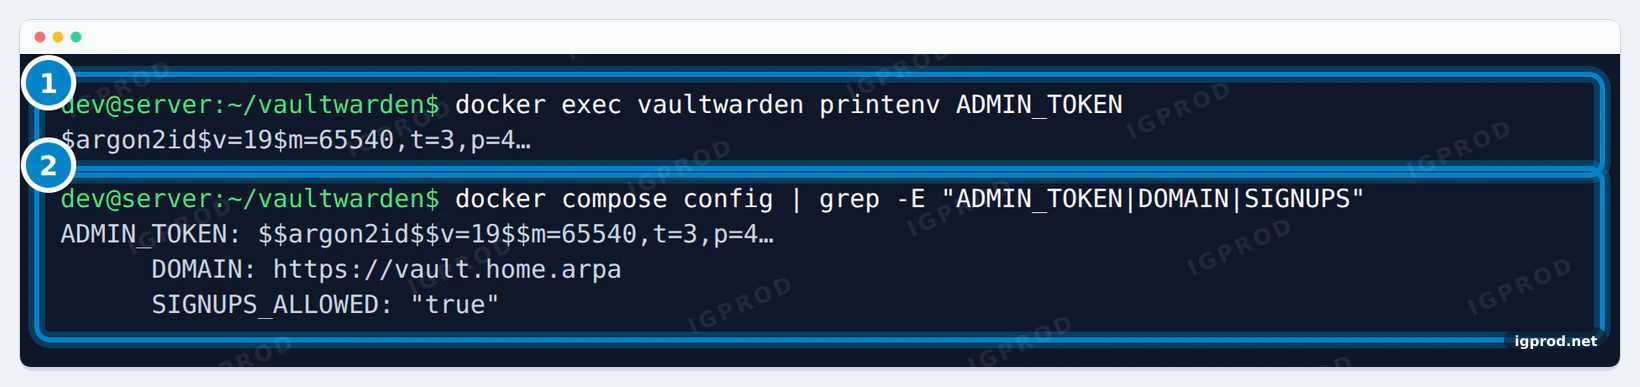
Compose reads .env and fills ${ADMIN_TOKEN} in the compose file. The single quotes keep every $ as it is. Once the containers run (next section), this shows what Vaultwarden received:
$ docker exec vaultwarden printenv ADMIN_TOKEN
$argon2id$v=19$m=65540,t=3,p=4…
Single dollar signs, as Vaultwarden expects. docker compose config prints them doubled ($$argon2id$$v=19...) in its output; the container still gets single ones, as printenv shows.
The $ trap: a hash pasted into compose.yaml
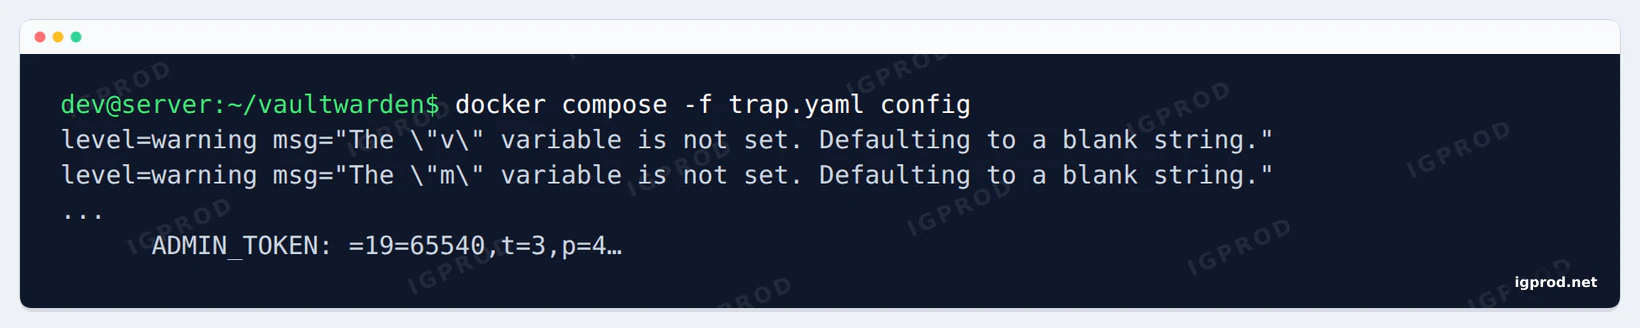
If you paste the hash straight into the environment section of compose.yaml, Compose reads each $ as the start of a variable. Our test file gave these warnings and a broken token:
level=warning msg="The \"v\" variable is not set. Defaulting to a blank string."
level=warning msg="The \"m\" variable is not set. Defaulting to a blank string."
...
      ADMIN_TOKEN: =19=65540,t=3,p=4…
That token no longer matches your password. Use the .env file above, or write every $ as $$ inside compose.yaml.
A plain password in ADMIN_TOKEN also works, but Vaultwarden warns about it in its log:
[NOTICE] You are using a plain text `ADMIN_TOKEN` which is insecure.
Please generate a secure Argon2 PHC string by using `vaultwarden hash` or `argon2`.
See: https://github.com/dani-garcia/vaultwarden/wiki/Enabling-admin-page#secure-the-admin_token
Start Vaultwarden
In the folder with compose.yaml, Caddyfile and .env:
$ docker compose up -d
 Network vaultwarden_default  Creating
 Network vaultwarden_default  Created
 Container caddy  Creating
 Container vaultwarden  Creating
 Container vaultwarden  Created
 Container caddy  Created
 Container vaultwarden  Starting
 Container caddy  Starting
 Container vaultwarden  Started
Container caddy Started$ docker compose ps
NAME IMAGE COMMAND SERVICE CREATED STATUS PORTS
caddy caddy:2.11.9 "caddy run --config …" caddy 9 seconds ago Up 8 seconds 80/tcp, 2019/tcp, 443/udp, 127.0.0.1:443->443/tcp
vaultwarden vaultwarden/server:1.37.5 "/start.sh" vaultwarden 9 seconds ago Up 8 seconds (health: starting) 80/tcp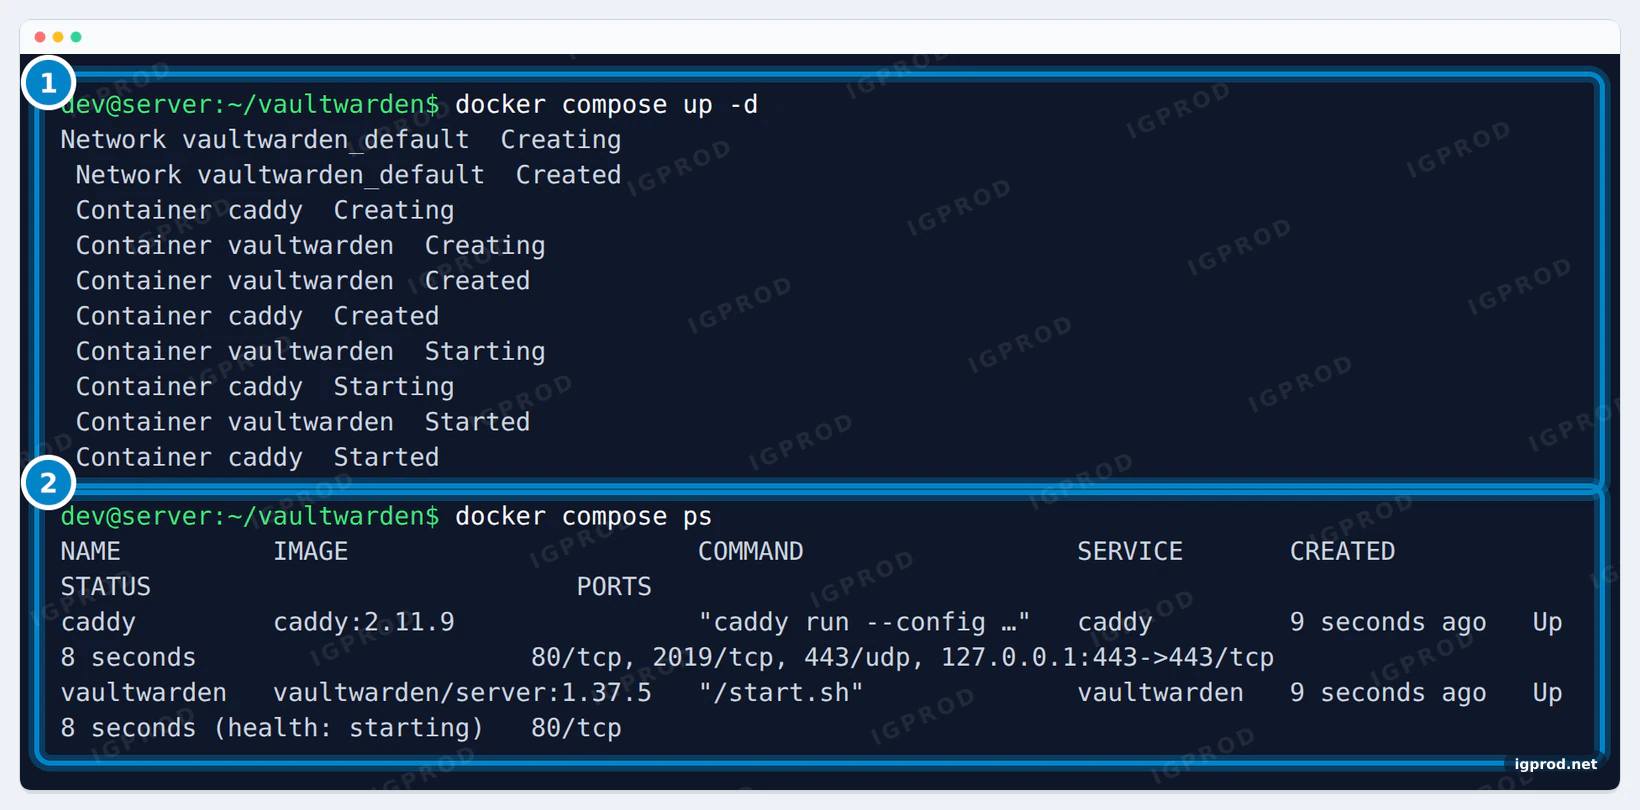
Our test published Caddy on 127.0.0.1 only, hence 127.0.0.1:443 above; with "443:443", port 443 is open on all the server's addresses. Vaultwarden shows only 80/tcp: none of its ports is published. The first start creates the signing key, and the server listens on port 80 inside the container:
$ docker compose logs vaultwarden | head -40
vaultwarden  | /--------------------------------------------------------------------\
vaultwarden  | |                        Starting Vaultwarden                        |
vaultwarden  | |                           Version 1.37.5                           |
vaultwarden  | |--------------------------------------------------------------------|
vaultwarden  | | This is an *unofficial* Bitwarden implementation, DO NOT use the   |
vaultwarden  | | official channels to report bugs/features, regardless of client.   |
vaultwarden  | | Send usage/configuration questions or feature requests to:         |
vaultwarden  | |   https://github.com/dani-garcia/vaultwarden/discussions or        |
vaultwarden  | |   https://vaultwarden.discourse.group/                             |
vaultwarden  | | Report suspected bugs/issues in the software itself at:            |
vaultwarden  | |   https://github.com/dani-garcia/vaultwarden/issues/new            |
vaultwarden  | \--------------------------------------------------------------------/
vaultwarden  |
vaultwarden  | [2026-11-14 18:16:07.407][vaultwarden::auth][INFO] Private key 'data/rsa_key.pem' created correctly
vaultwarden  | [2026-11-14 18:16:07.904][start][INFO] Rocket has launched from http://0.0.0.0:80
Trust Caddy's local certificate
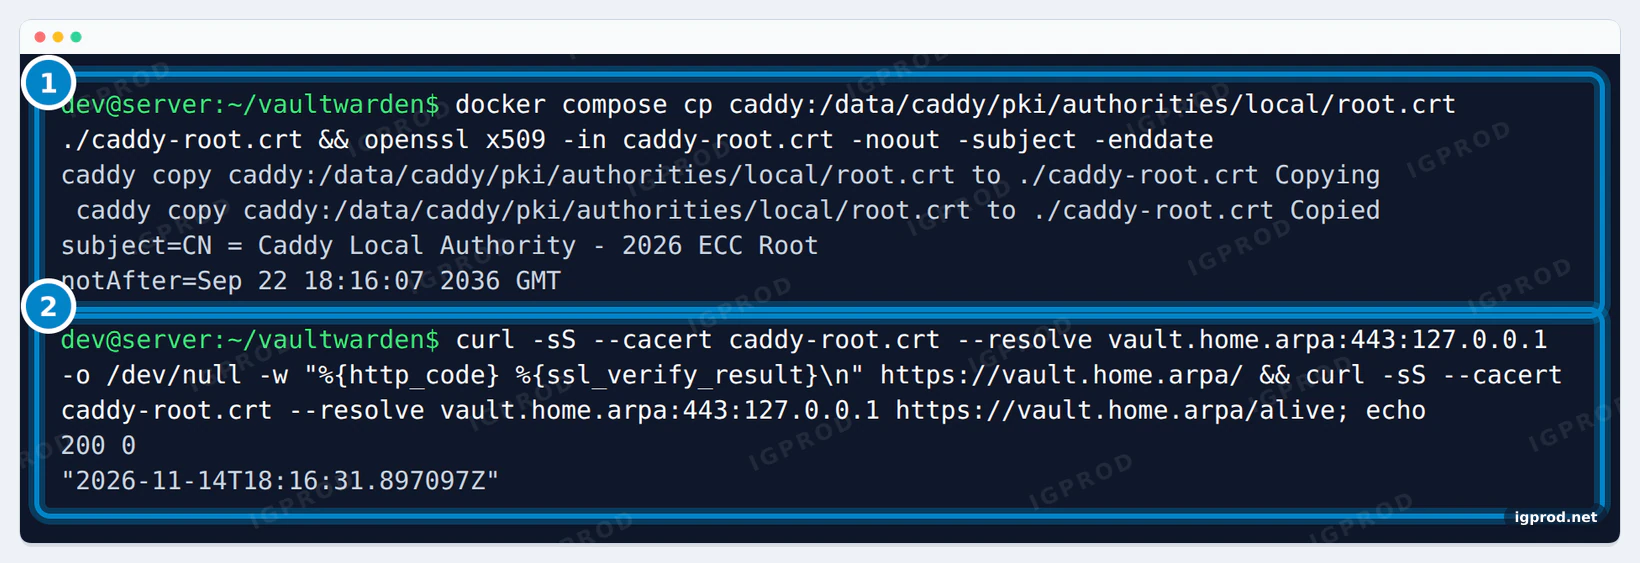
Caddy made its own root certificate on the first start. Copy it out of the container and check it:
$ docker compose cp caddy:/data/caddy/pki/authorities/local/root.crt ./caddy-root.crt && openssl x509 -in caddy-root.crt -noout -subject -enddate
 caddy copy caddy:/data/caddy/pki/authorities/local/root.crt to ./caddy-root.crt Copying
 caddy copy caddy:/data/caddy/pki/authorities/local/root.crt to ./caddy-root.crt Copied
subject=CN = Caddy Local Authority - 2026 ECC Root
notAfter=Sep 22 18:16:07 2036 GMT
Test HTTPS from the server with this root. --resolve points the name at the server itself, so the test works before your DNS does:
$ curl -sS --cacert caddy-root.crt --resolve vault.home.arpa:443:127.0.0.1 -o /dev/null -w "%{http_code} %{ssl_verify_result}\n" https://vault.home.arpa/ && curl -sS --cacert caddy-root.crt --resolve vault.home.arpa:443:127.0.0.1 https://vault.home.arpa/alive; echo
200 0
"2026-11-14T18:16:31.897097Z"
200 is the HTTP status, 0 means curl verified the certificate, and /alive is Vaultwarden's health address.
Then install caddy-root.crt as a trusted root certificate on each device that opens the vault. The steps are the same as for an mkcert root: follow Step 5 of our guide to local HTTPS with mkcert for Android, iPhone, Windows, macOS and Firefox. The root is valid until 2036, and Caddy renews the server certificate by itself. Keep the caddy-data folder private: it holds the root's private key.
Create your account
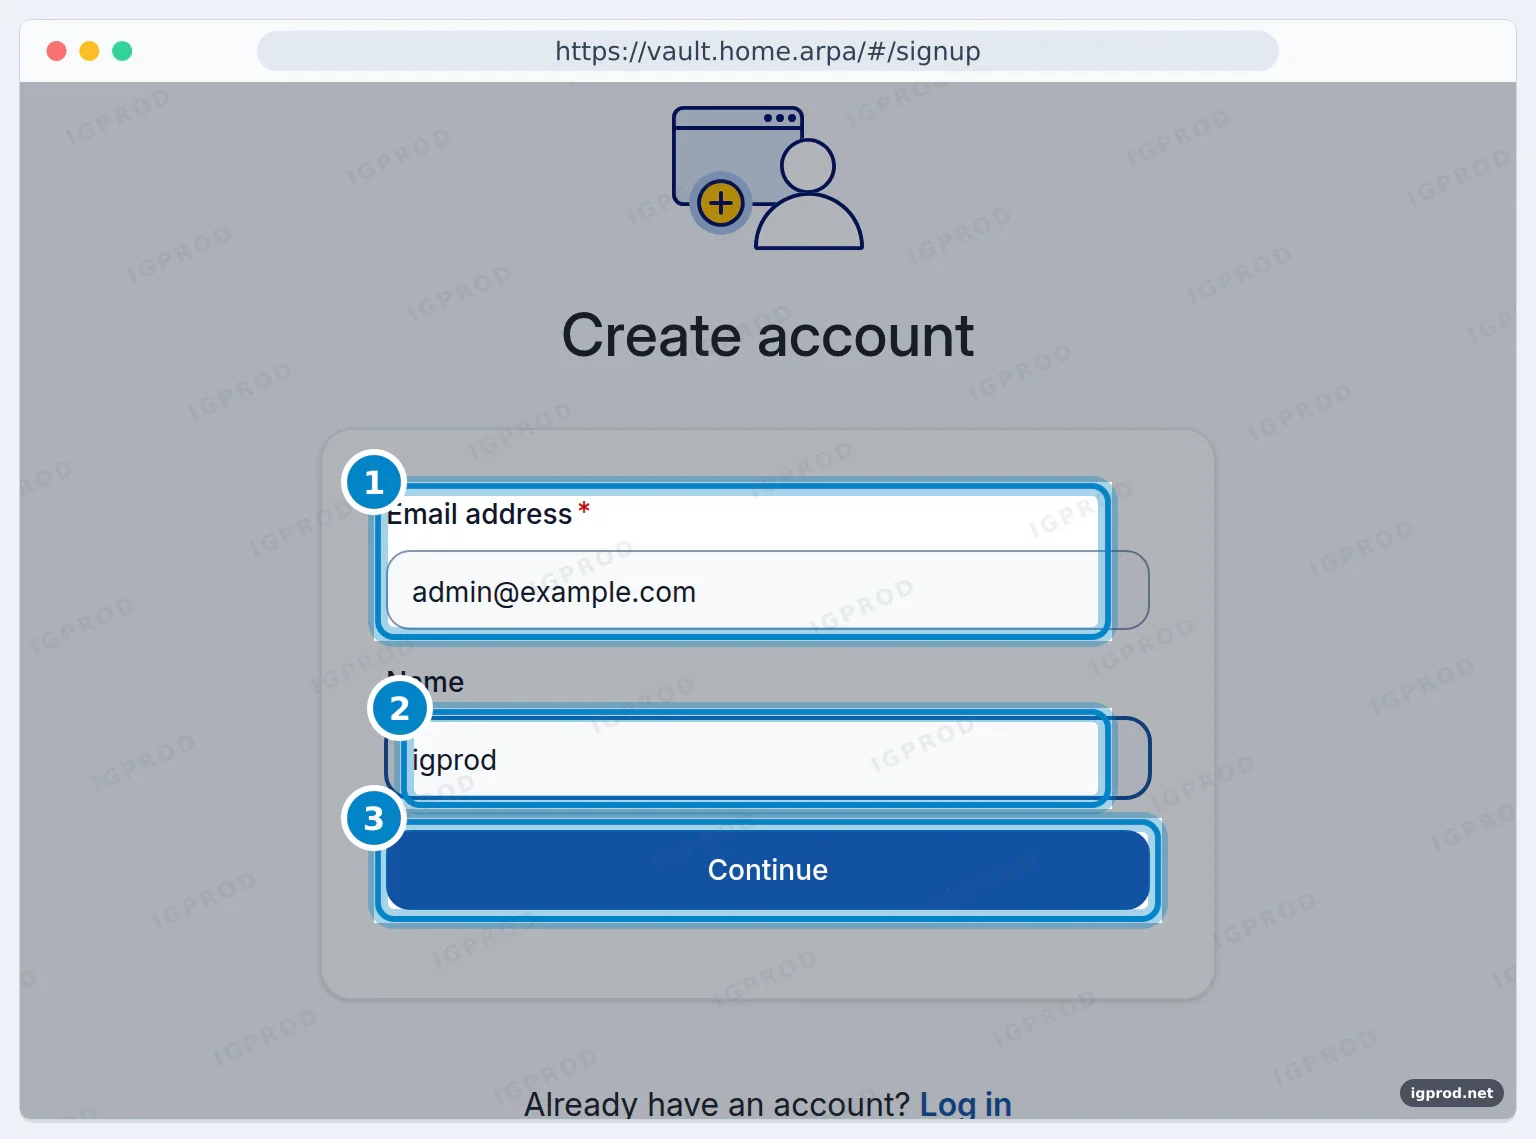
Open https://vault.home.arpa and select Create account. Enter your email address and a name, then Continue:
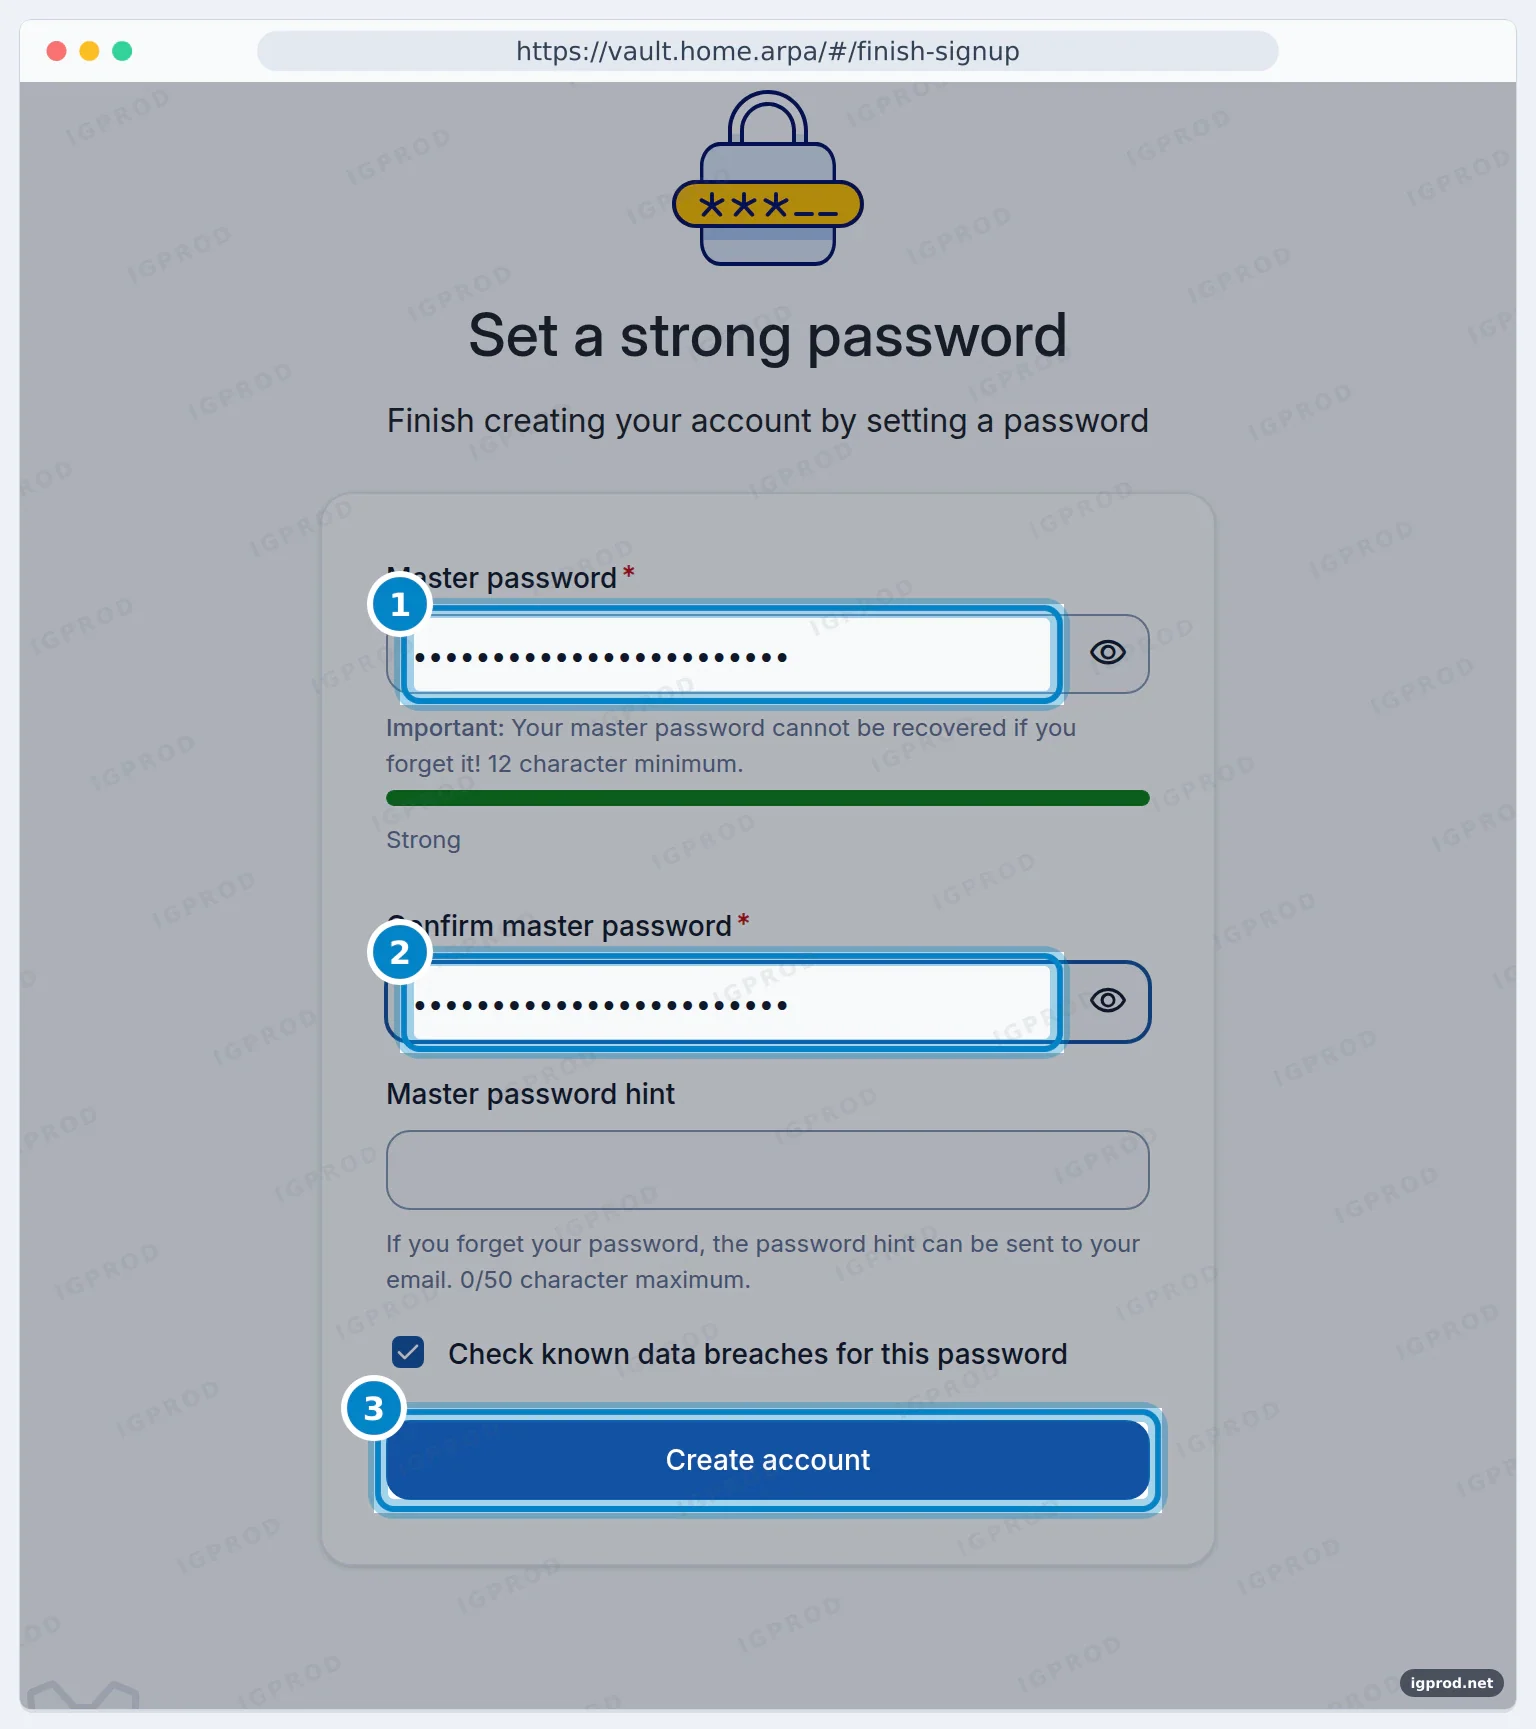
Set the master password. It needs at least 12 characters, and the web vault checks it against known data breaches by default. Nobody can recover it for you, Vaultwarden included, so keep a copy somewhere safe offline:
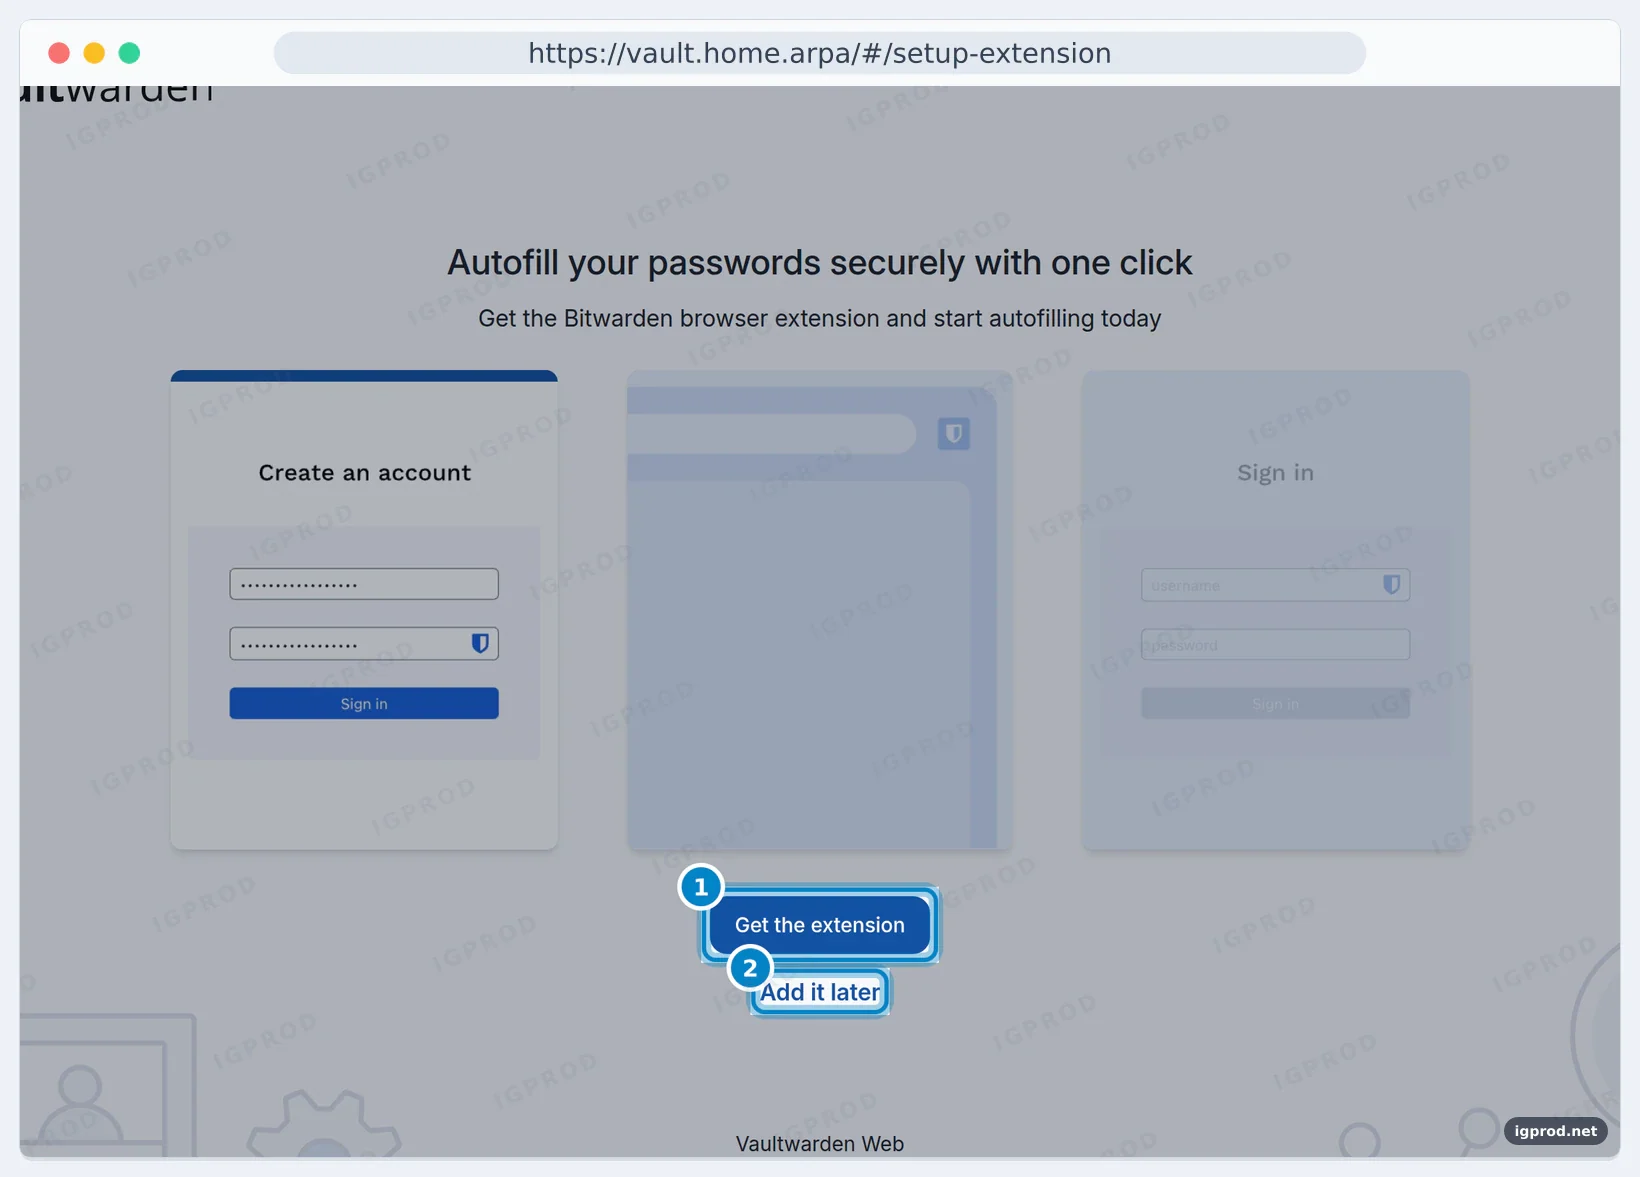
After the message "Your new account has been created!", the web vault offers the browser extension. Select Add it later, then Skip to web app, and skip the welcome tour:
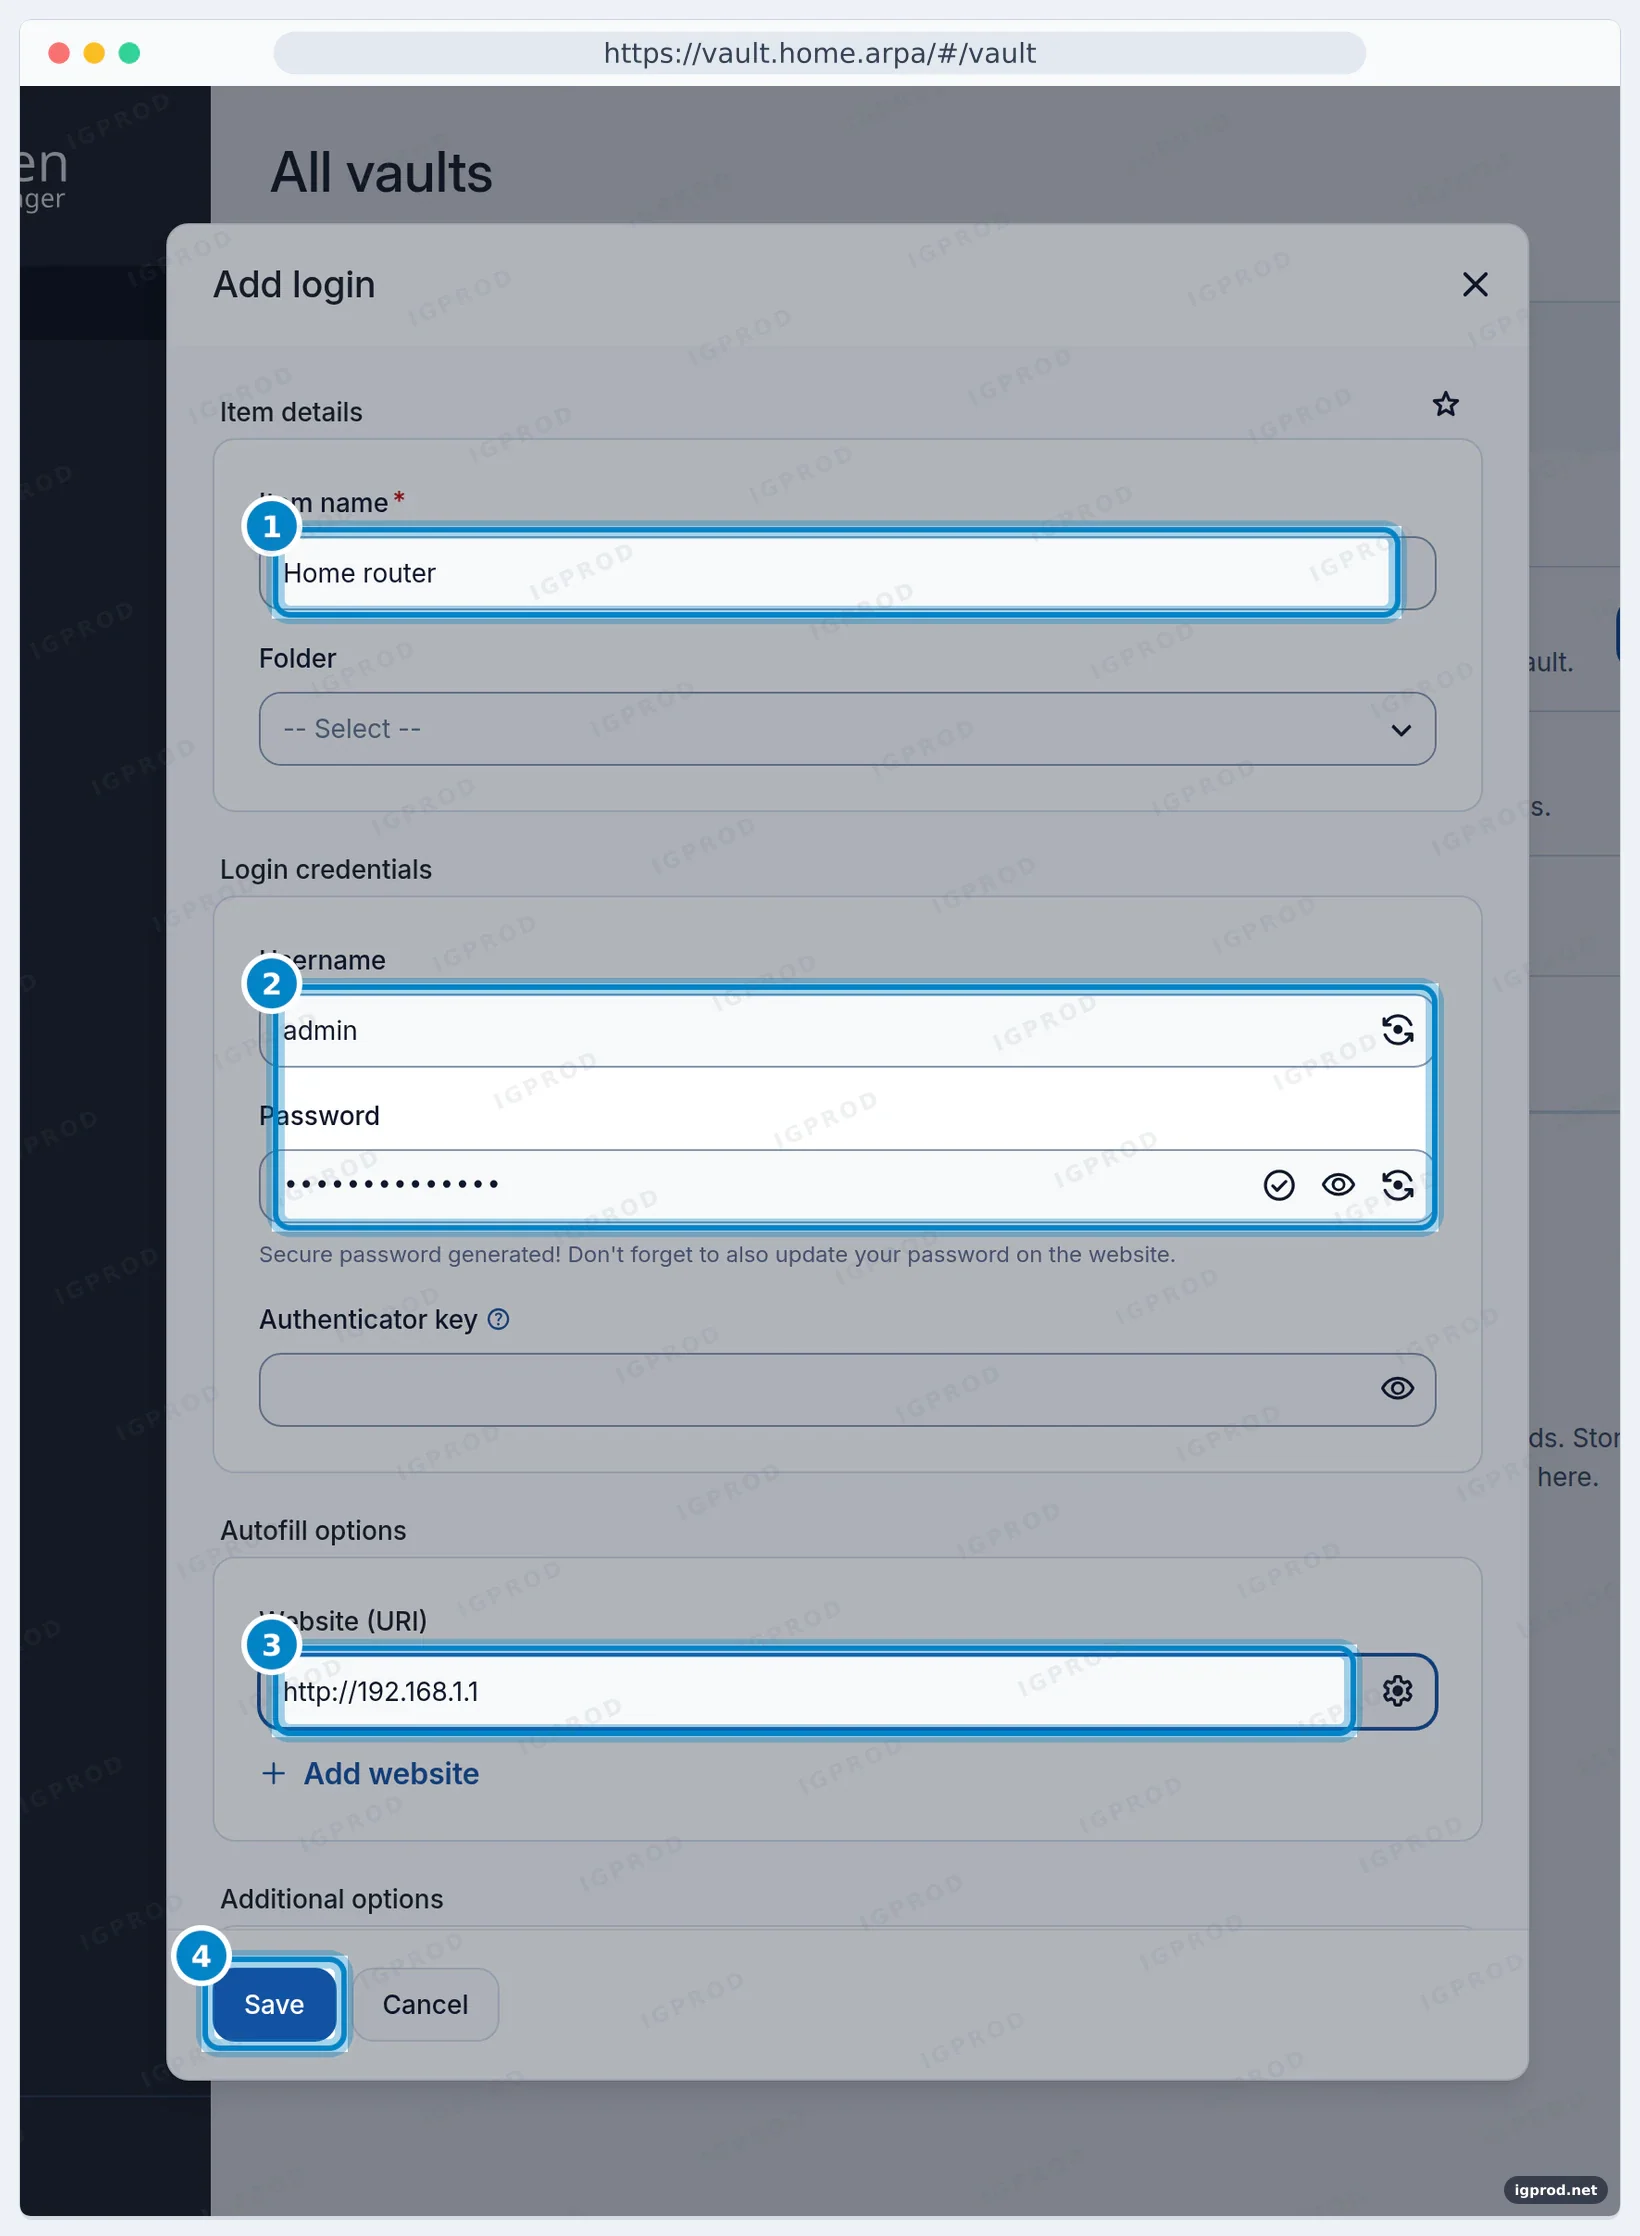
To save a first item, select Add > Login. Generate password opens the password generator; select Use this password, then Save:
Turn off sign-ups and invite users
As soon as your account exists, set SIGNUPS_ALLOWED to "false" in compose.yaml and recreate the container:
$ docker compose up -d
 Container caddy  Running
 Container vaultwarden  Recreate
 Container vaultwarden  Recreated
 Container vaultwarden  Starting
 Container vaultwarden  Started
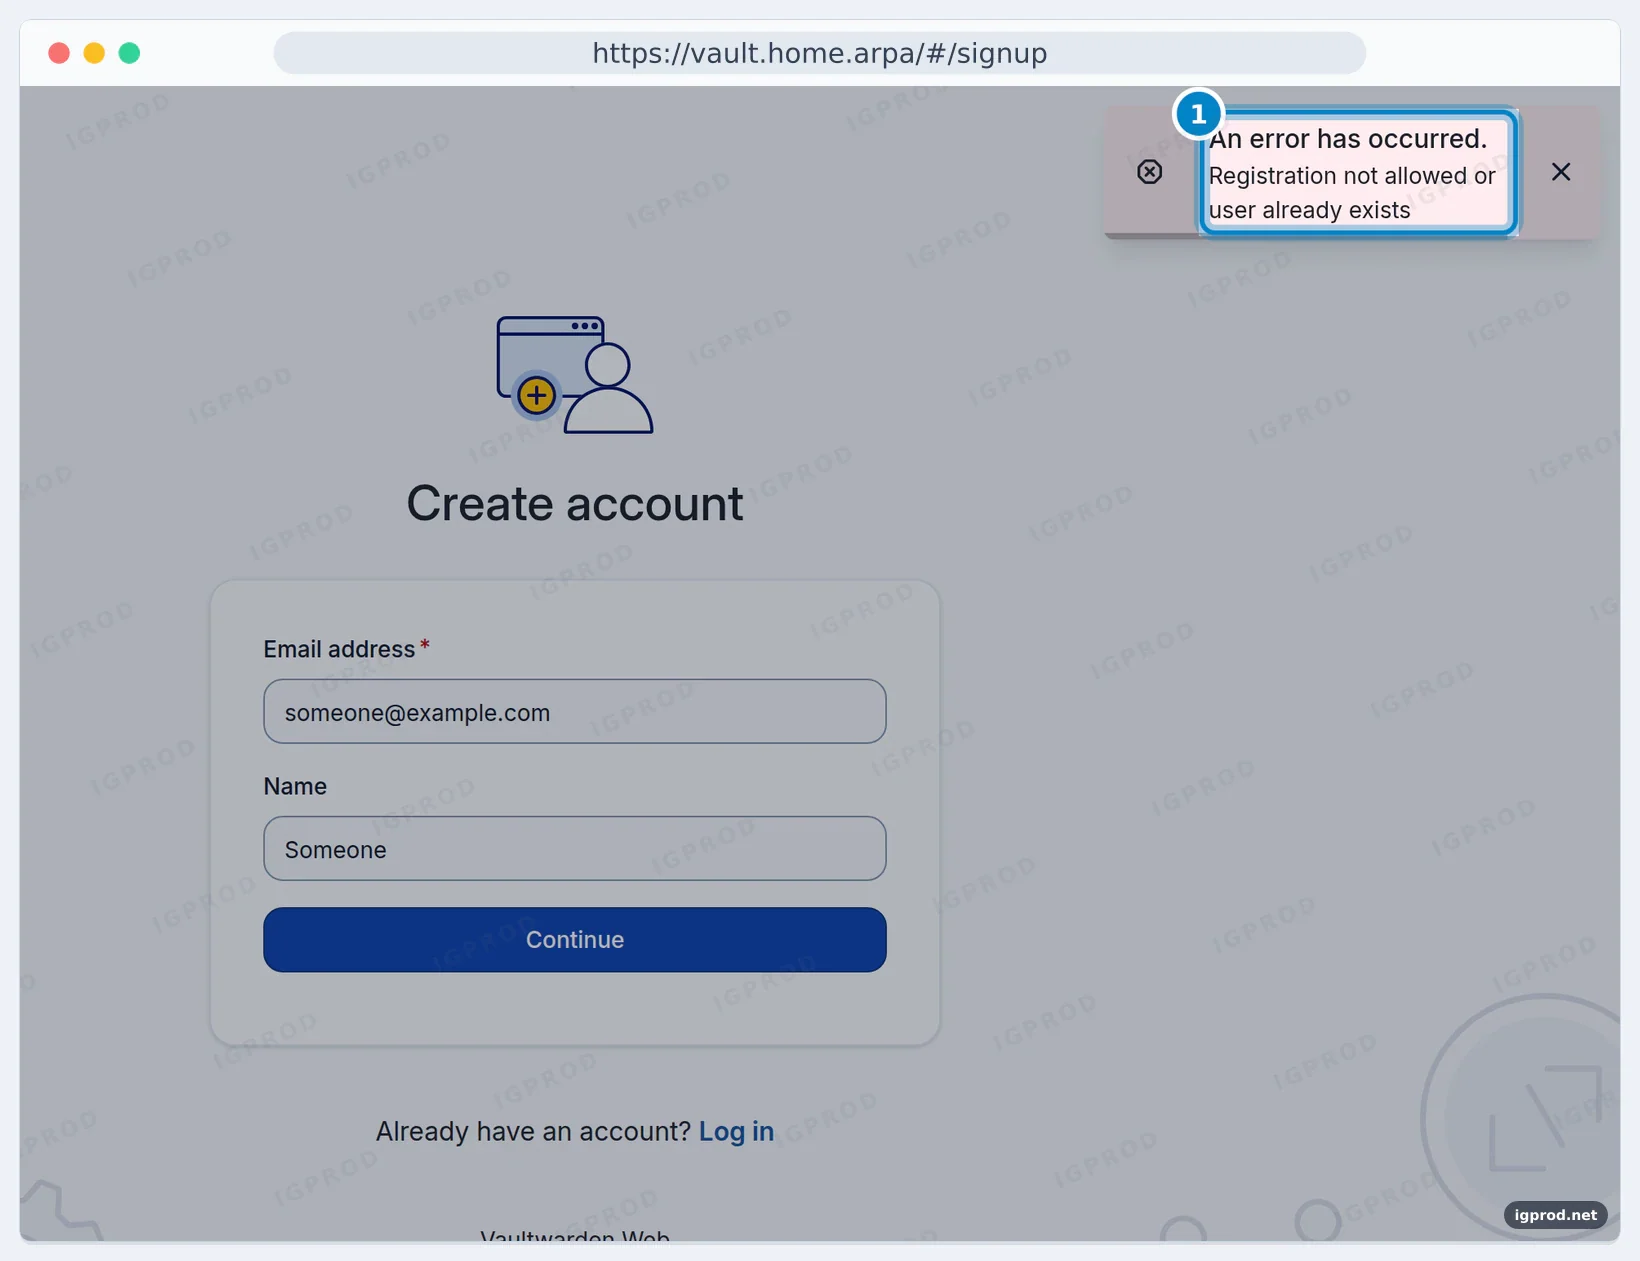
A new sign-up now fails:
To add family members, invite them from the admin panel (Users > Invite User). Without SMTP no email goes out: the person opens https://vault.home.arpa/#/signup and registers with the invited address. We registered two invited accounts this way, with sign-ups off.
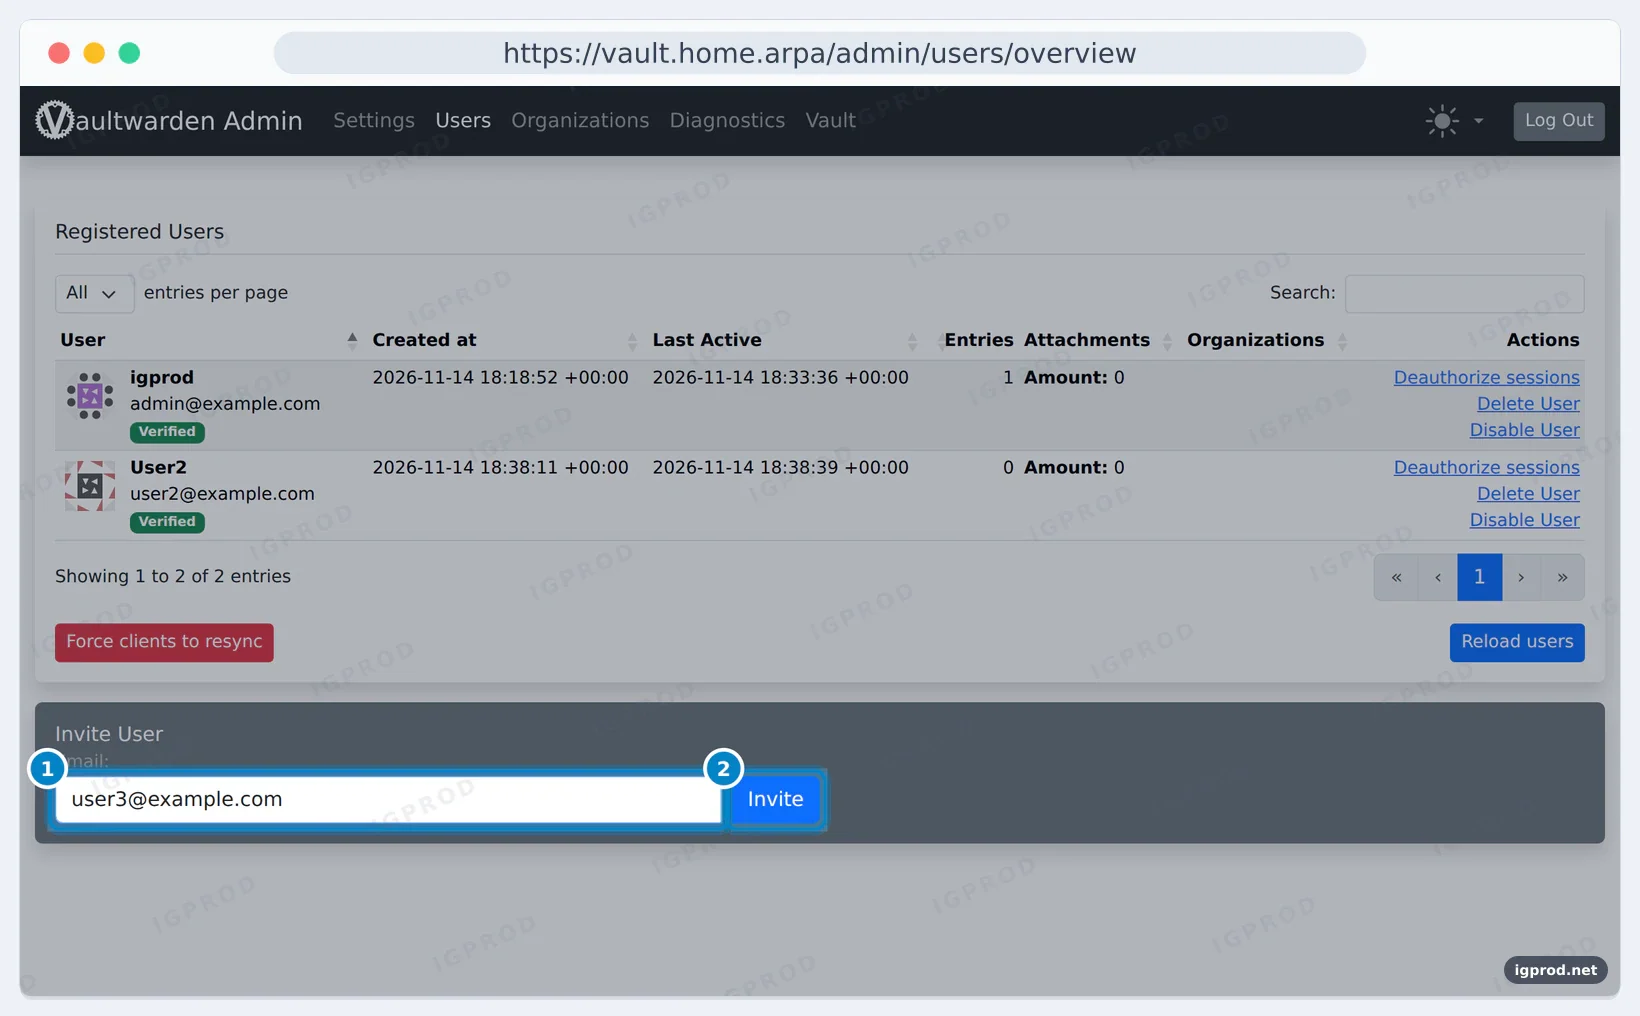
You can also keep sign-ups off from the very start and invite yourself from the admin panel.
The Vaultwarden admin panel
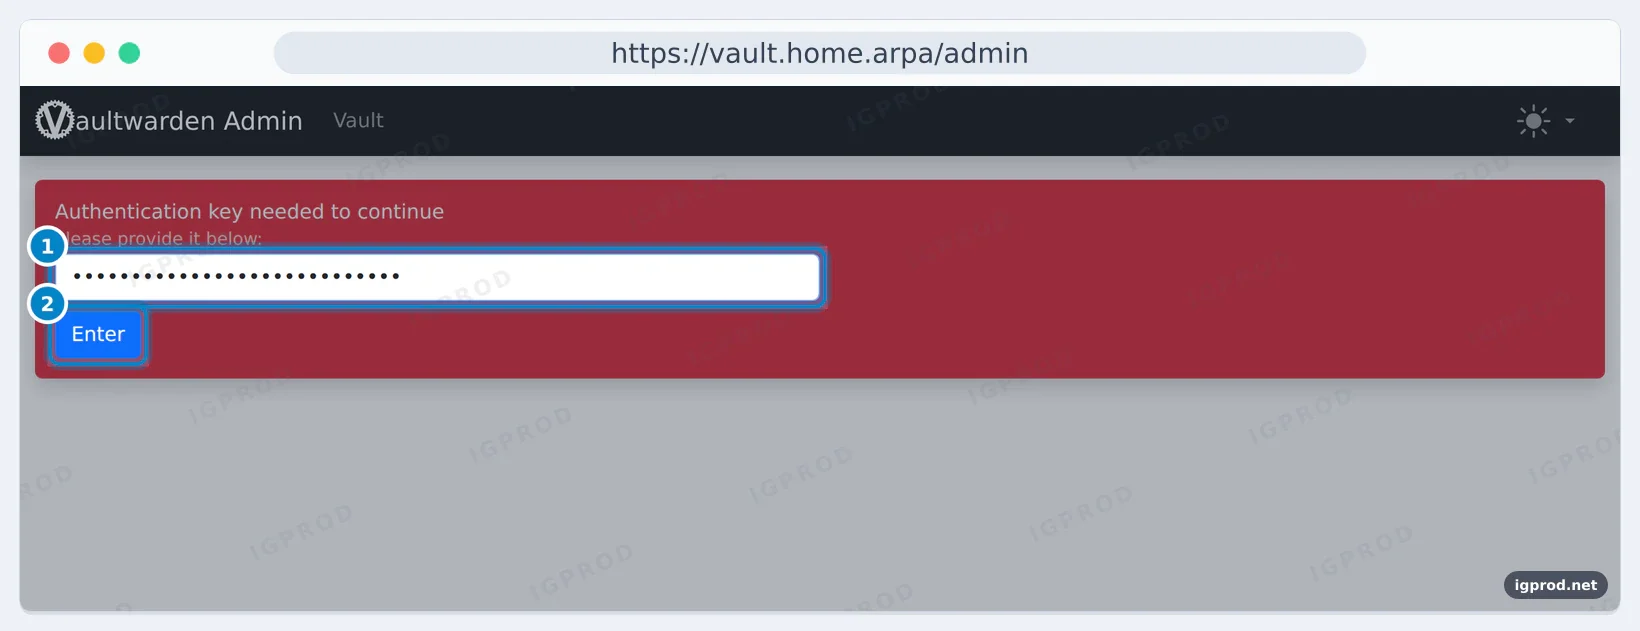
Open https://vault.home.arpa/admin and enter the password you hashed:
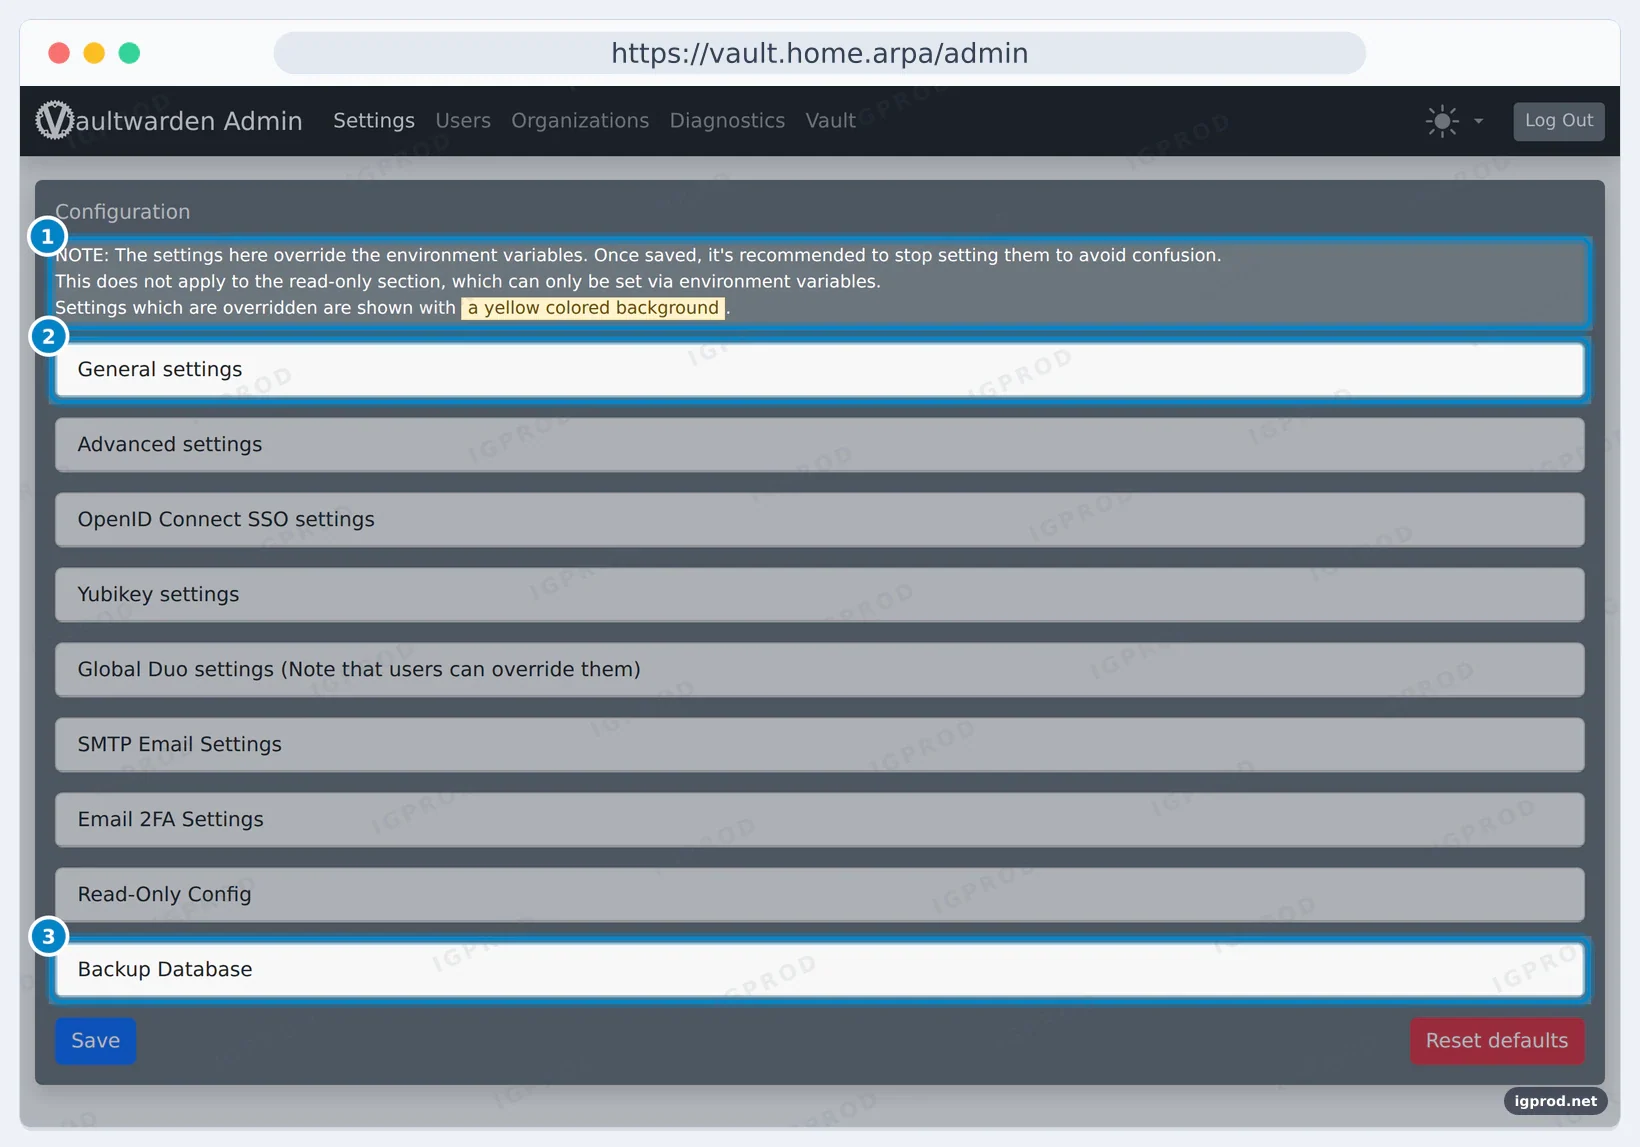
Settings holds every option, in groups such as General, Advanced, SMTP Email and Email 2FA, plus a Backup Database button. Read the note at the top: a setting you save here goes to config.json in the data folder and overrides the environment variable from then on.
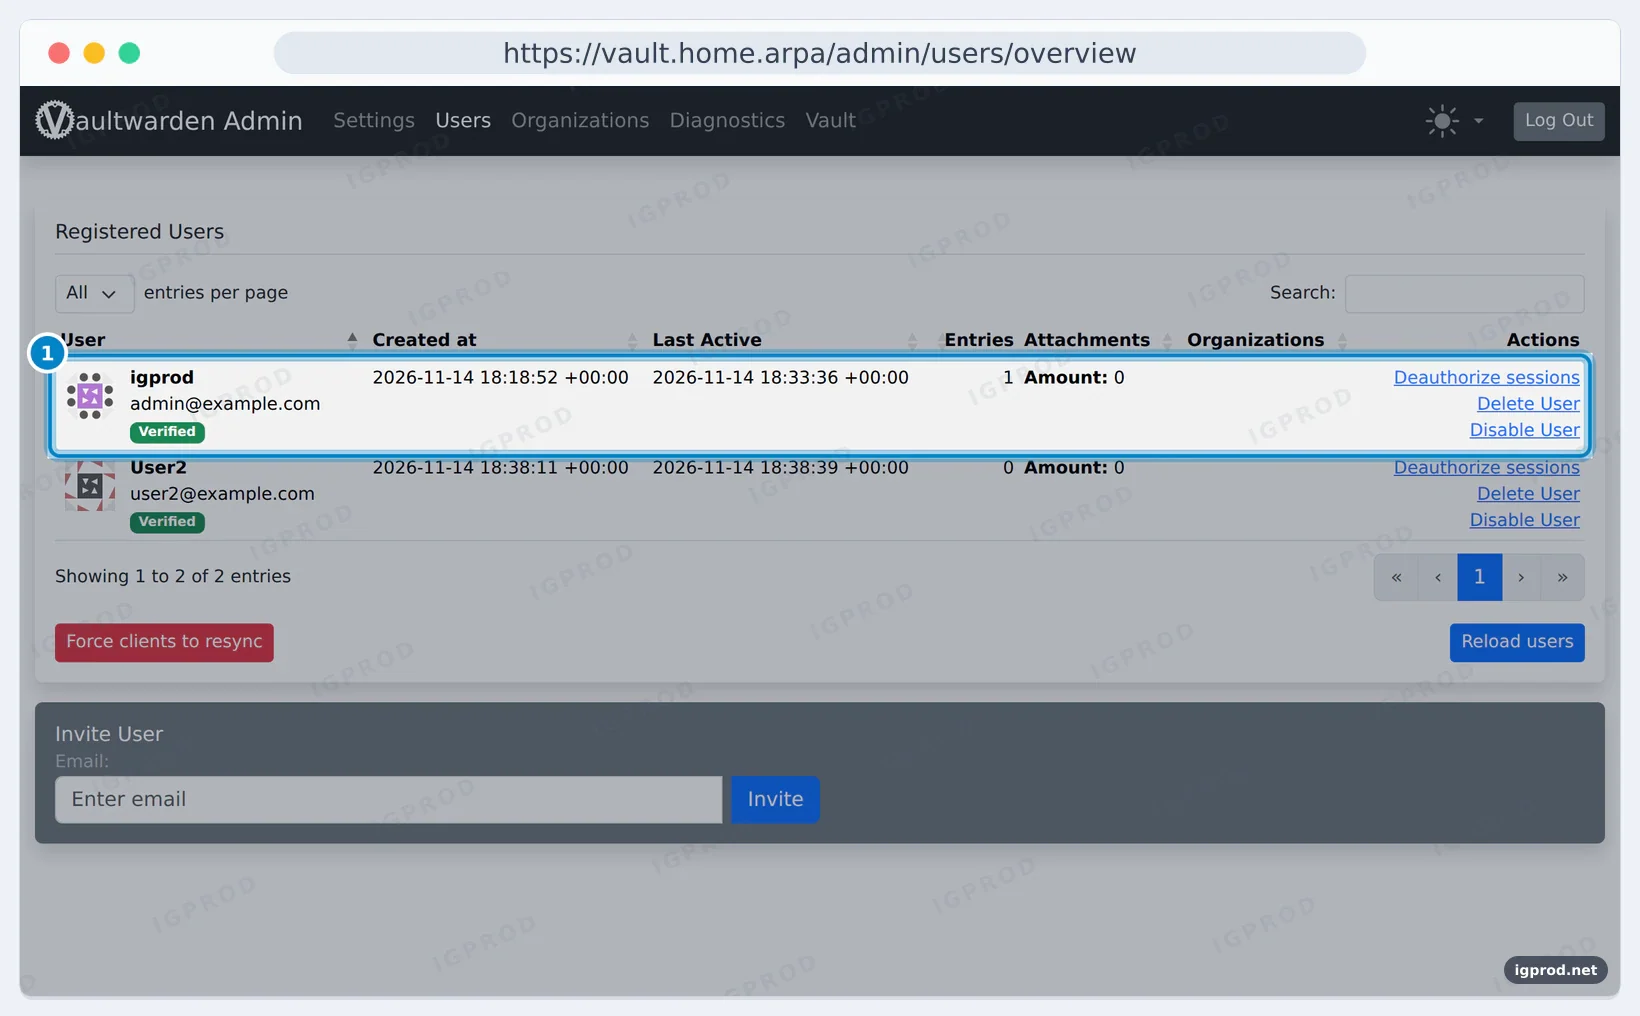
Users lists the accounts with their items and attachments, and the actions to deauthorize sessions, disable or delete a user:
How to check the Vaultwarden version
$ docker exec vaultwarden /vaultwarden --version
Vaultwarden 1.37.5
Web-Vault 2026.10.1
Diagnostics shows the same versions next to the latest release, and checks your setup:
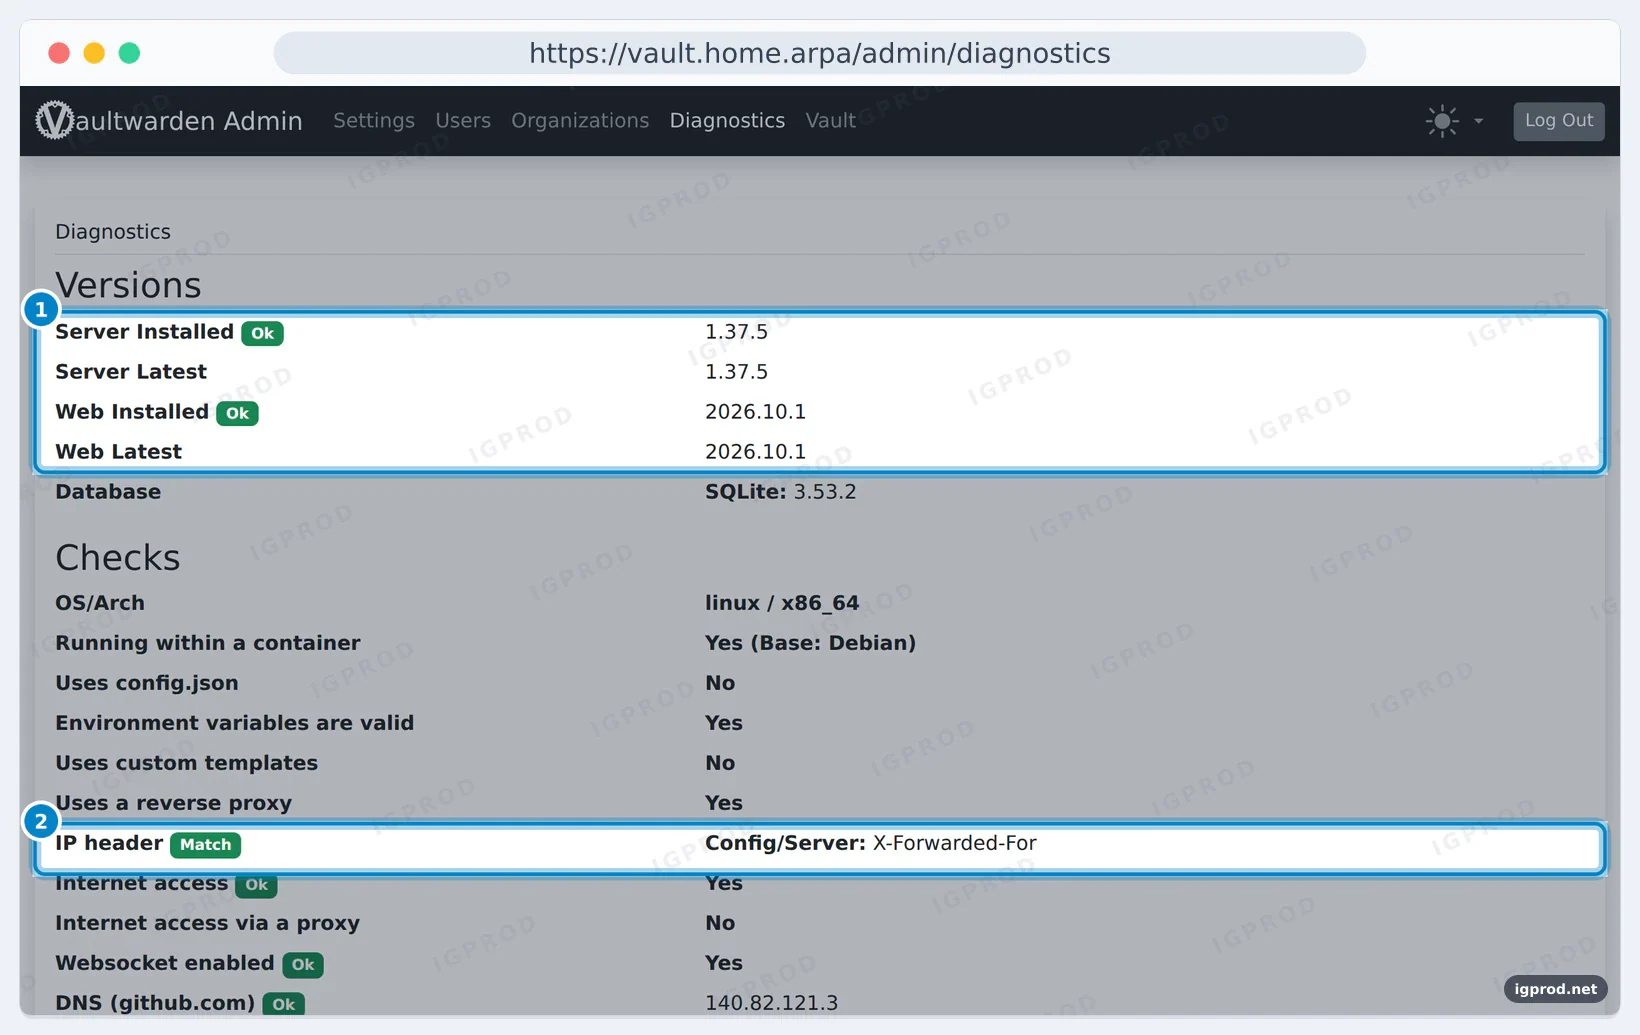
Before we added IP_HEADER, this page said IP header No Match (Config: X-Real-IP, Server: X-Forwarded-For): Vaultwarden looked for X-Real-IP while Caddy sends X-Forwarded-For. The log then records Caddy's address instead of the visitor's, which also blinds tools such as fail2ban. IP_HEADER: "X-Forwarded-For" fixed it. If you use Nginx Proxy Manager instead of Caddy, our guide to the real IP behind Nginx Proxy Manager covers the same problem.
Connect a Bitwarden client
The official Bitwarden apps work with Vaultwarden: choose the self-hosted option on the login screen and enter https://vault.home.arpa. Our Bitwarden Chrome extension guide shows each screen of the extension.
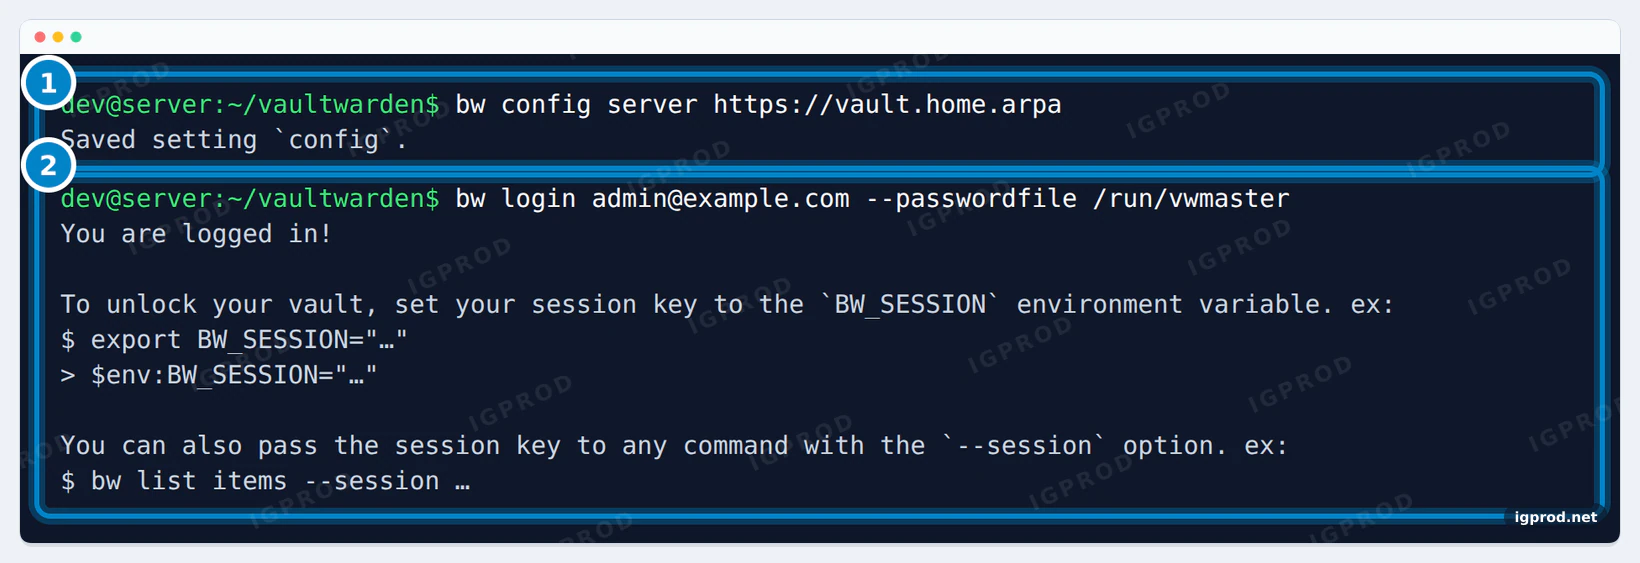
We connected the Bitwarden CLI 2026.10.1. It runs on Node.js, which uses its own list of root certificates, so we pointed NODE_EXTRA_CA_CERTS at Caddy's root first:
export NODE_EXTRA_CA_CERTS=/certs/caddy-root.crt$ bw config server https://vault.home.arpa
Saved setting `config`.$ bw login [email protected] --passwordfile /run/vwmaster
You are logged in!
To unlock your vault, set your session key to the `BW_SESSION` environment variable. ex:
$ export BW_SESSION="…"
> $env:BW_SESSION="…"
You can also pass the session key to any command with the `--session` option. ex:
$ bw list items --session …--passwordfile reads the master password from a file, so it stays out of your shell history.
Back up and restore Vaultwarden
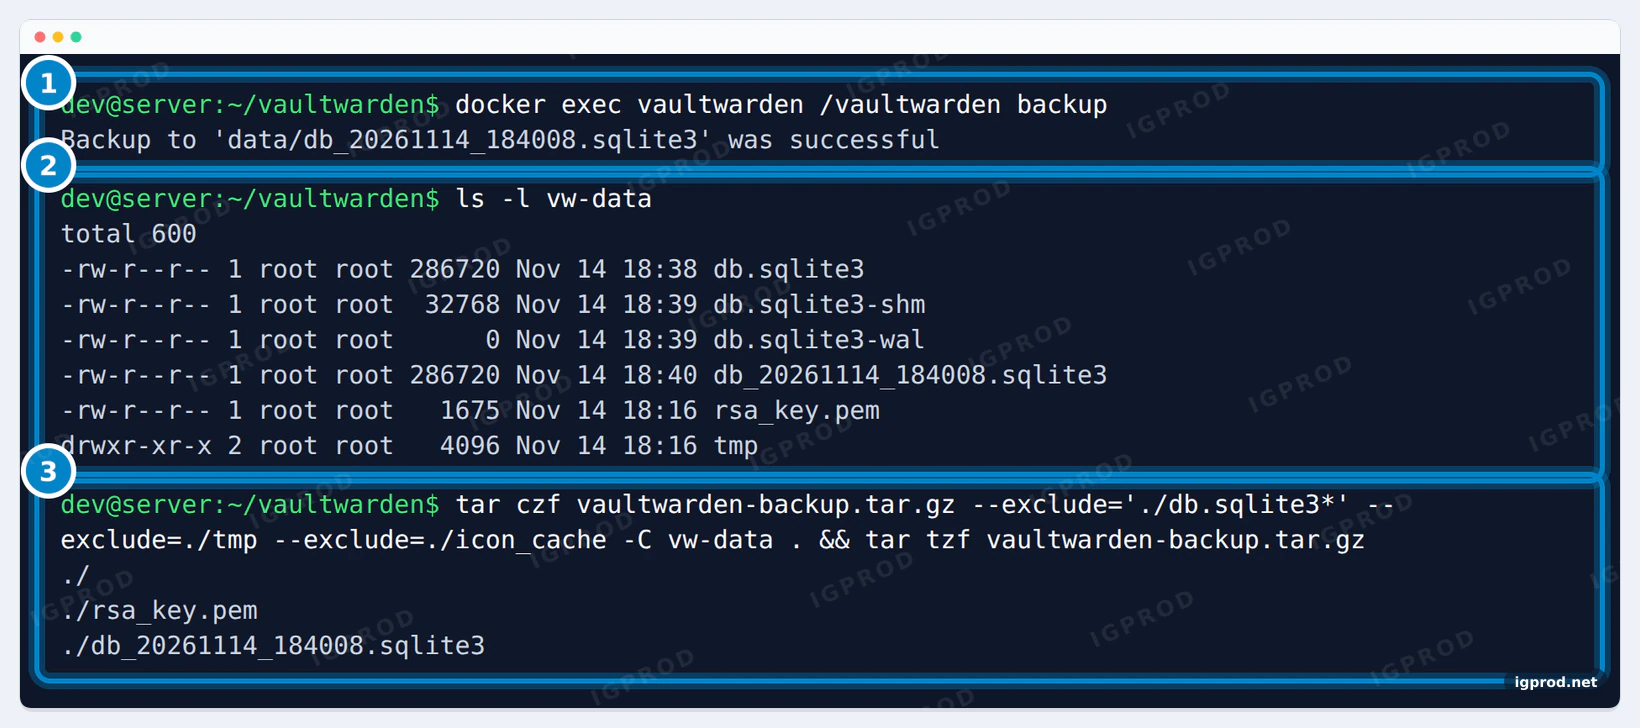
Vaultwarden keeps everything in the data folder: the SQLite database, rsa_key.pem (it signs login sessions), config.json if you saved admin settings, and file attachments. The built-in backup command makes a safe copy of the database while the server runs:
$ docker exec vaultwarden /vaultwarden backup
Backup to 'data/db_20261114_184008.sqlite3' was successful$ TZ=UTC ls -l vw-data
total 600
-rw-r--r-- 1 root root 286720 Nov 14 18:38 db.sqlite3
-rw-r--r-- 1 root root 32768 Nov 14 18:39 db.sqlite3-shm
-rw-r--r-- 1 root root 0 Nov 14 18:39 db.sqlite3-wal
-rw-r--r-- 1 root root 286720 Nov 14 18:40 db_20261114_184008.sqlite3
-rw-r--r-- 1 root root 1675 Nov 14 18:16 rsa_key.pem
drwxr-xr-x 2 root root 4096 Nov 14 18:16 tmpPack the copy with the rest of the folder, without the live database files, the temporary files and the icon cache:
$ tar czf vaultwarden-backup.tar.gz --exclude='./db.sqlite3*' --exclude=./tmp --exclude=./icon_cache -C vw-data . && tar tzf vaultwarden-backup.tar.gz
./
./rsa_key.pem
./db_20261114_184008.sqlite3
Each run leaves one more db_*.sqlite3 file in the data folder, so delete it once the archive is safe:
$ docker exec vaultwarden sh -c 'ls /data/db_*.sqlite3 && rm /data/db_*.sqlite3 && ls /data'
/data/db_20261114_184008.sqlite3
db.sqlite3
db.sqlite3-shm
db.sqlite3-wal
rsa_key.pem
tmp
Copy vaultwarden-backup.tar.gz to another machine or to cloud storage. The Vaultwarden wiki suggests encrypting it, since rsa_key.pem and your settings are inside.
Test the restore
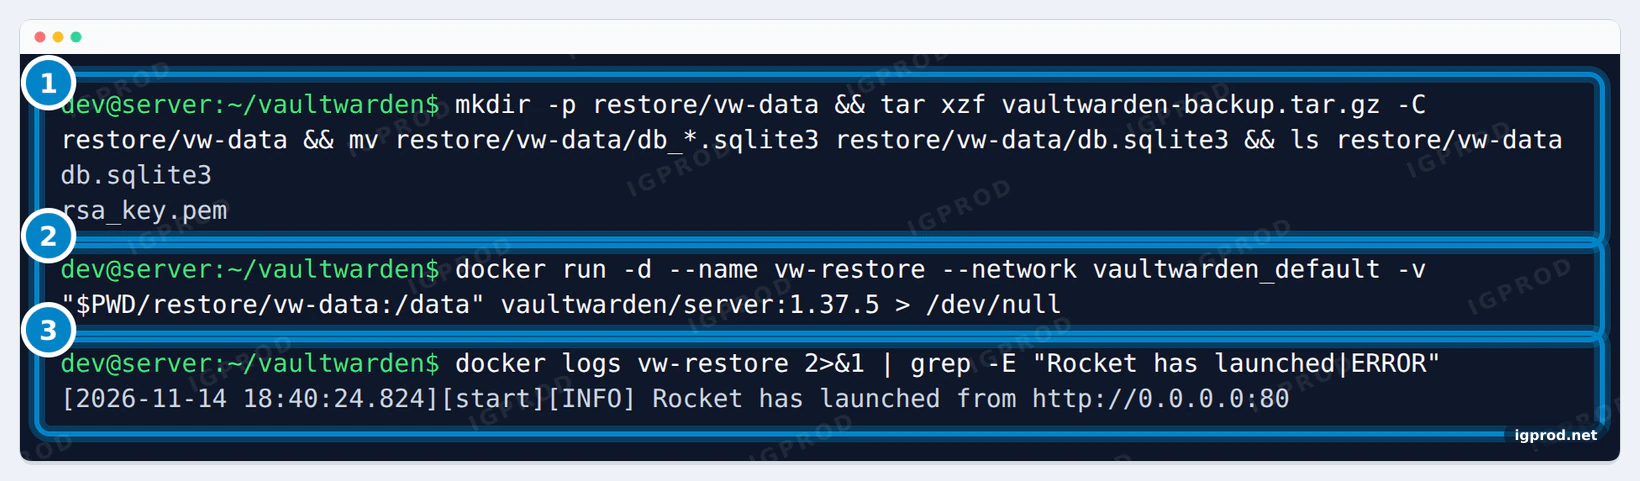
A backup counts only once you have restored it. We extracted the archive into a new folder and renamed the copy to db.sqlite3:
mkdir -p restore/vw-data
tar xzf vaultwarden-backup.tar.gz -C restore/vw-data
mv restore/vw-data/db_*.sqlite3 restore/vw-data/db.sqlite3
ls restore/vw-datadb.sqlite3
rsa_key.pemA second Vaultwarden container started on that folder:
[2026-11-14 18:40:24.824][start][INFO] Rocket has launched from http://0.0.0.0:80We stopped the main container, gave the restored one the name vaultwarden on the Docker network so Caddy served it, and logged in with the CLI. The item we had saved came back:
Saved setting `config`.Home router admin http://192.168.1.1To restore for real, stop Vaultwarden, replace the contents of vw-data with the extracted files (the db_ file renamed to db.sqlite3) and start it again. The Vaultwarden wiki adds one rule: delete any old db.sqlite3-wal file first, or SQLite may damage the restored database.
Update Vaultwarden
Back up first. Then change the image tag in compose.yaml to the new version from the releases page (Diagnostics shows the latest one) and run:
docker compose pull
docker compose up -d
The data folder stays, so accounts and items survive the update, and the clients need no change.

Use Vaultwarden away from home
A password vault is a valuable target, so keep it off the open internet if you can. A VPN such as WireGuard or Tailscale lets your phone reach https://vault.home.arpa from anywhere, with nothing new exposed.
For a public address, a Cloudflare Tunnel publishes the vault without opening ports; our Cloudflare Tunnel guide shows the setup. Set DOMAIN to the public HTTPS address, point the tunnel at http://vaultwarden:80 on the same Docker network, and turn on two-step login for every account. We did not test a tunnel in this guide. A 502 Bad Gateway from the tunnel means cloudflared cannot reach the address you gave it.
Vaultwarden errors and fixes
"You are not using a secure context": the web vault does not load
The page is open over plain HTTP from an address other than localhost. Open it over HTTPS, through Caddy, and trust Caddy's root certificate on that device.
"No persistent volume!" and the container stops
container exit code: 1
[2026-11-14 18:37:25.566][vaultwarden][ERROR] No persistent volume!
########################################################################################
# It looks like you did not configure a persistent volume!                             #
# This will result in permanent data loss when the container is removed or updated!    #
# If you really want to use volatile storage set `I_REALLY_WANT_VOLATILE_STORAGE=true` #
########################################################################################
Vaultwarden 1.37.5 refuses to start without a data volume, so a recreated container cannot lose your vault. Keep the ./vw-data:/data line.
"The "v" variable is not set" when you start Compose
The hash is pasted into compose.yaml with single $ signs. Move it to .env in single quotes, as shown above.
"Registration not allowed or user already exists"
Sign-ups are off, or the address already has an account. Invite the address from the admin panel.
"Insecure URL not allowed. All URLs must use HTTPS."
The client got an http:// server address. Enter the https:// address, and make sure the device trusts the certificate.
The hash command panics with "No such device or address"
The container has no terminal to ask for the password. Run docker run --rm -it ... /vaultwarden hash with -it.
The admin page ignores a new ADMIN_TOKEN
Settings saved once in the admin panel live in config.json and win over the environment. Change the token in the admin panel, or remove the admin_token line from vw-data/config.json and restart.
Frequently asked questions
Is Vaultwarden the same as Bitwarden?
No. Vaultwarden is an unofficial server that works with the official Bitwarden apps; its own start banner says "This is an *unofficial* Bitwarden implementation". Report its bugs to the Vaultwarden project, not to Bitwarden.
What port does Vaultwarden use?
Port 80 inside the container ("Rocket has launched from http://0.0.0.0:80" in the log). In this guide, only Caddy publishes a port: 443 for HTTPS.
How do I check my Vaultwarden version?
Run docker exec vaultwarden /vaultwarden --version, or open Diagnostics in the admin panel, which also shows the latest release.
How do I open the Vaultwarden admin panel?
Go to https://your-vault-address/admin and enter the password behind ADMIN_TOKEN. With no admin token set, the admin panel stays disabled.
Can I use Vaultwarden without HTTPS?
Only from the server itself, on http://localhost. Other devices get the secure context alert, and the Bitwarden clients refuse http:// addresses.
Does Vaultwarden need SMTP?
Not to run. Invited users can register without email, as in our test. You need SMTP for email features such as Email 2FA and invitation emails.
Can I run Vaultwarden on a Synology NAS?
Yes, Container Manager runs the same compose file as a project. DSM already uses ports 80 and 443, so publish Vaultwarden on another port, such as "8080:80", and put DSM's reverse proxy with a certificate in front of it. We did not repeat this test on a NAS.
How much RAM does Vaultwarden need?
Very little: everything in this guide, admin panel and restore included, ran with a 256 MB memory limit on the Vaultwarden container.
Related guides
- Bitwarden Chrome Extension: Install, Autofill and Self-Hosted Setup
- How to create cloudflare tunnel and expose your services with-synology
- Fix Nginx Proxy Manager Real IP Behind Docker and Cloudflare
- Install Docker Compose on Ubuntu using Docker’s repository
- Self-Hosting for Beginners: Plan Your First Service
Sources
- Vaultwarden wiki: Using Docker Compose
- Vaultwarden wiki: Enabling admin page
- Vaultwarden wiki: Disable registration of new users
- Vaultwarden wiki: Backing up your vault
- Vaultwarden wiki: Enabling HTTPS
- Vaultwarden 1.37.5 release
- Caddy: Automatic HTTPS, local HTTPS
- Bitwarden: Password Manager CLI
- RFC 8375: Special-Use Domain home.arpa
- MDN: Secure contexts

Leave a comment
Your email address will not be published. Required fields are marked *